Silicone Casting with 3D Printed Moulds
3D printing is not just for plastics. Well, it is (at hobbyist level), but you can print moulds to make things out of any material that can be casted.
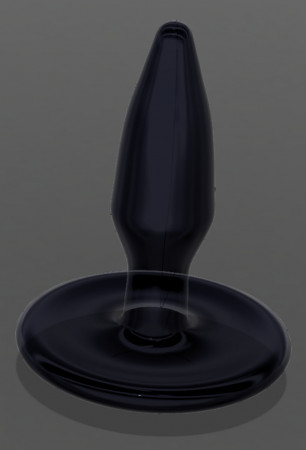
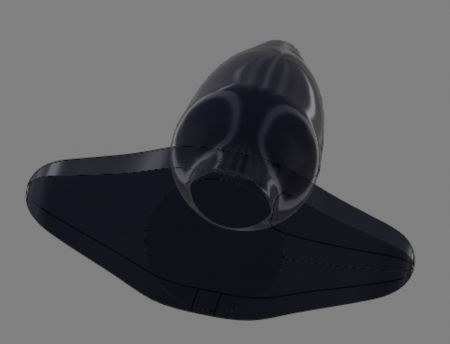
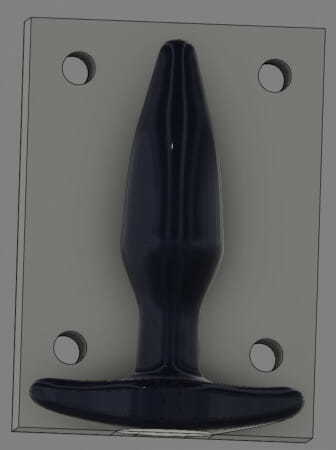
First prototype, designed by my friend Forest in Blender. The tutorial will take us through the second design and attempt.
Why?
- Silicone can be used to make all sorts of things, but perhaps the most popular application is sex toys. There are huge variations in personal preferences, and if you are designing your own, you can make it exactly how you like it. Have a really good toy that’s just 2mm too wide? Make your own version!
- You know what’s in there. 100% platinum-catalysed silicone is the holy grail material for safe insertables, and since consumers start asking for it, unscrupulous marketing people at sex toy manufacturers started getting creative. Most that are sold as silicone isn’t actually silicone, but TPE or other porous and unsafe materials.
What?
The traditional silicone casting process is to create the positive first (eg. carving it out of wood), making a mould around it out of plaster, and then pour silicone into the plaster mould, making it a two step process. In this case because we are 3D printing, we can just print the mould directly and skip the first step.
Print a mould, clamp the parts together, pour silicone, and remove mould. Easy! But of course, the devil is in the detail…
What Do You Need?
- A 3D printer and filament. Type of filament isn’t important. I’ve used PLA and PETG and they both worked well. Dimensional accuracy is important. Don’t use a filament that warps (ABS, Nylon, PC, etc).
- Silicone. Be sure to get platinum-catalysed silicone. It’s more expensive than tin-catalysed stuff, but much more stable, and the curing process doesn’t produce byproducts. Most people use Smooth-On Dragon Skin because it’s skin safe (it’s marketed for use in special effects, where there is often prolonged skin contact). There are 3 different hardnesses to choose from – 10A, 20A, and 30A. I am using 20A and it seems to be pretty standard sex toy hardness (slightly on the soft side). You can get a 1kg “trial” set for about £32.
- Art and Craft Epoxy Resin. We only need a little bit.
- Disposable cups for mixing – 500+ml recommended (more than 4 times the volume of the objects you want to make).
- Disposable chopsticks or similar for stirring.
- Small cheap brushes – makeup brushes work well.
- Cable ties (zip ties).
- (Optional) Silicone mould release spray. Will make it much easier to remove the mould after casting. I did my first one without it, and was able to get it out, but there was a lot more cursing involved.
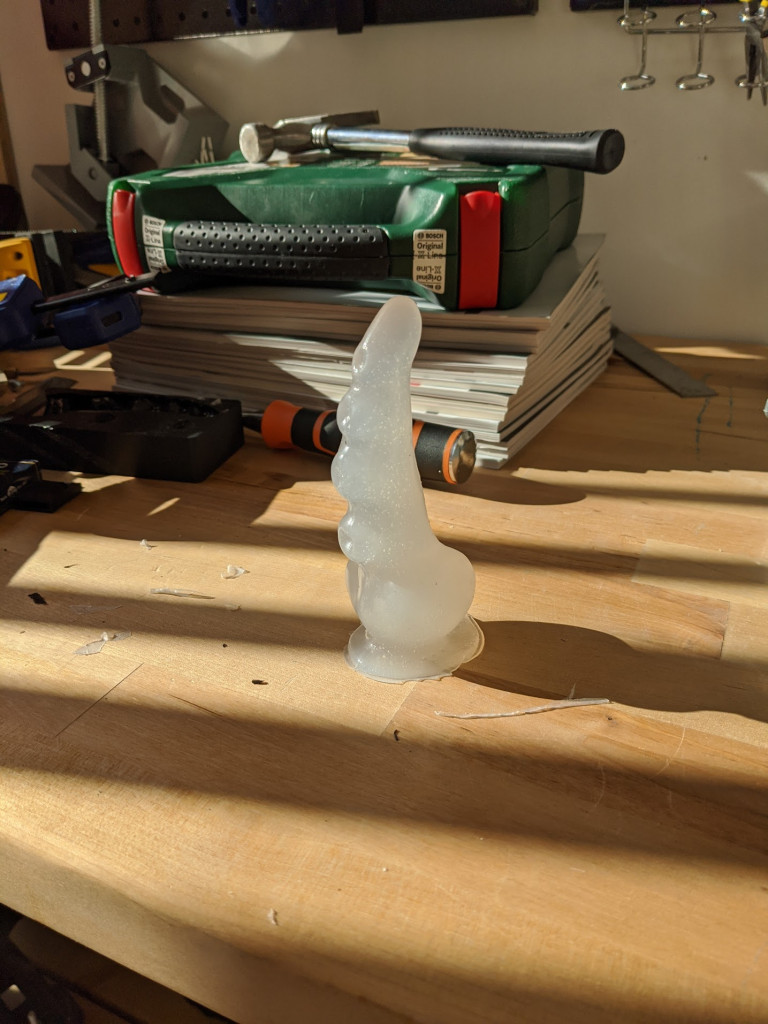
- (Optional) Silicone Colourant. If you want any colour other than cloudy white (see picture at the beginning of this page). The Smooth-On colourant isn’t cheap, but it’s highly concentrated, so you only need a little bit, and each pot is enough to make many objects. I’ve heard people having success using soap pigment or watercolour, but keep in mind that the platinum curing process is very easy to disrupt if your pigment happens to have wrong additives. Sulphur is the big one that will completely inhibit the curing process.
- (Optional) Vacuum degassing setup. If you don’t degas, there will be many small bubbles in your finished product (see picture at the beginning of this page). It’s mostly an aesthetic issue as the bubbles don’t change the texture, so if you are fine with that it’s ok to go without. When choosing a degassing set, the pot has to be big enough for your mould, and the pump basically doesn’t matter as long as it can get to -1 bar (full vacuum). Single stage pump is fine. We don’t need a fast pump since, unlike degassing resin for example, silicone has a much longer pot life. More information.
Design
First you need a design for the object you want to cast. For more organic designs Blender is a good choice. For more symmetrical designs Autodesk Fusion 360 is one option. You can also scan an object you have, if you have access to a 3D scanner. There are also sites like http://dildogenerator.com that will give you a downloadable model.
Regardless of how you choose to get your design, we’ll be using Autodesk Fusion 360 to create the mould. It’s free for hobbyist and startup use, so go download that. I’ll wait!
I won’t write a detailed tutorial for Fusion 360 here because Autodesk made very good tutorial videos. Even if you have never done any 3D modelling before, it shouldn’t take more than 2-3 (fun) hours to learn the basics, and we only need the basics for this. Go do that and come back when you are ready! Rest of the tutorial assumes you have basic knowledge of Fusion 360.
I made a quick design here, modelling a random toy from my drawer:
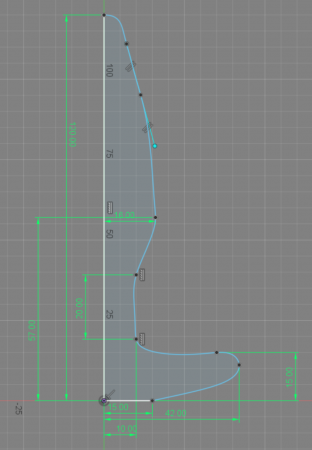
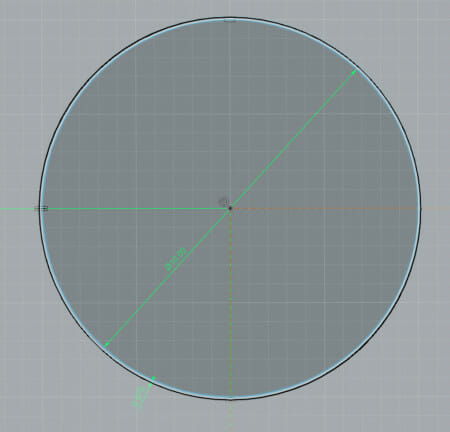
Start with a sketch of the profile to revolve. I used a spline here to define the shape. Be sure to leave a flat area underneath for filling. Oh and it’s probably a good idea to make sure the tangent at the topmost point is horizontal, unless you want a pointy tip.
Revolve.
Another sketch on the bottom face for cutting. More splines and mirroring.
Extruded cut for the boat-shaped bottom.

Fillet to make the bottom edges rounded.
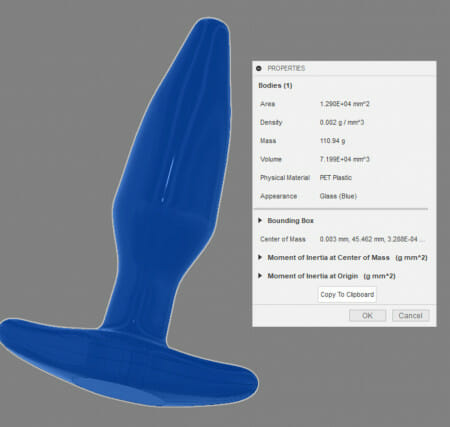
Right click on the body (in the object tree) -> properties. That will give us the volume. Write that down as we will need it later to calculate how much silicone we need. Here I have 7.19e4 mm^3, which is 71.9 ml.
Now we have the object we are casting. If you are getting your design from another source, just import the STL instead and continue from here. If you have a very high poly model (>10000 triangles), it’s probably a good idea to use Meshmixer to simplify it to 10k triangles. This is because Fusion 360 is a BRep modeller, and cannot deal with meshes very efficiently. It shouldn’t affect the quality of the final product if you do it right, since silicone pouring doesn’t have anywhere near that kind of resolution.

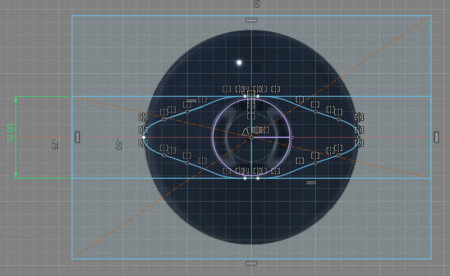
Create a sketch through the middle of the object (if you have imported an object so it’s not aligned with the default planes, use construction planes to get the plane you need). This will be where the mould splits into two. It should be a rectangle that covers the whole object, and with the bottom edge coincident with the bottom of the object (this will be the fill hole where we pour silicone in). Also add some geometry for aligning the two sides of the mould. I am using circles here, but you can use whatever you want.
For each alignment post, make two concentric circles. The outer one will be used to make the hole, and the inner one will be used to make the post. Due to 3D printing tolerance, we can’t use the same circle for both. A gap of 0.075mm works well for me, but I have a very well tuned Prusa i3 MK3S. You may want to experiment to see what works well for your setup.
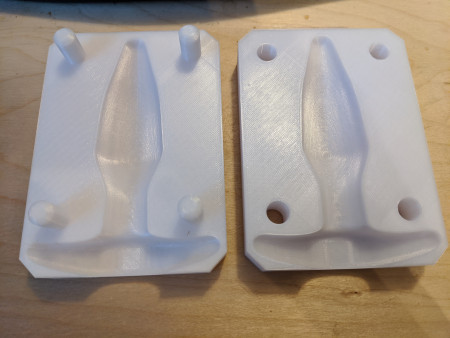
Extrude with holes to one side. Make sure it’s thick enough to cover the whole object, and use “new body” mode so it doesn’t get joined to the object.
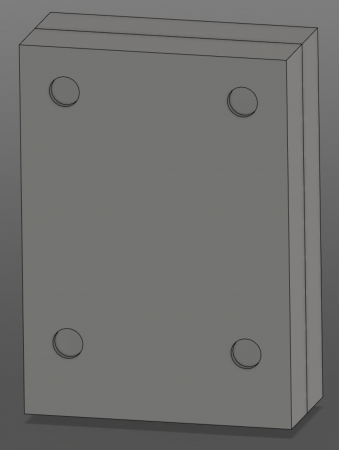
Extrude the other side, with the posts to go into the holes.
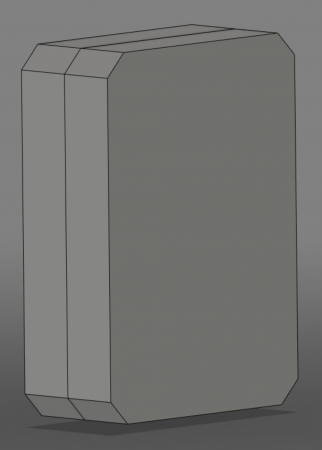
Chamfer the corners of the mould to reduce the risk of corners lifting.
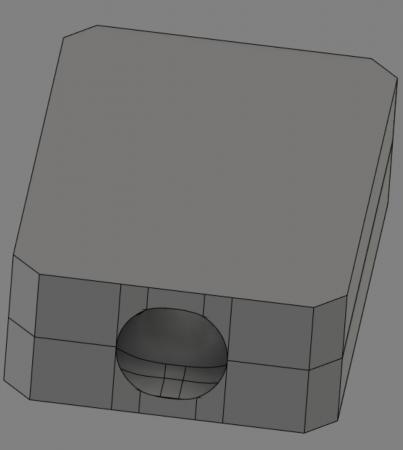
Use “Modify -> Combine” to cut the object out of the mould (use the object as the “tool body”).
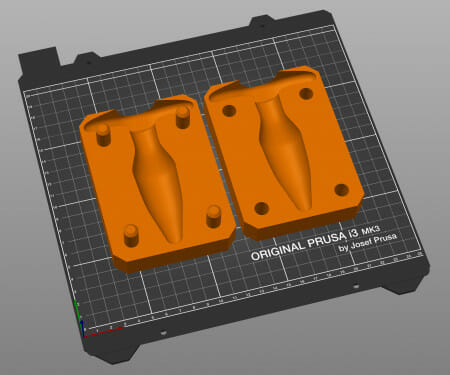
That’s all! Export and print the mould. 2 shells and 15% infill works well for me. I recommend printing one side at a time, since they do take quite a while (6 hours per side in my case).
Making the Thing!
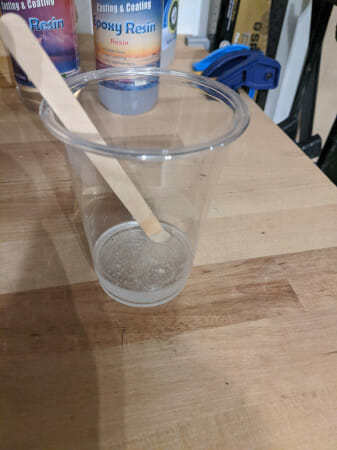
Mix some epoxy as per the instructions. We only need a little bit.
(Untested: if you have a vacuum chamber it may be a good idea to put the mixed epoxy in to get rid of the bubbles at this point)
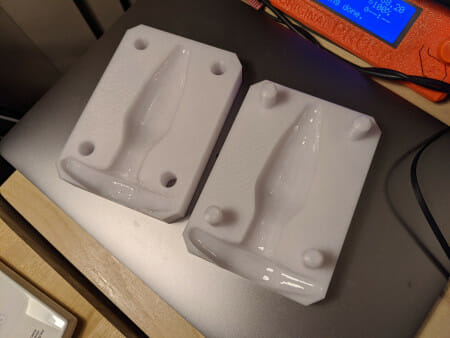
Use the makeup brush to brush a thin layer of epoxy onto the negative parts of the mould. This is to cover up the layer lines from 3D printing, so they won’t transfer to the final product. This is important because if they do transfer, we’ll get bacteria traps that won’t be possible to clean. Make sure you have complete coverage but don’t go overboard with the coating – a thin layer is all we need, and surface tension will do most of the work for us.
Wait for the epoxy to cure. It will take 8-12 hours at typical room temperature. You may think a thin coating like this should cure very quickly, but counter-intuitively, a thick layer would actually cure faster than a thin layer. This is because the curing reaction is exothermic (releases heat), which further speeds up the reaction. With a thin layer the heat generated quickly dissipates, and you get less of this effect. You can put it in an oven to speed up curing if you want, but be careful not to melt the plastic, especially if you are using PLA. My oven goes down to 40C (104F), and that’s what I would use.
Once that’s done…
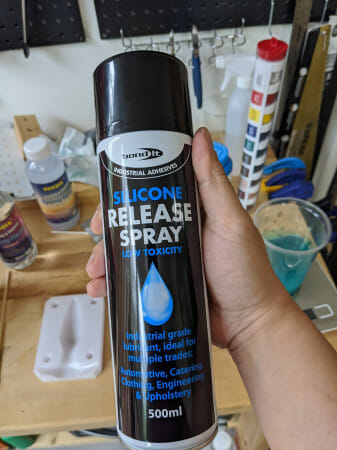
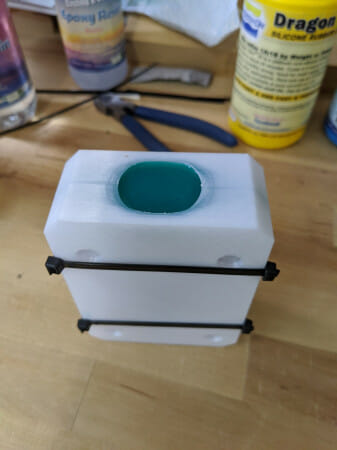
Give both sides of the mould a good spray of the release agent if you have it. This will make removing the mould much easier later on.

Secure the two sides together with cable ties. You can use whatever method you want to hold them together, but it has to be pretty tight, and also keep in mind that it will have to fit into the vacuum chamber later if you are planning on degassing, so no huge clamp setups.
Now we are ready to mix the silicone. Remember the number we got above? 71 ml is the volume of my final product, and I mixed 100 ml (50g of each part) because I know some will be stuck to the cup. That turned out to be more or less the correct amount.
If you are very observant, you may have noticed that the two parts to the silicone actually have slightly different density. So should we mix 1:1 by weight or by volume?
It doesn’t actually matter. It will be fine as long as the ratio is more or less right, because the second part is just a catalyst (so if you used a bit less, you get a slightly slower curing, and vice versa).
I am mixing by weight here because I have a scale.
If you are planning on degassing, the cup should be at least 4x the size of how much you are mixing, because it will foam and expand to about 3x the starting volume during the degassing process.
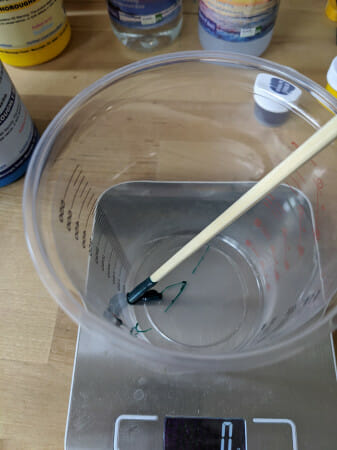
If you are using colourant, add it now. A very small amount will be enough. I use a chopstick to stir the pot, and just used the amount that’s stuck on the chopstick. put it in the mixing cup, and zero the scale.

Pour the right amount of Part A into the cup. The order is important. If you are using a colourant it has to be mixed with Part A before Part B is added.
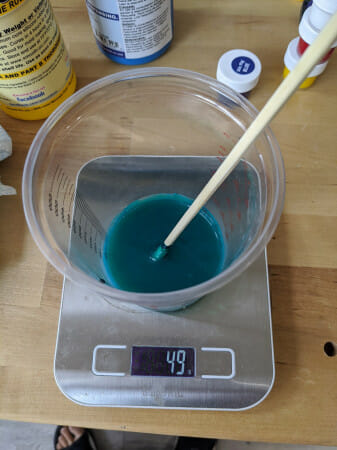
Mix thoroughly.
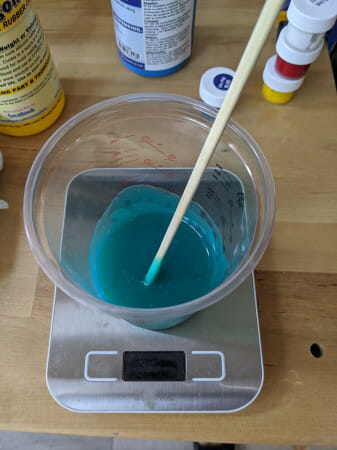
Zero the scale again, add the same amount of Part B, and mix thoroughly again. If you are not degassing, try not to stir too many bubbles into the mixture, but at the same time, you have to make sure it’s thoroughly mixed. If you are degassing, it doesn’t matter. We will be getting the bubbles out later.
At this point the clock has started. How much time you have depends on the silicone you are using, but it’s 25 minutes in my case, so the rest of the steps have to be completed within 25 minutes. It’s plenty of time so there is no need to rush, but also don’t go take a bath.
If you are not degassing, skip to the pouring step. Otherwise read on…

First make sure your vacuum pump has the right level of oil between min and max.
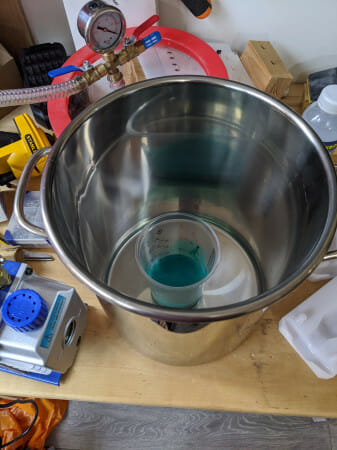
Place the mixed epoxy into the chamber, close it, close the re-pressurising valve, and turn the vacuum pump on.
. Or maybe you have an air leak somewhere?](/images/wp-content/uploads/2020/07/IMG_20200715_102109-450x338.jpg)
You should be able to get to a good vacuum level (pressure too low to detect) in less than 2-3 minutes. If not, either your pump is broken (does it have enough oil?) or the vacuum gauge needs “burping”. Or maybe you have an air leak somewhere?
You’ll see the silicone rise at some point to about 3x the original volume, as all the bubbles are drawn out and expanded to hundreds of times their original sizes due to the vacuum. Then it will suddenly collapse back to the original volume as the bubbles pop. Continue vacuuming for 90 seconds, then turn off the pump, re-pressurise, and take the silicone out.
Smooth-On’s degassing instruction video.
Finally, we can pour the silicone into the mould. Here I poured it all the way to the top, but in hindsight it’s probably a better idea to pour to 1cm (half an inch) from the top first if we are degassing. If you are not degassing, just pour to the top, and that’s it!
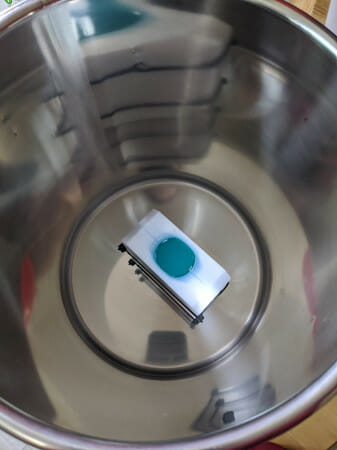
Put it into the vacuum chamber again. This time we will be removing any bubble introduced in the pouring process.
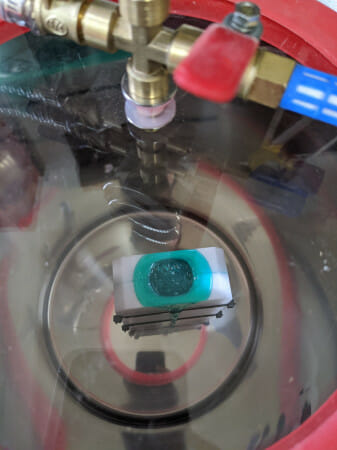
Vacuum until you stop seeing bubbles. It will be much slower this time, as most of the bubbles have already been removed. As you can see, I have a bit of a spill here as the bubbles came up, because I filled all the way to the top.
De-pressurise and the silicone will settle into a clear, bubble-less state. You may have seen a few bubbles left still when you turned the pump off, but remember that those bubbles are hundreds of times bigger than they would be in normal pressure, and probably not visible.

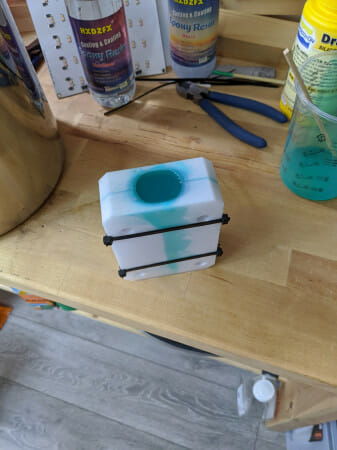
Wait for it to cure. How long you have to wait depends on your silicone, and you can speed it up by putting it into the oven at a very low temperature. Again, don’t melt your plastic… I am using 45C in fan mode.
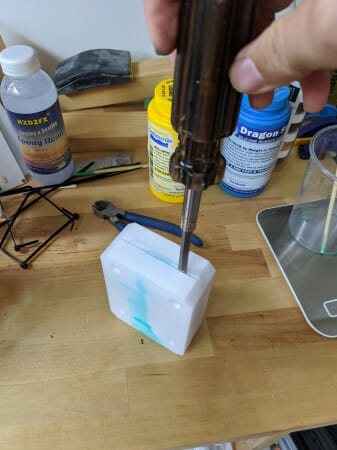
Finally, pry the mould open with a flat head screwdriver. Just slot it in and turn, going all around the edges until it opens up. Curse liberally if you did not use mould release.
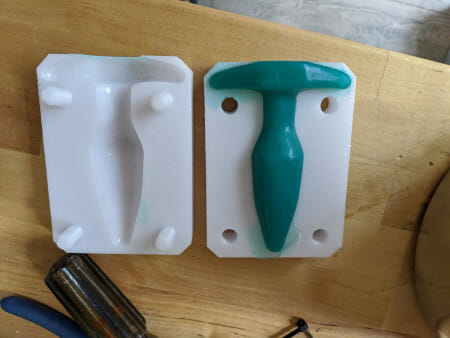
Tada!
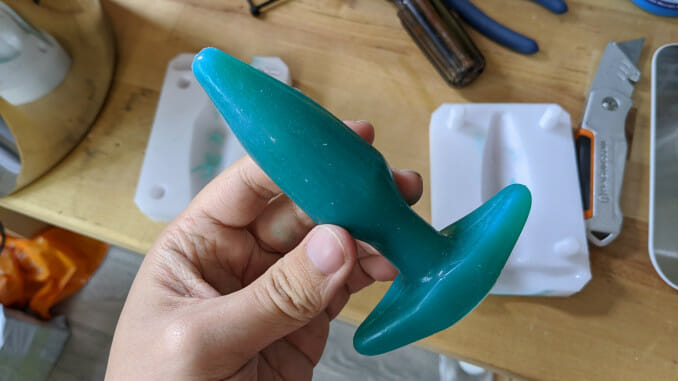
Remove the extra bits of silicone that went outside of the negative, and that’s all!
Good luck! For next time, I’ll probably get some long screws for both alignment and holding the mould together instead.
Here is my Fusion 360 file if you want to take a look. You can also import it into Fusion 360 for editing: https://a360.co/32sVLoJ
Everything in this blog post excluding the first image (I do not own copyright to the design), and including the Fusion 360 project, is hereby released into the Public Domain (or, if you prefer, licensed under Creative Commons CC0). No Rights Reserved.