Garden Workshop Part 1: The Bones
We built a workshop in the garden… from a kit! Bonus: evolution of my woodworking spaces.
It all started back in 2015. I was stuck in my tiny dorm room working on my master’s thesis for a weeks-long stretch, and it was driving me a bit insane. So I did what any reasonable person would have done, and signed up for a week-long full-time woodworking intensive.
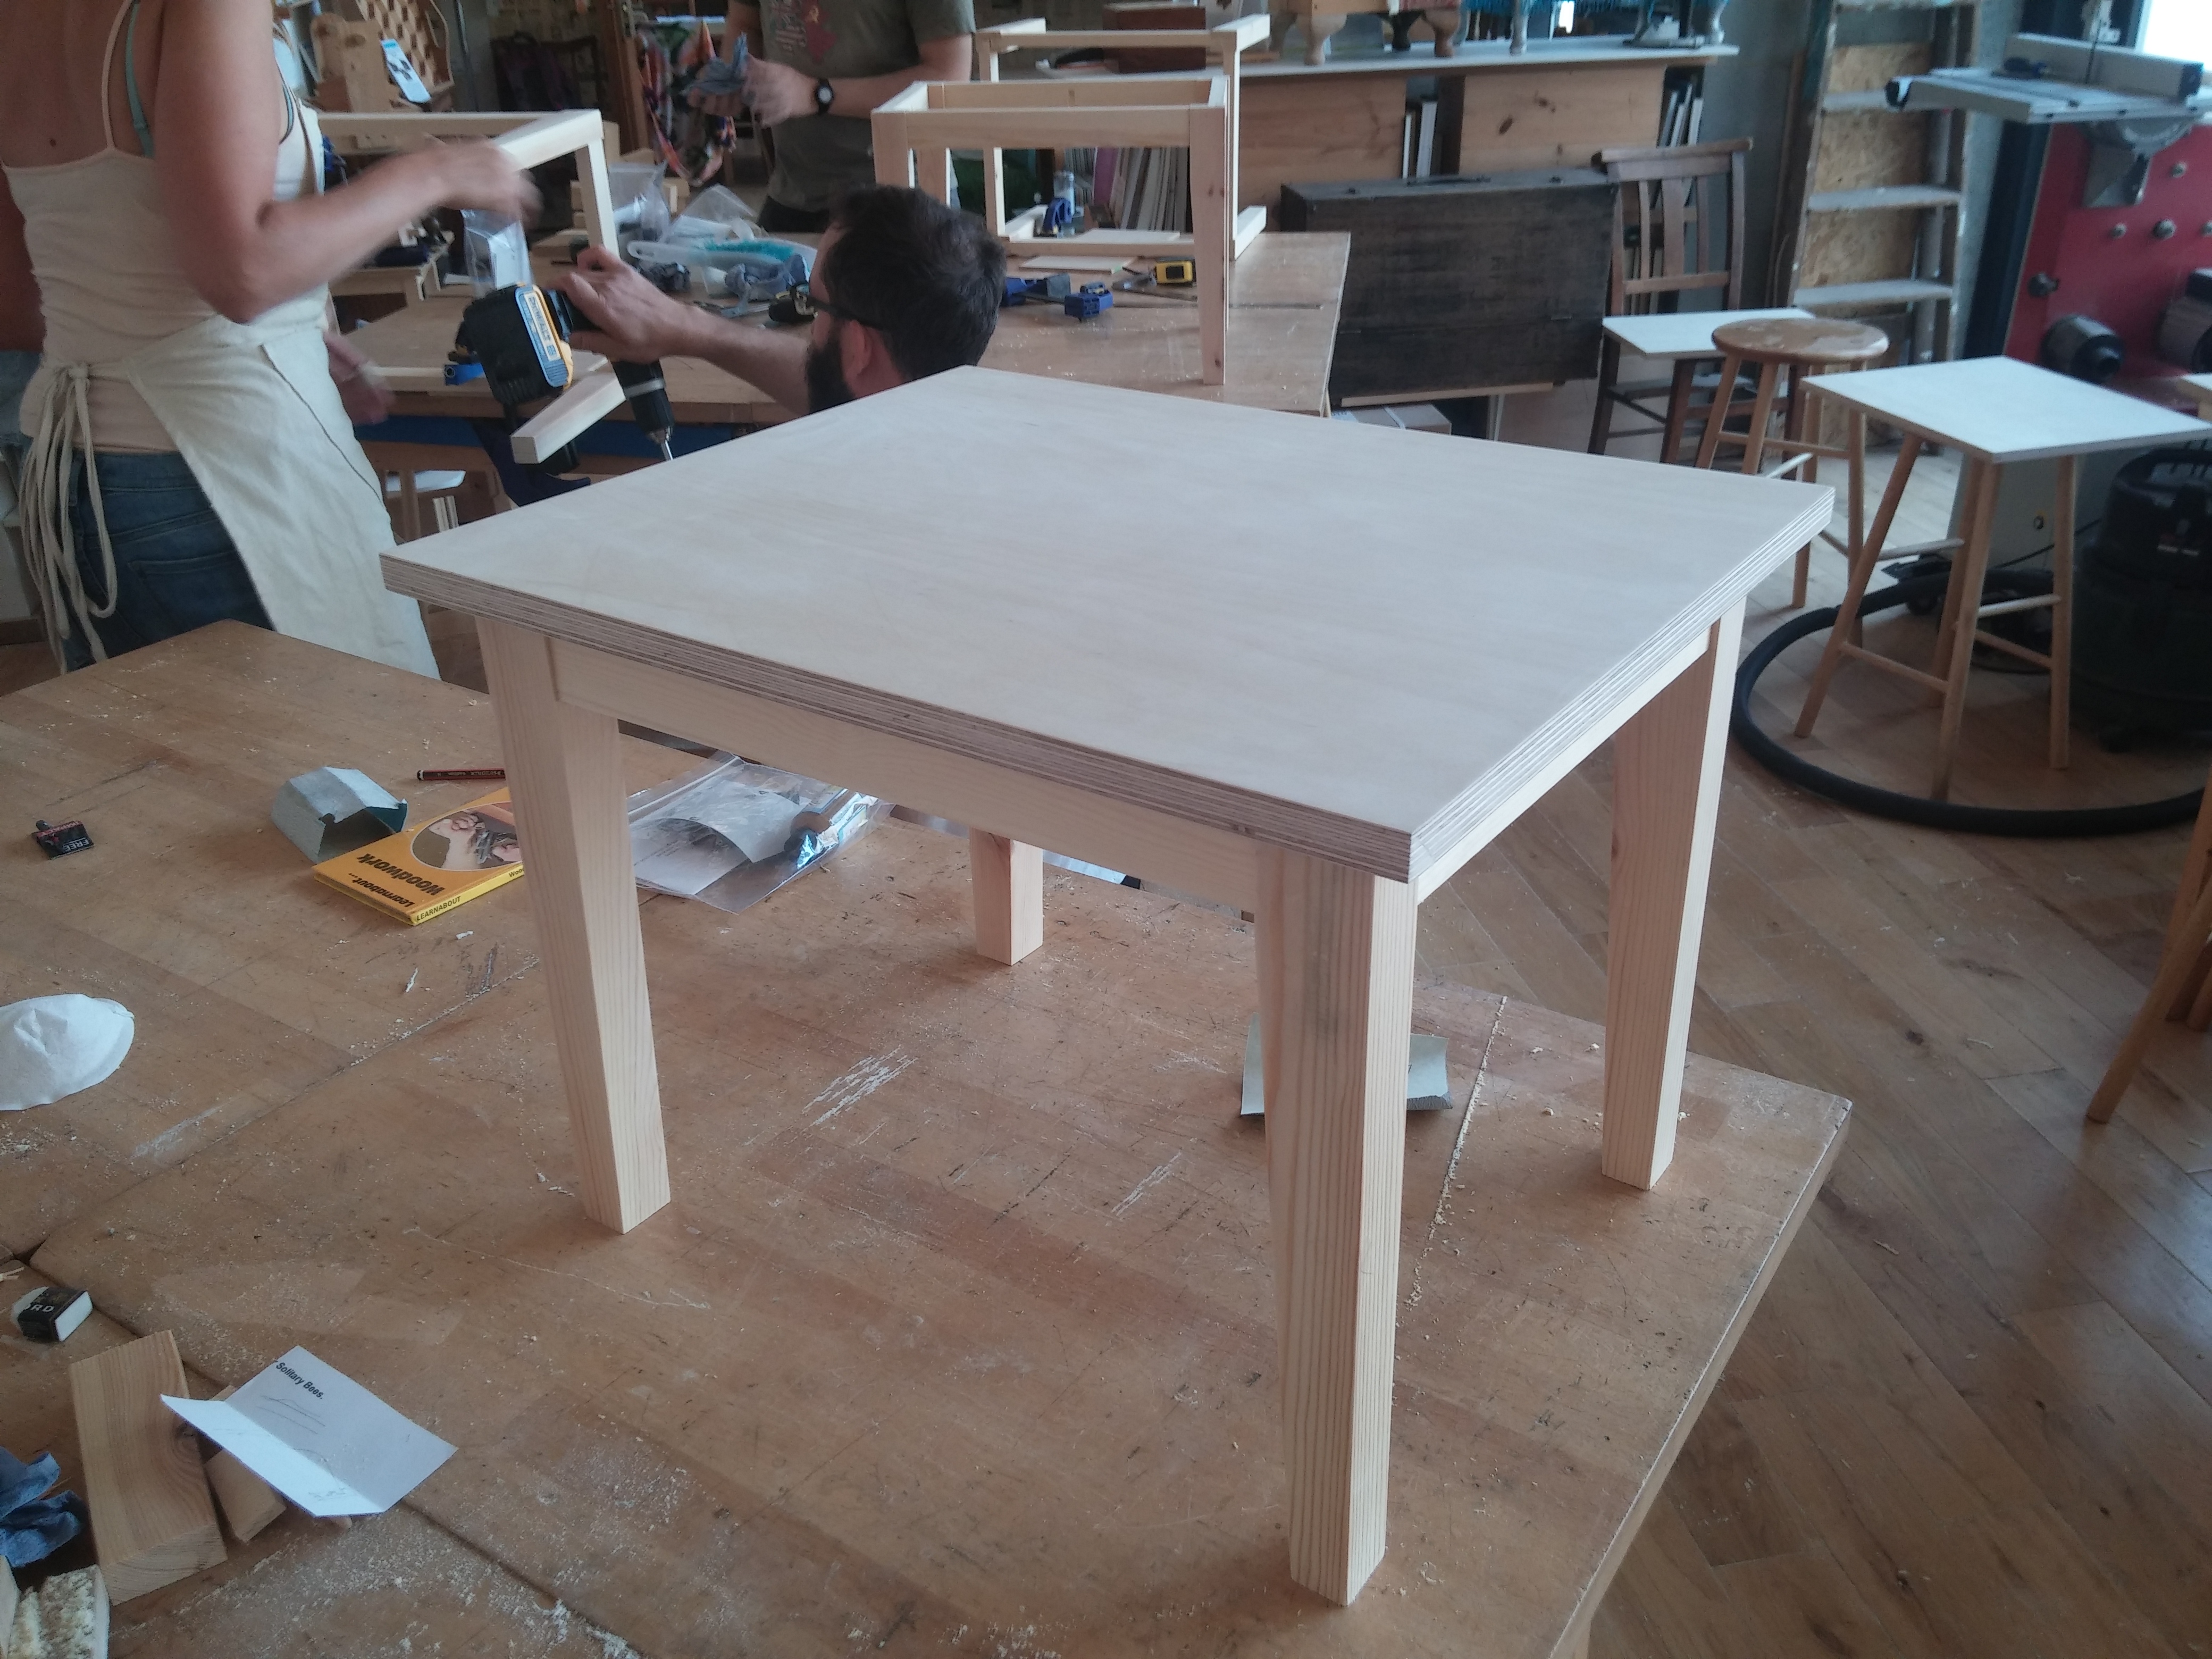
The class project - a coffee table. Doesn’t look like much, but it’s all hand-cut mortise and tenon joints. Have not done a M&T joint since…
That planted the bug and I wanted my own space to work in. Not an easy task living in central London.
History
Workshop Iteration 1 - Kitchen
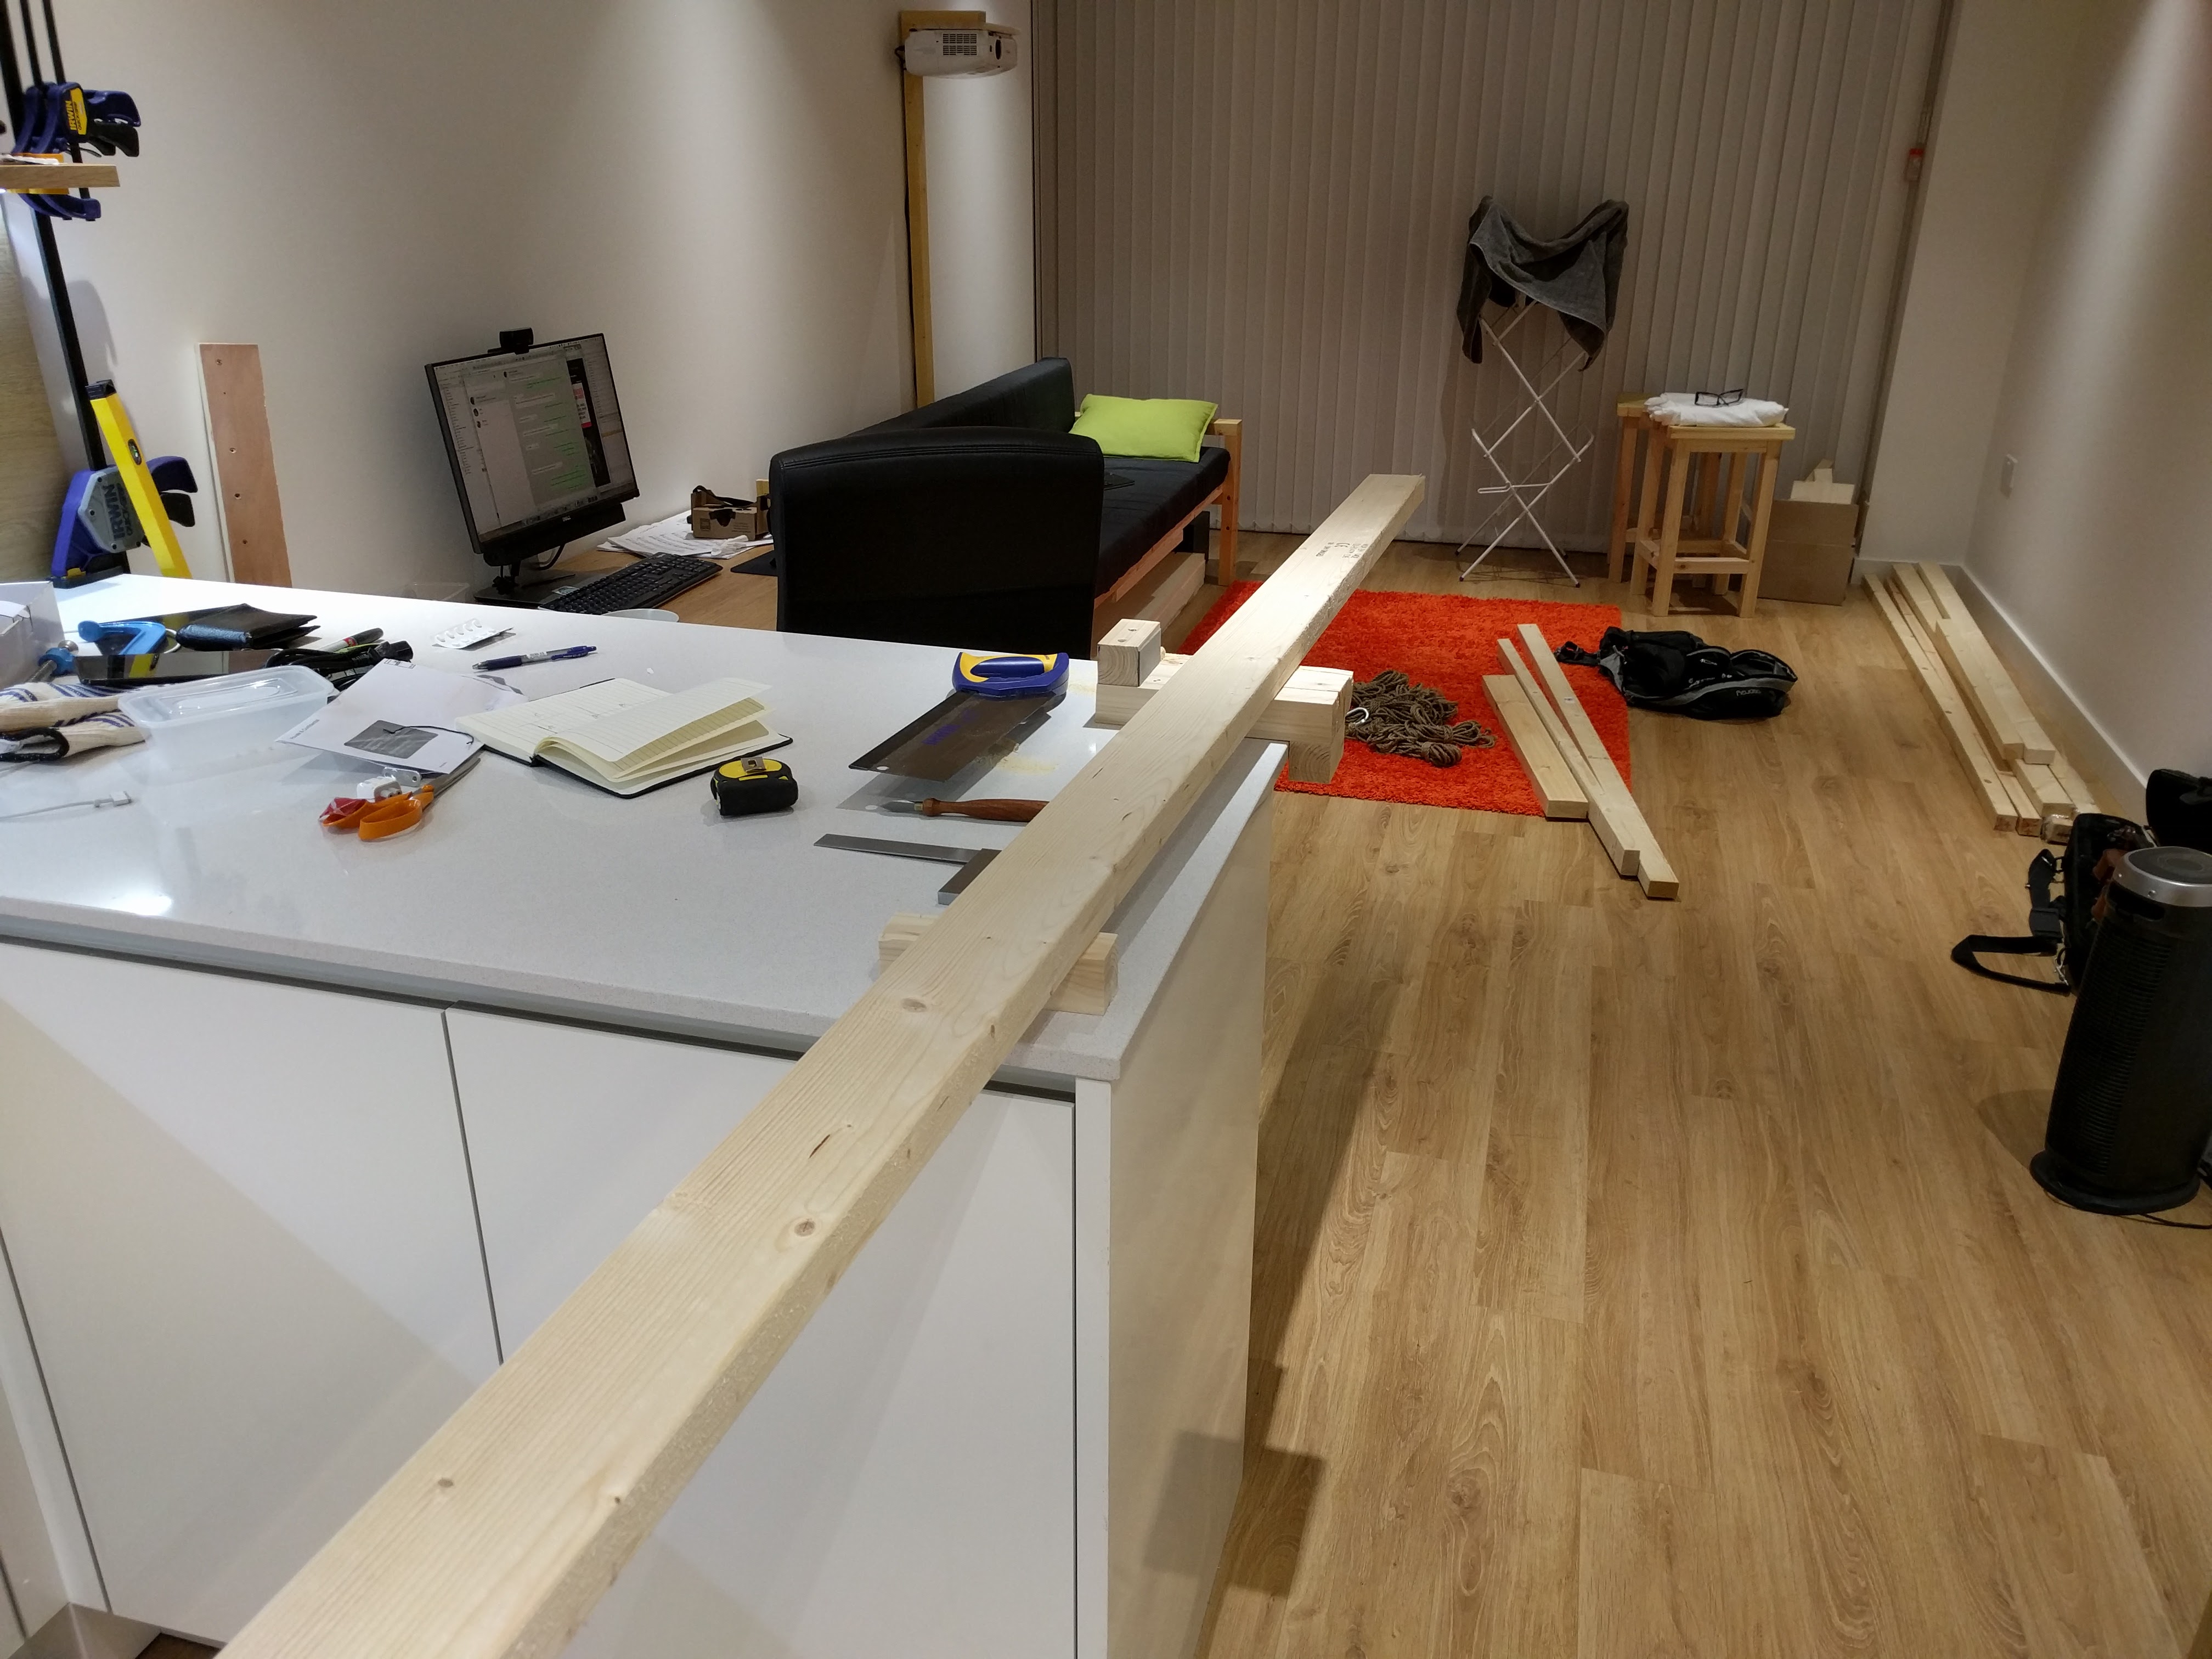
In my first 1-bedroom flat, my open plan kitchen/living room doubled as my workshop, with the beautiful stone kitchen island as my workbench. Since I didn’t want to coat the inside of my whole flat with saw dust, I was limited to just hand tools, and spent almost as much time cleaning up as actually building things. Not ideal, but that’s the space I had, and I did what I could with it - simple stuff out of construction timber.
Kitchen for food wood preparation.
Never got around to building a bed by the time I moved out.
Workshop Iteration 2 - Spare Bedroom
In my second flat I had a spare bedroom that I converted into an office and a workshop. Not ideal to have computers in the same room as dusty wood workshop, but again, that’s the space I had. I also had a garden that I could do the very dusty stuff in, and it was at this point that I became the proud owner of a mitre saw, and stopped the character-building practice of sawing everything with a tenon saw. The obligatory first project was the workbench.
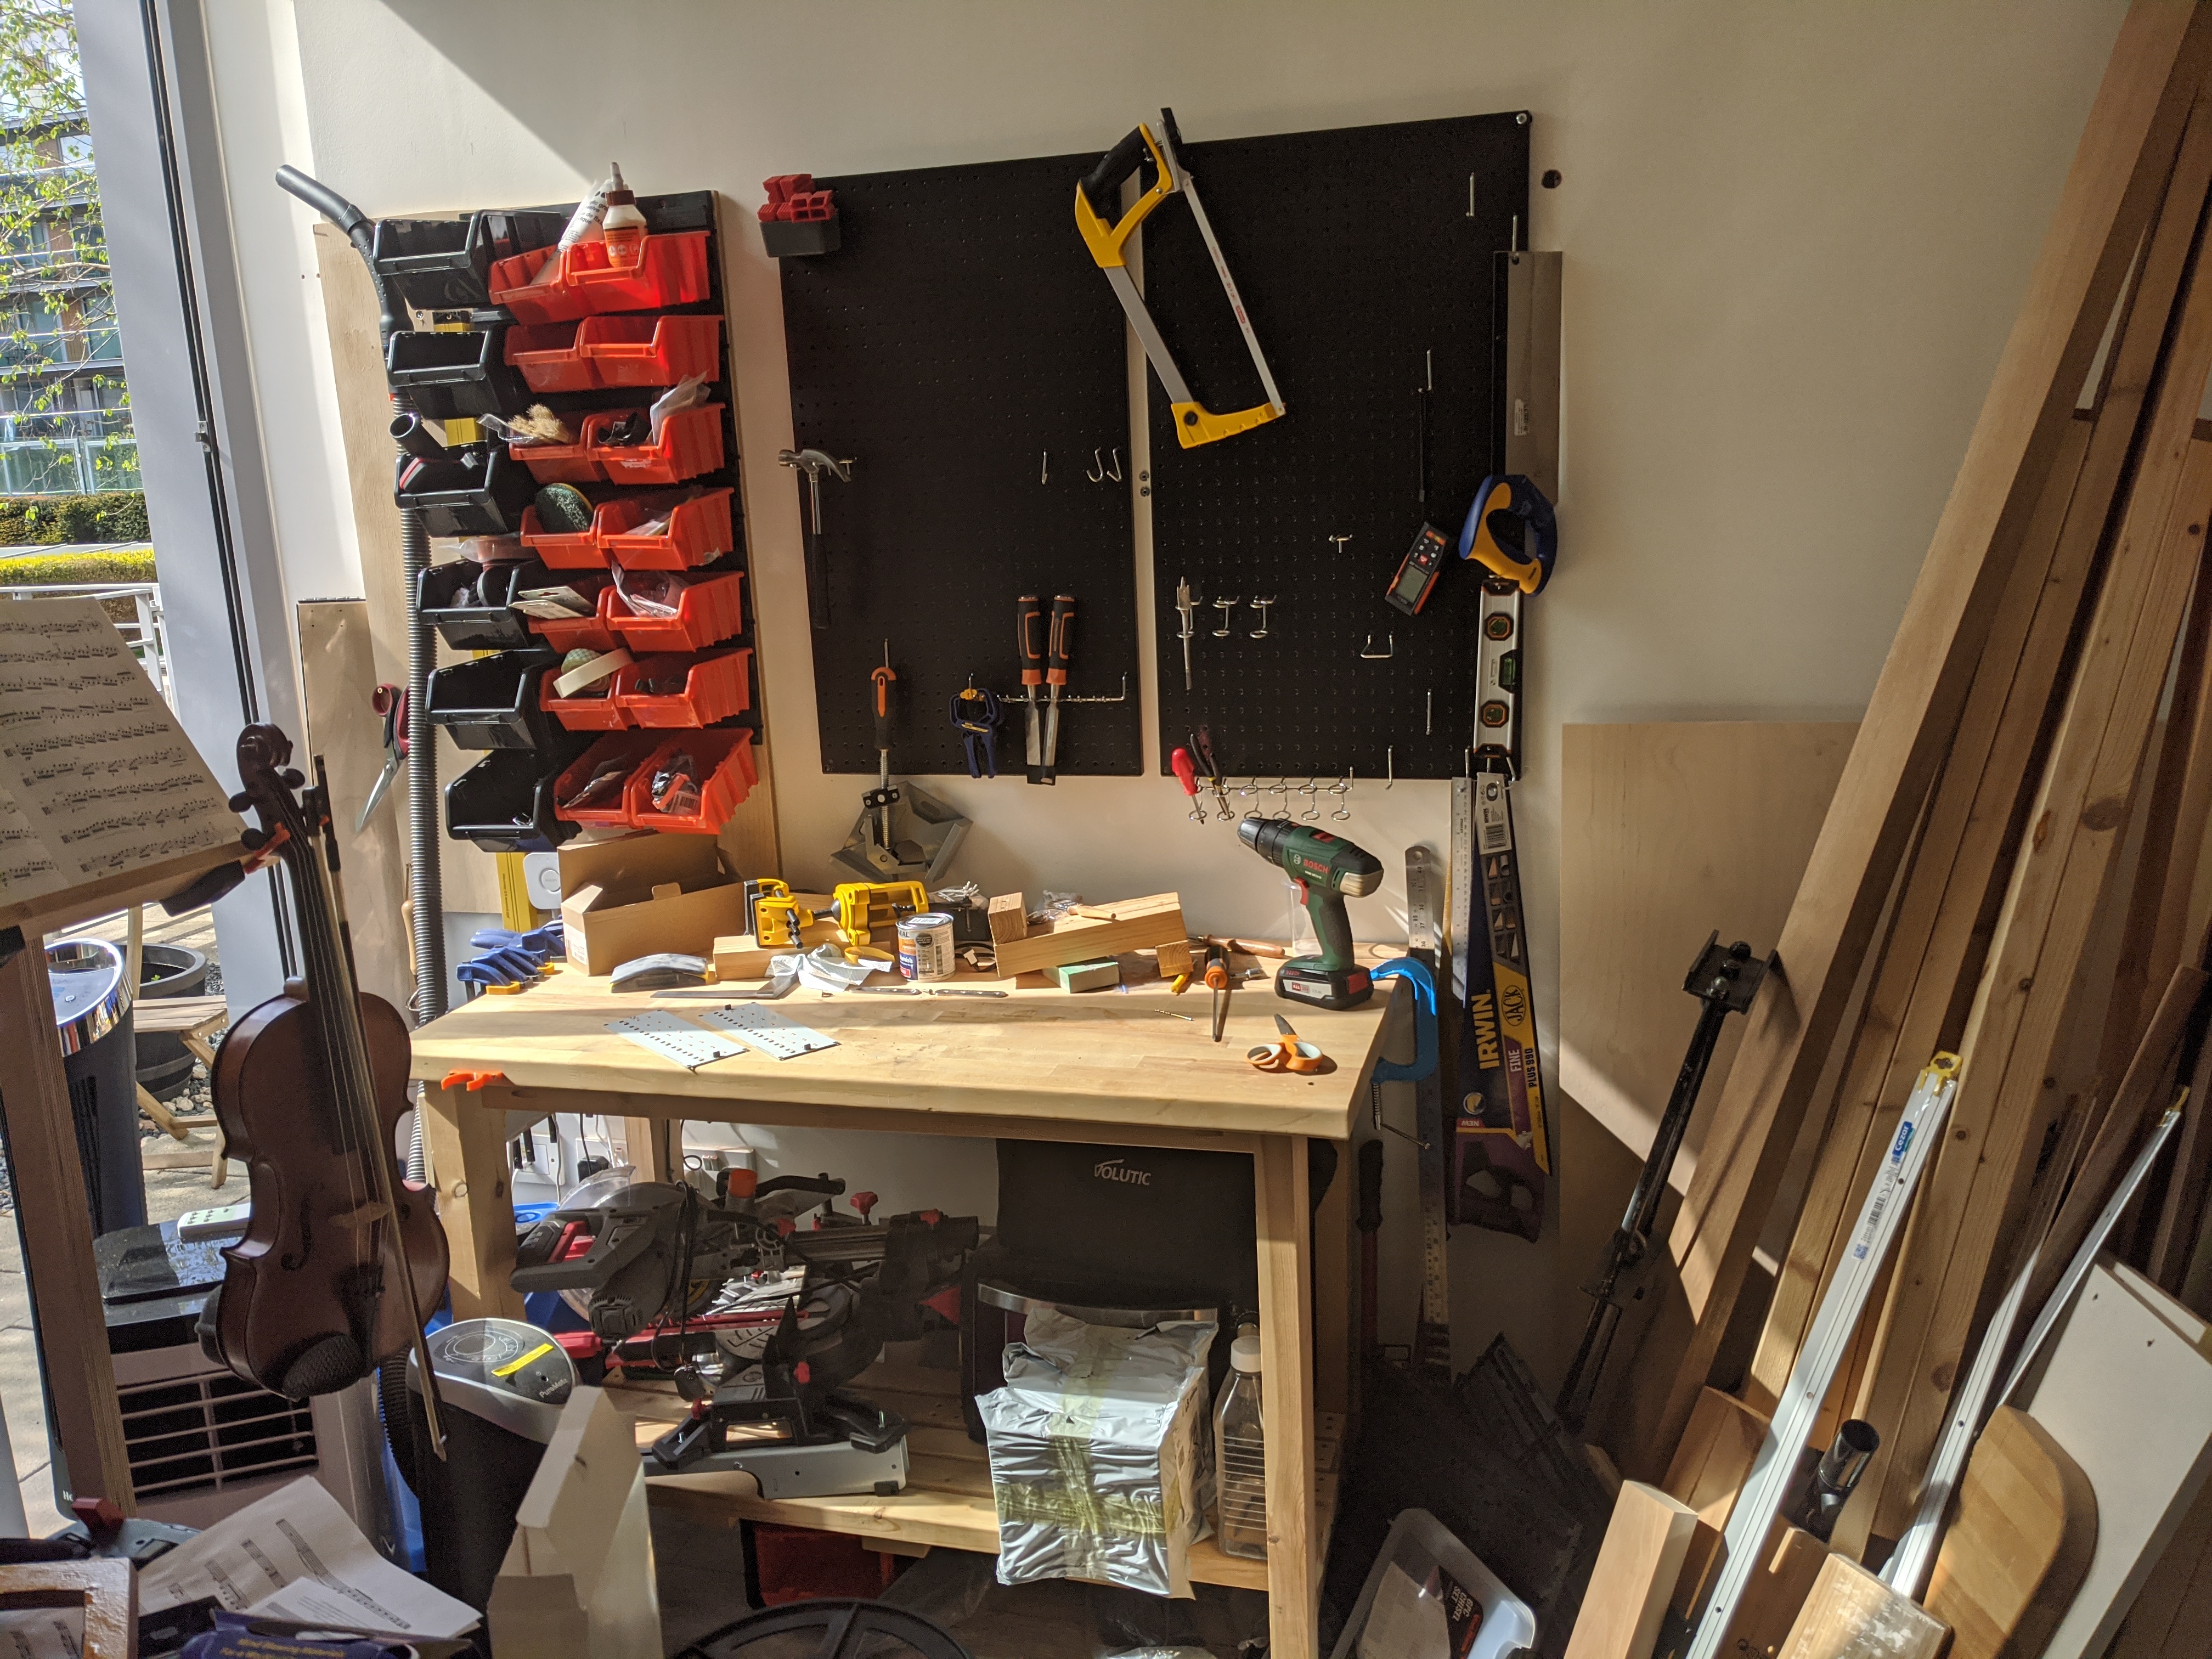
Workbench
Not a lot of space, but being able to use a mitre saw outside made cross cuts much less painful, and I was able to build a few more things.
New Workshop!
This year we finally moved into a house with a reasonably-sized garden. As is common practice in the 50s in the UK (1950s, just in case you are reading this after the 2050s), the garage is behind the house, with a narrow driveway for access shared with a neighbour. Cars nowadays are much wider than they were back then, so it is no longer usable as a garage. But that’s a perfect new home for my workshop!
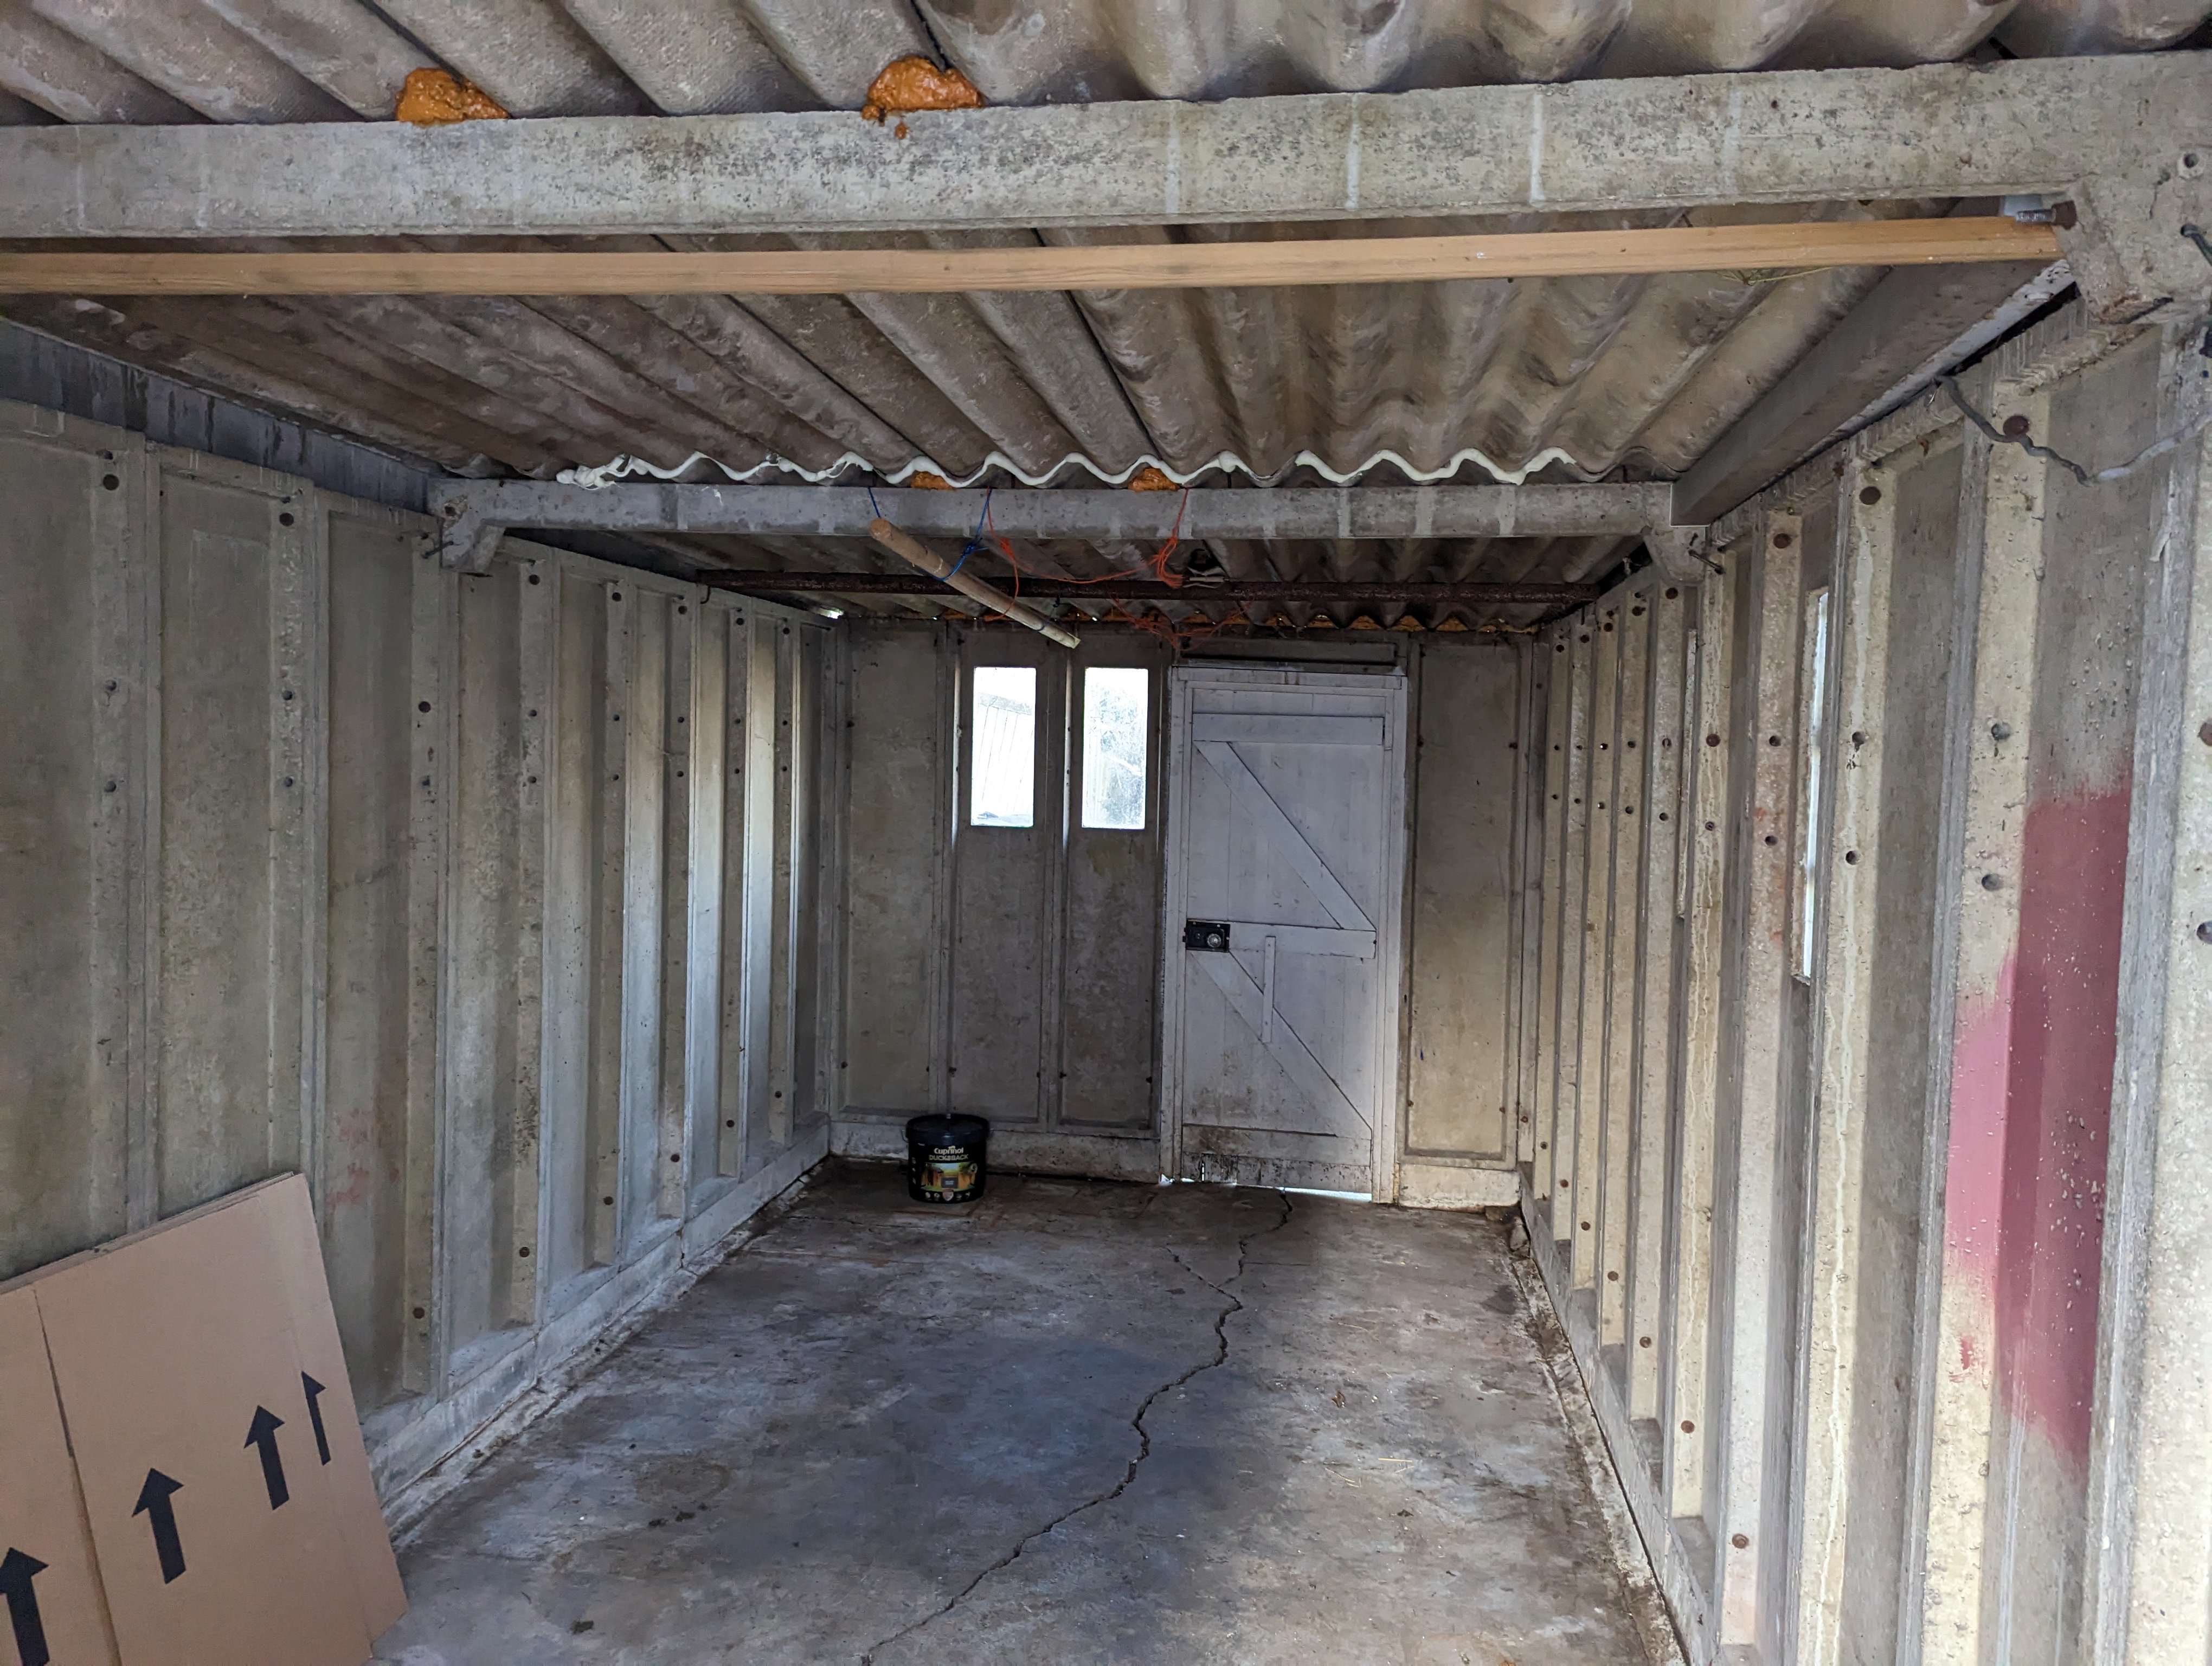
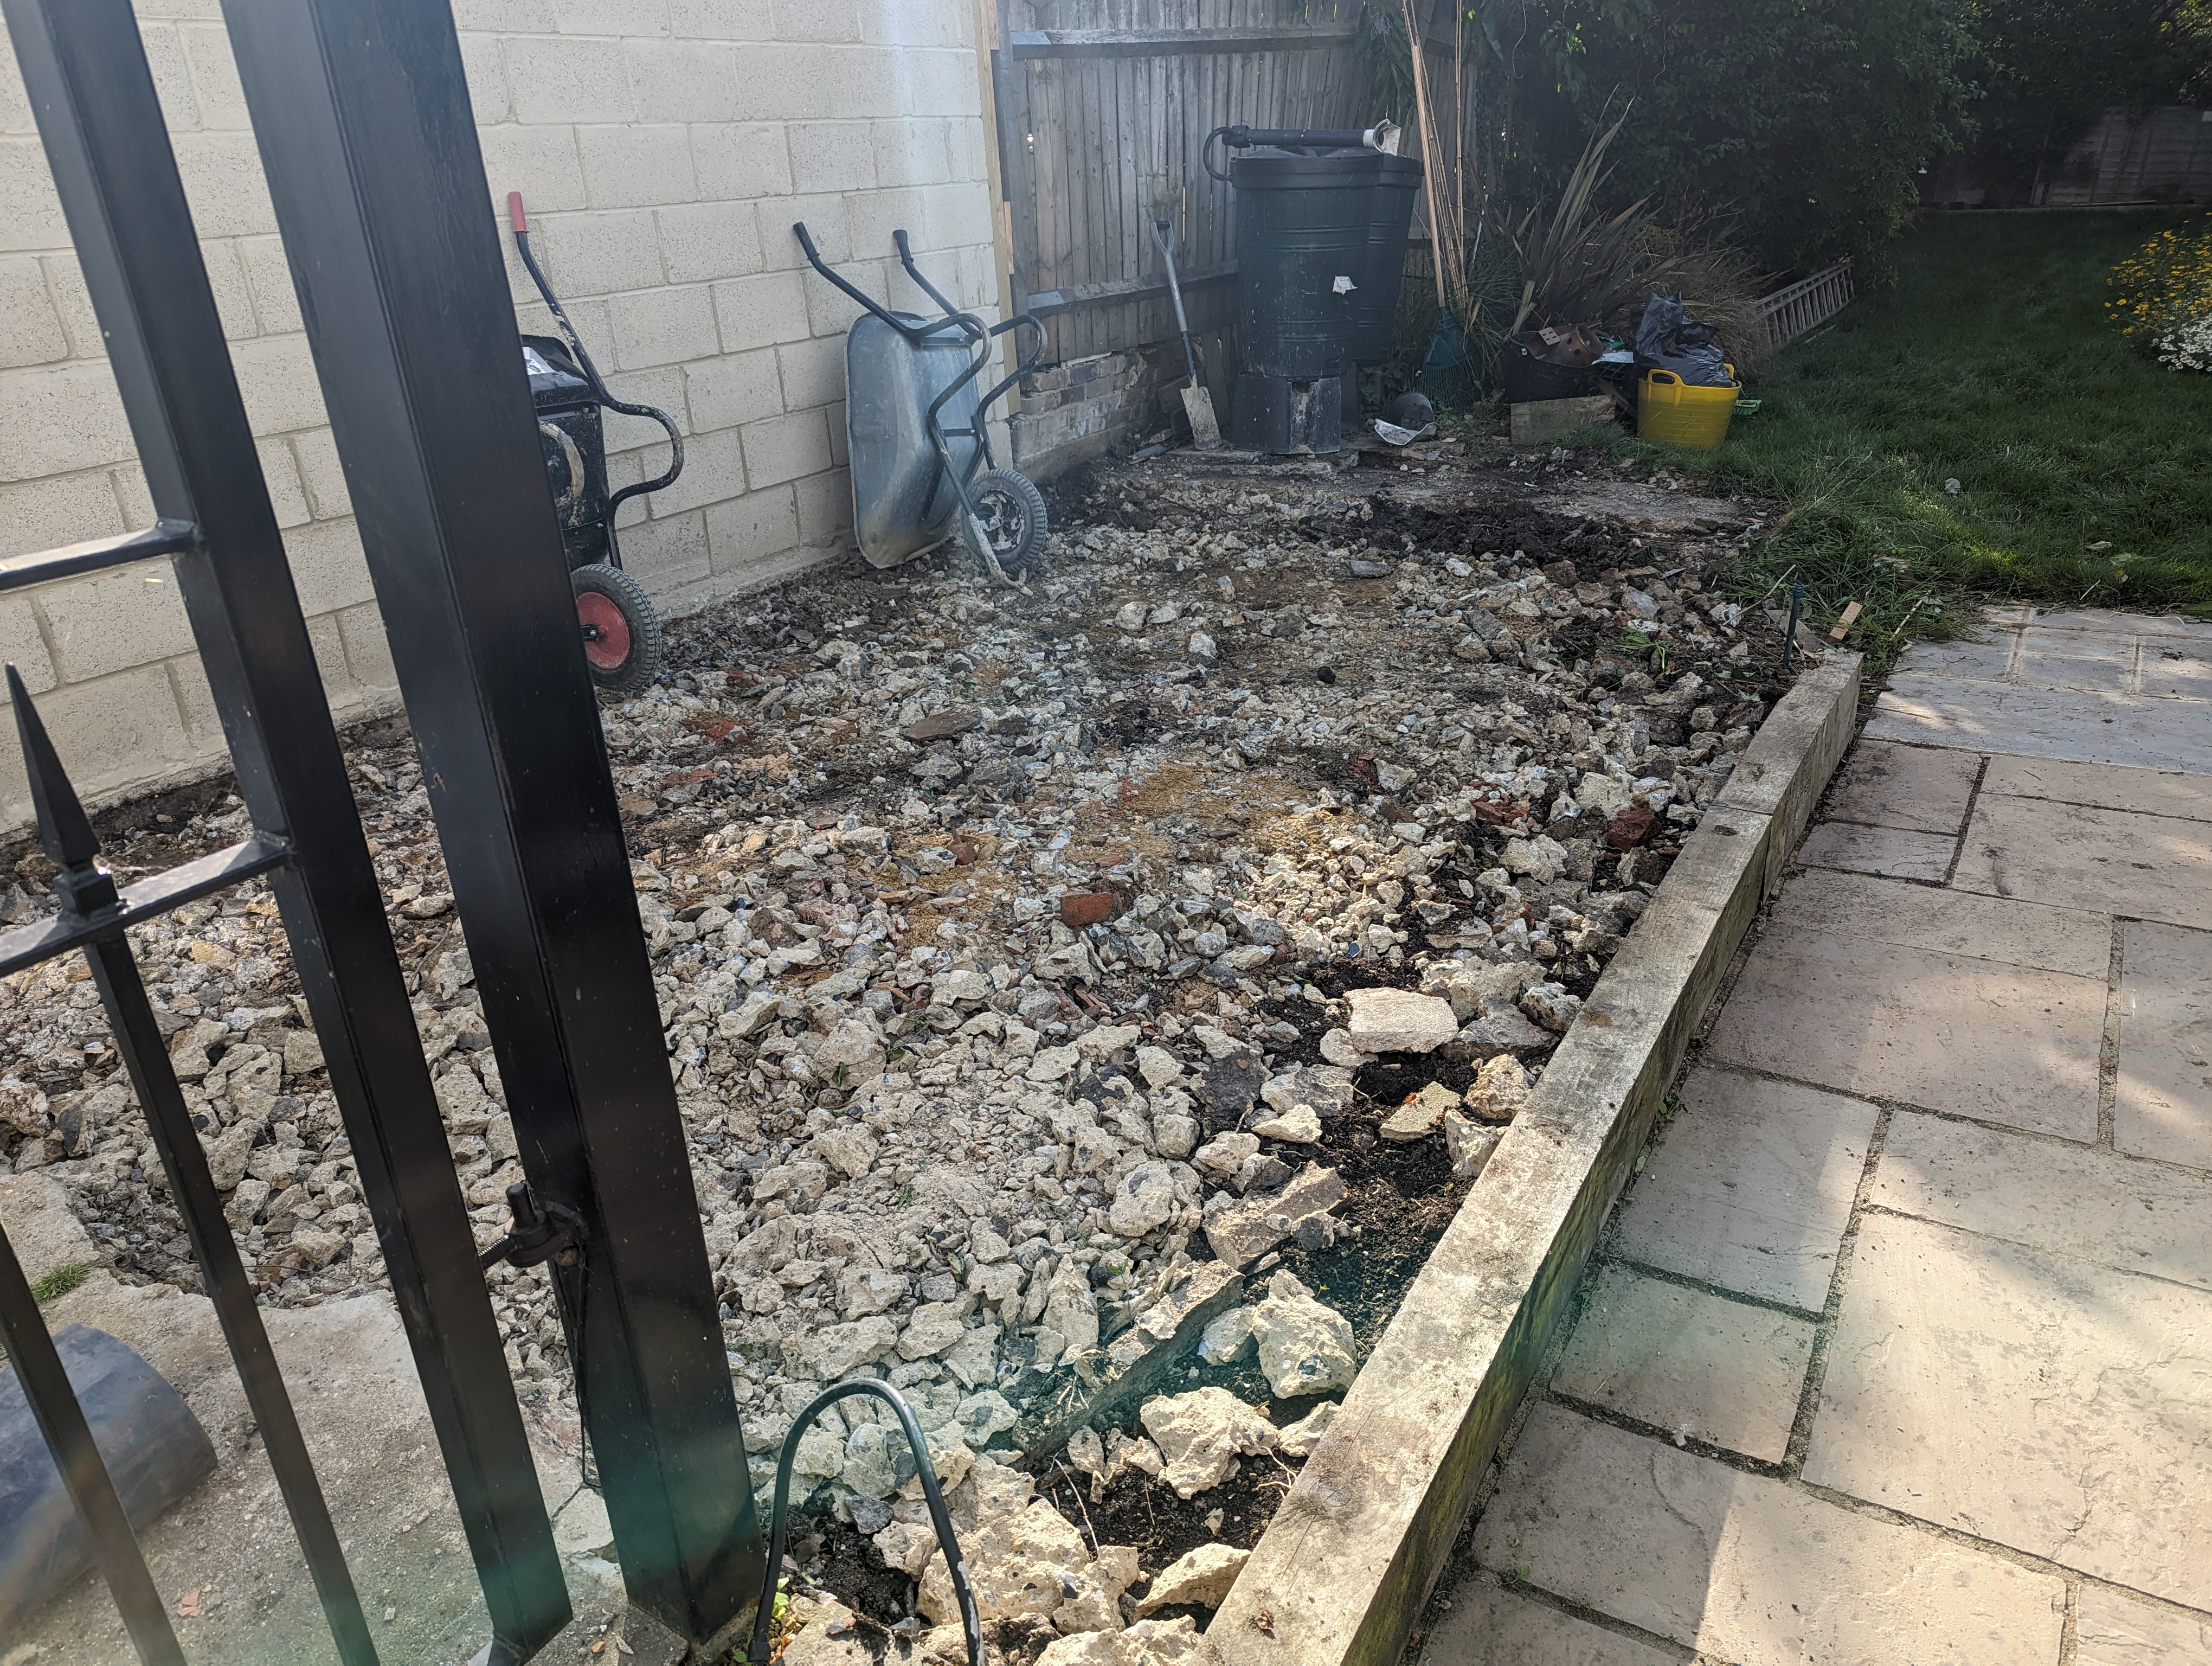
Old garage.
Only a few small issues:
- It’s made out of prefab concrete blocks with tiny windows, so it’s quite dark
- The mitre saw trips the circuit breaker
- The concrete base has cracked and moved significantly over the years
- Oh, and it’s got an asbestos roof
So we got it demolished and hired someone to pour a new reinforced concrete slab.
Bye!
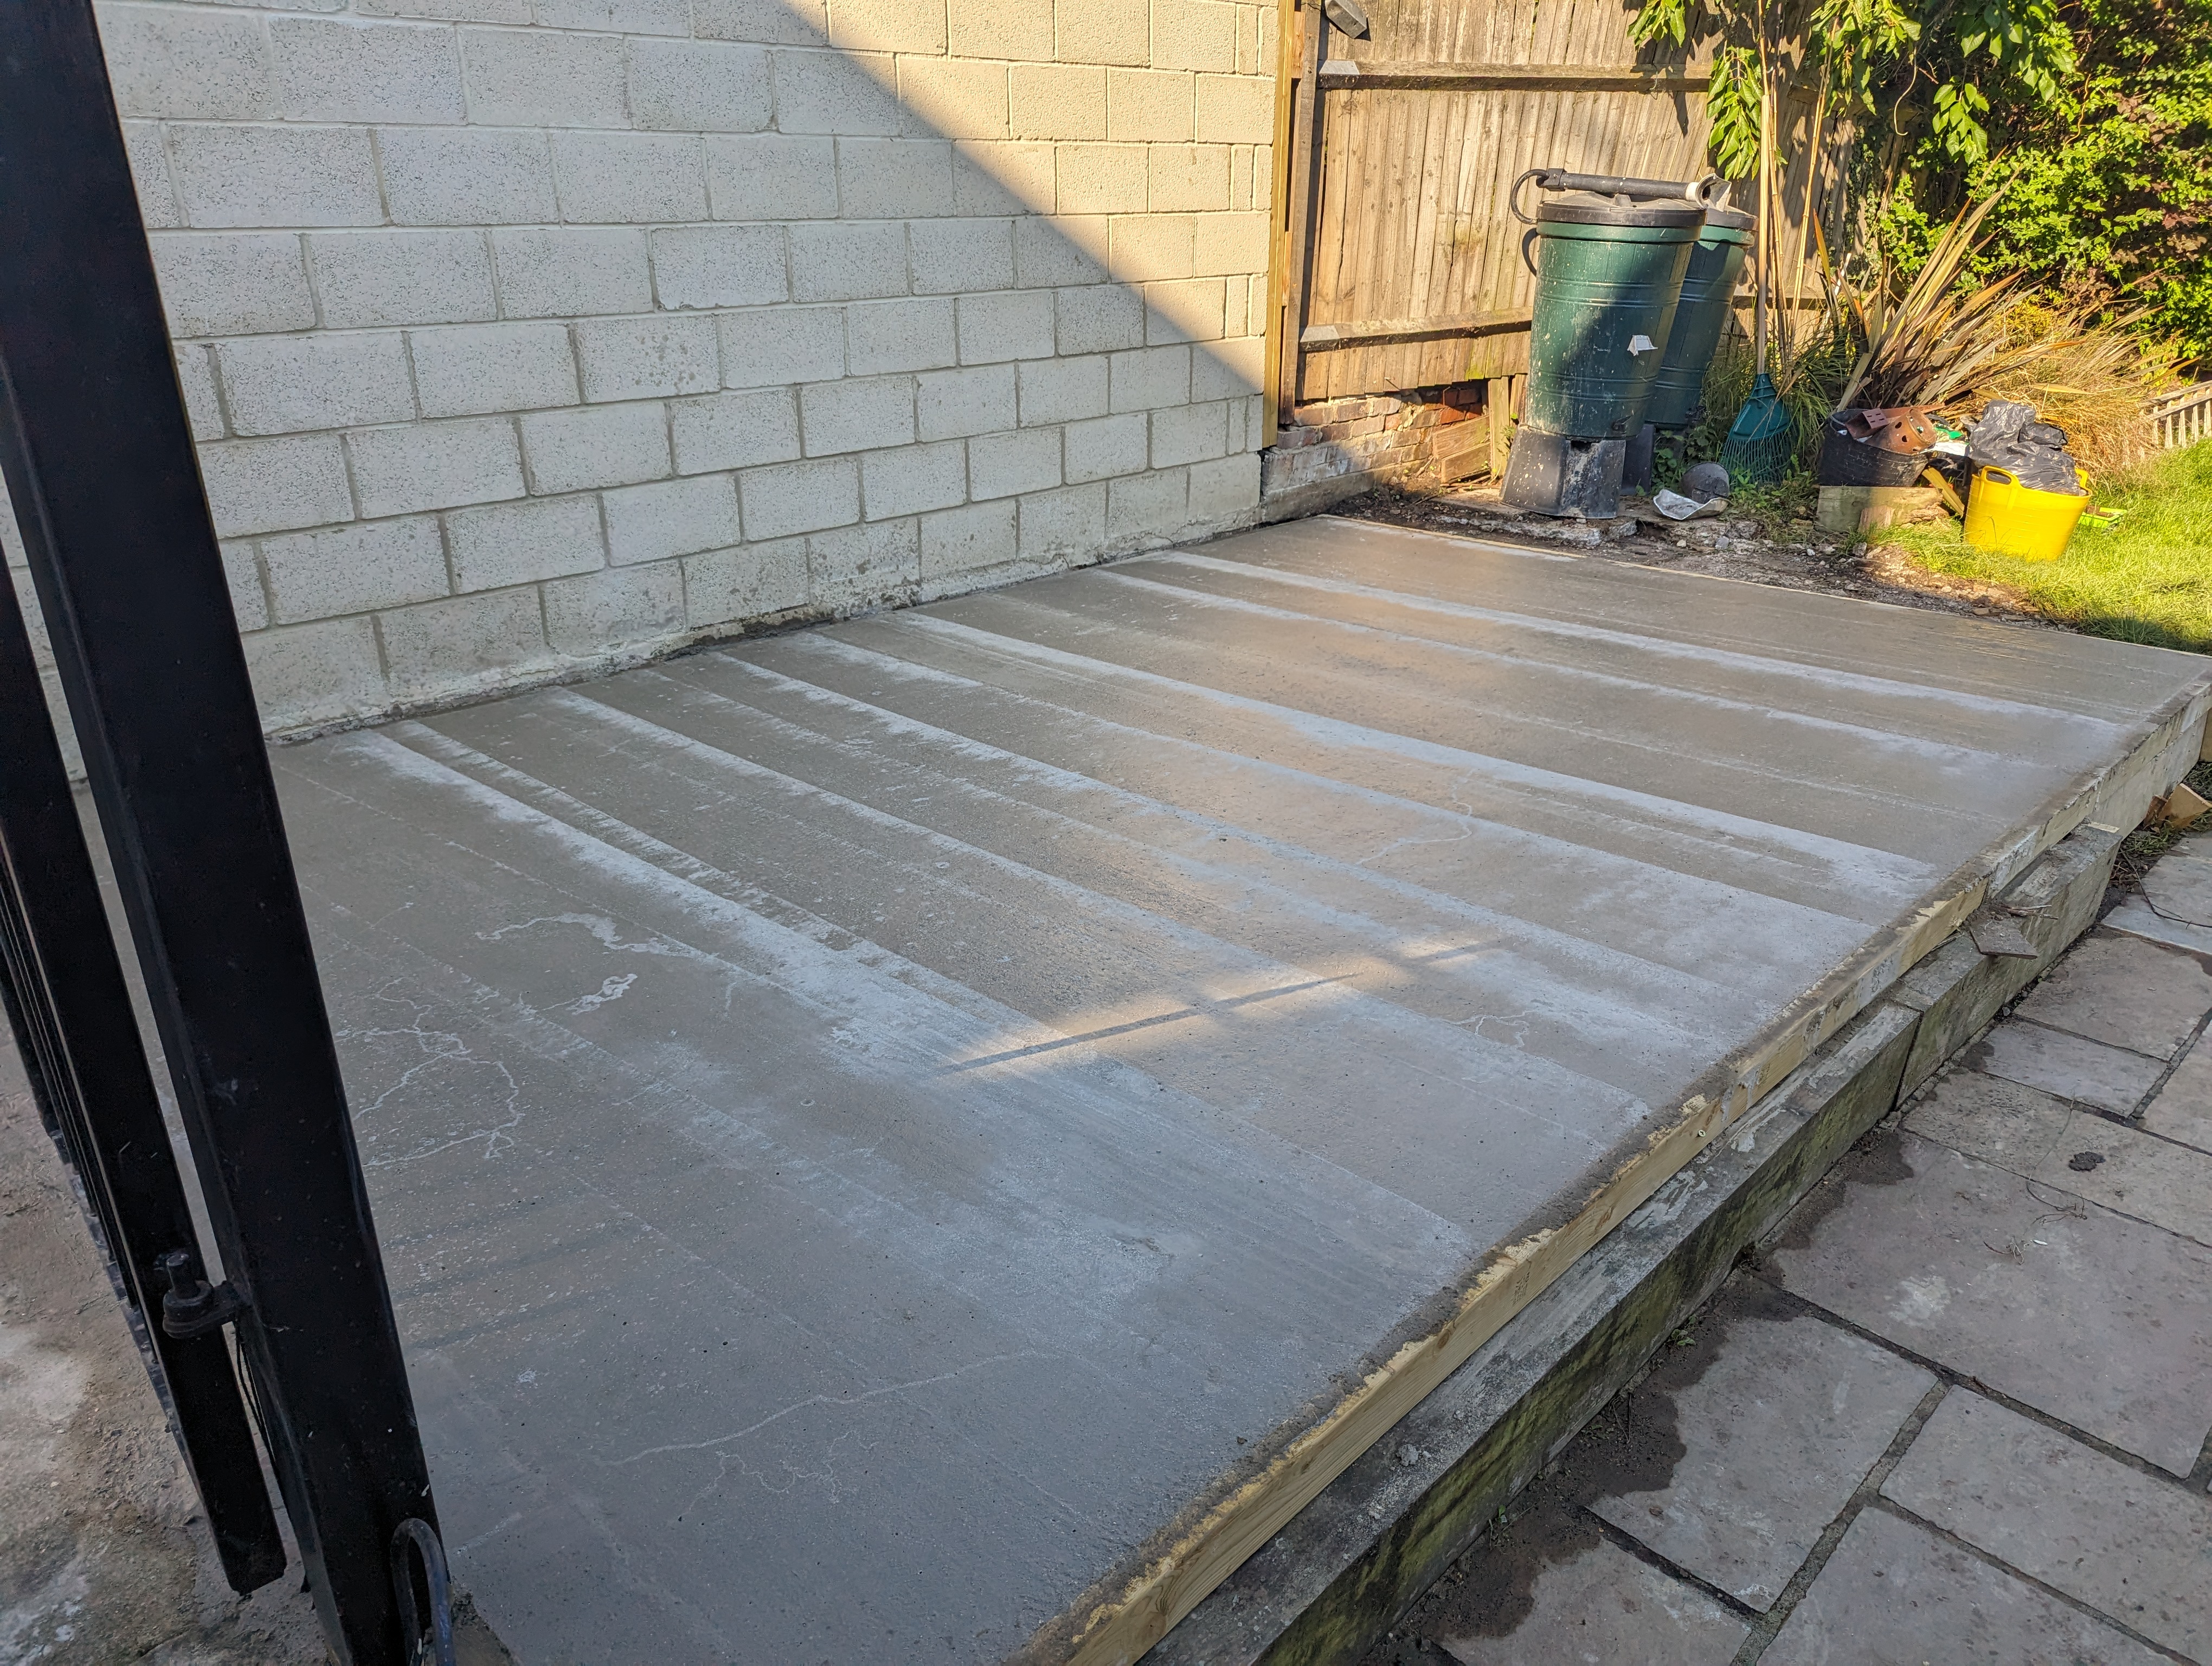
New reinforced concrete base.
When it comes to actually getting a new building in, there are quite a few choices - primarily brick/blocks, prefab SIP (structural insulated panels), timber framing, and log cabins.
Brick made out of sand and lime is the traditional option. Durable, but labour-intensive and has a tendency of developing cracks over time. Concrete blocks is the more modern option that is cheaper, stronger, but less durable.
SIPs are another modern option that is very clever - two chipboards sandwiching some insulation foam, and glued together with construction adhesive. They can be cut to size at the factory and sold as kits. They provide very good thermal insulation, but sometimes humidity problems (due to the very good sealing), and they are quite expensive. They are also not inherently waterproof on the outside, and require a waterproof cladding to be installed, which is often also expensive.
Timber framing is a method very popular in North America, where construction timber is used to create a skeleton of the building, with plasterboard (drywall for North Americans) on either side, and cladding/rendering on the outside for protection from the environment. Relatively cheap, but also quite labour intensive.
Another interesting option is “log cabin” kits, where the company supply wooden tongue-and-groove planks that simply slot together to form the walls. Cheapest option, but the building will grow and shrink over the seasons, and thermal insulation is also not great.
In the end I decided to go with a log cabin option as I quite like the idea of having a wood workshop be made out of wood itself, and be easy to modify using tools in the workshop. The wood movement requires some care to work around (especially for wiring), but since we are going to be woodworkers, that’s something we need to be very familiar with anyways. Here is the delivered kit:
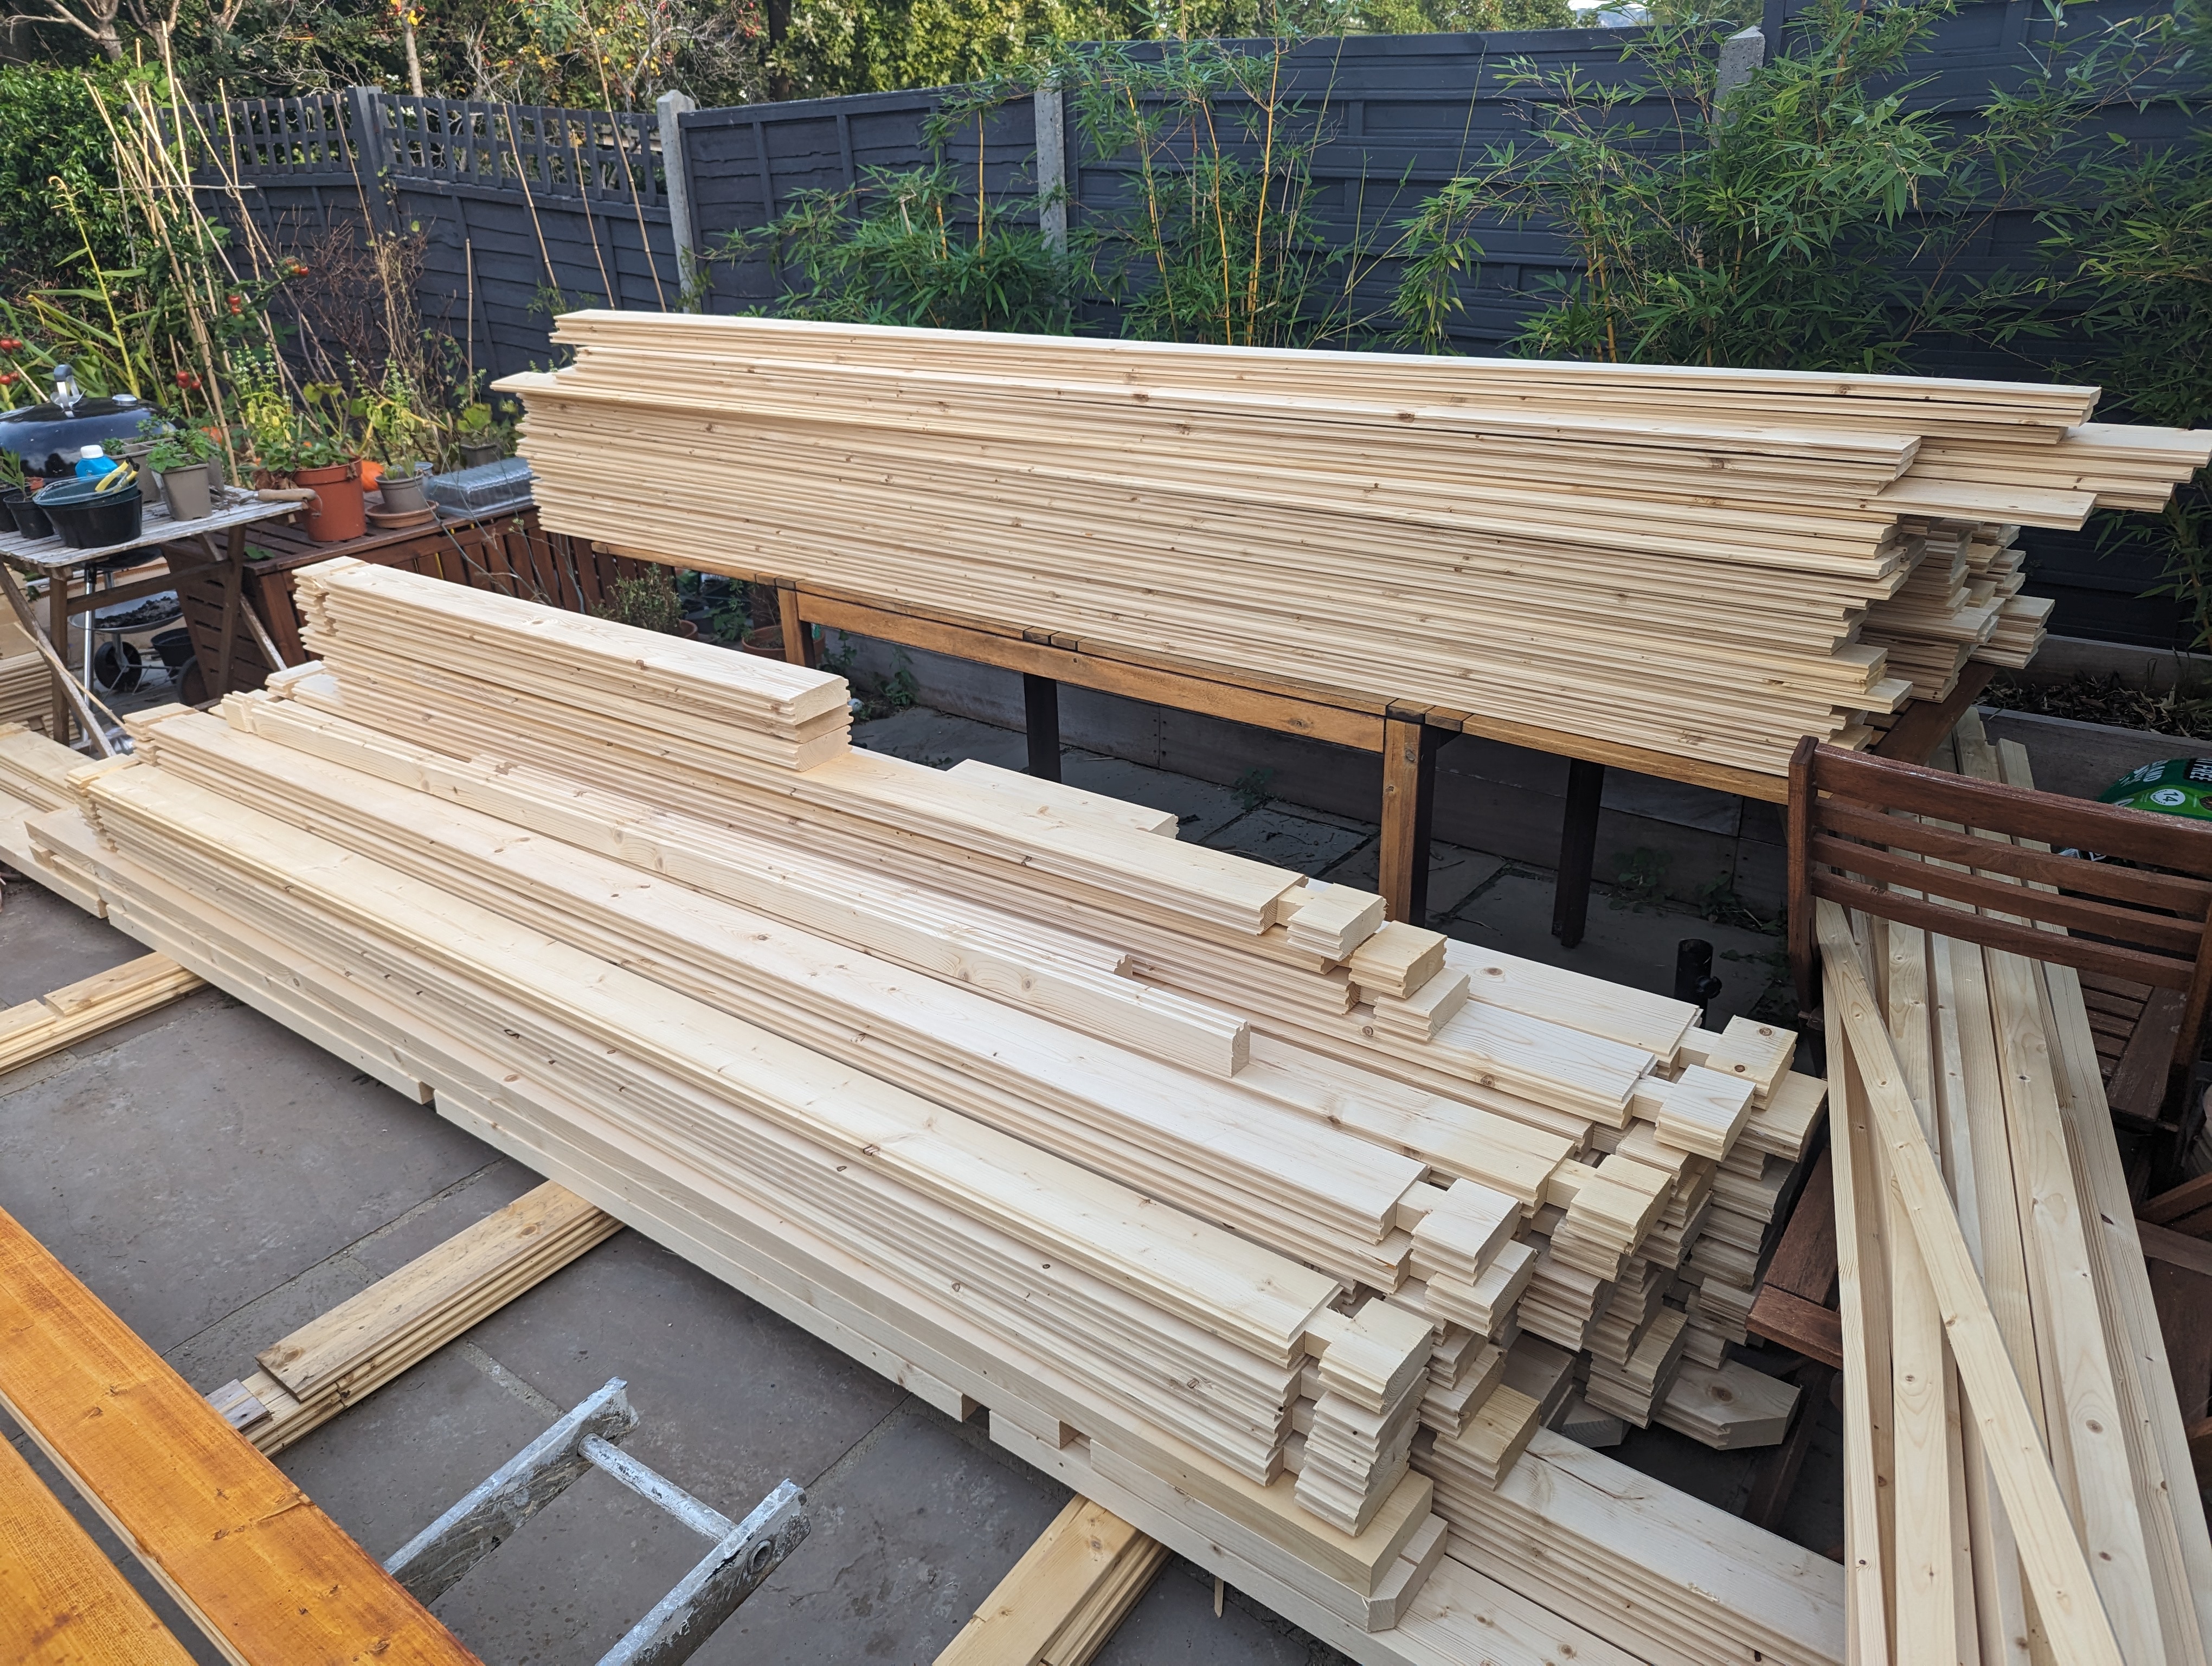
The kit as delivered.
They are available in all sorts of dimensions from multiple suppliers here in the UK, and we decided to go with a 15m2 kit because that’s the largest size that doesn’t require planning permission in England (this is not legal advice - the actual rules are a bit more complicated than that). We also chose a pent roof design because we want to put solar panels on top of it.
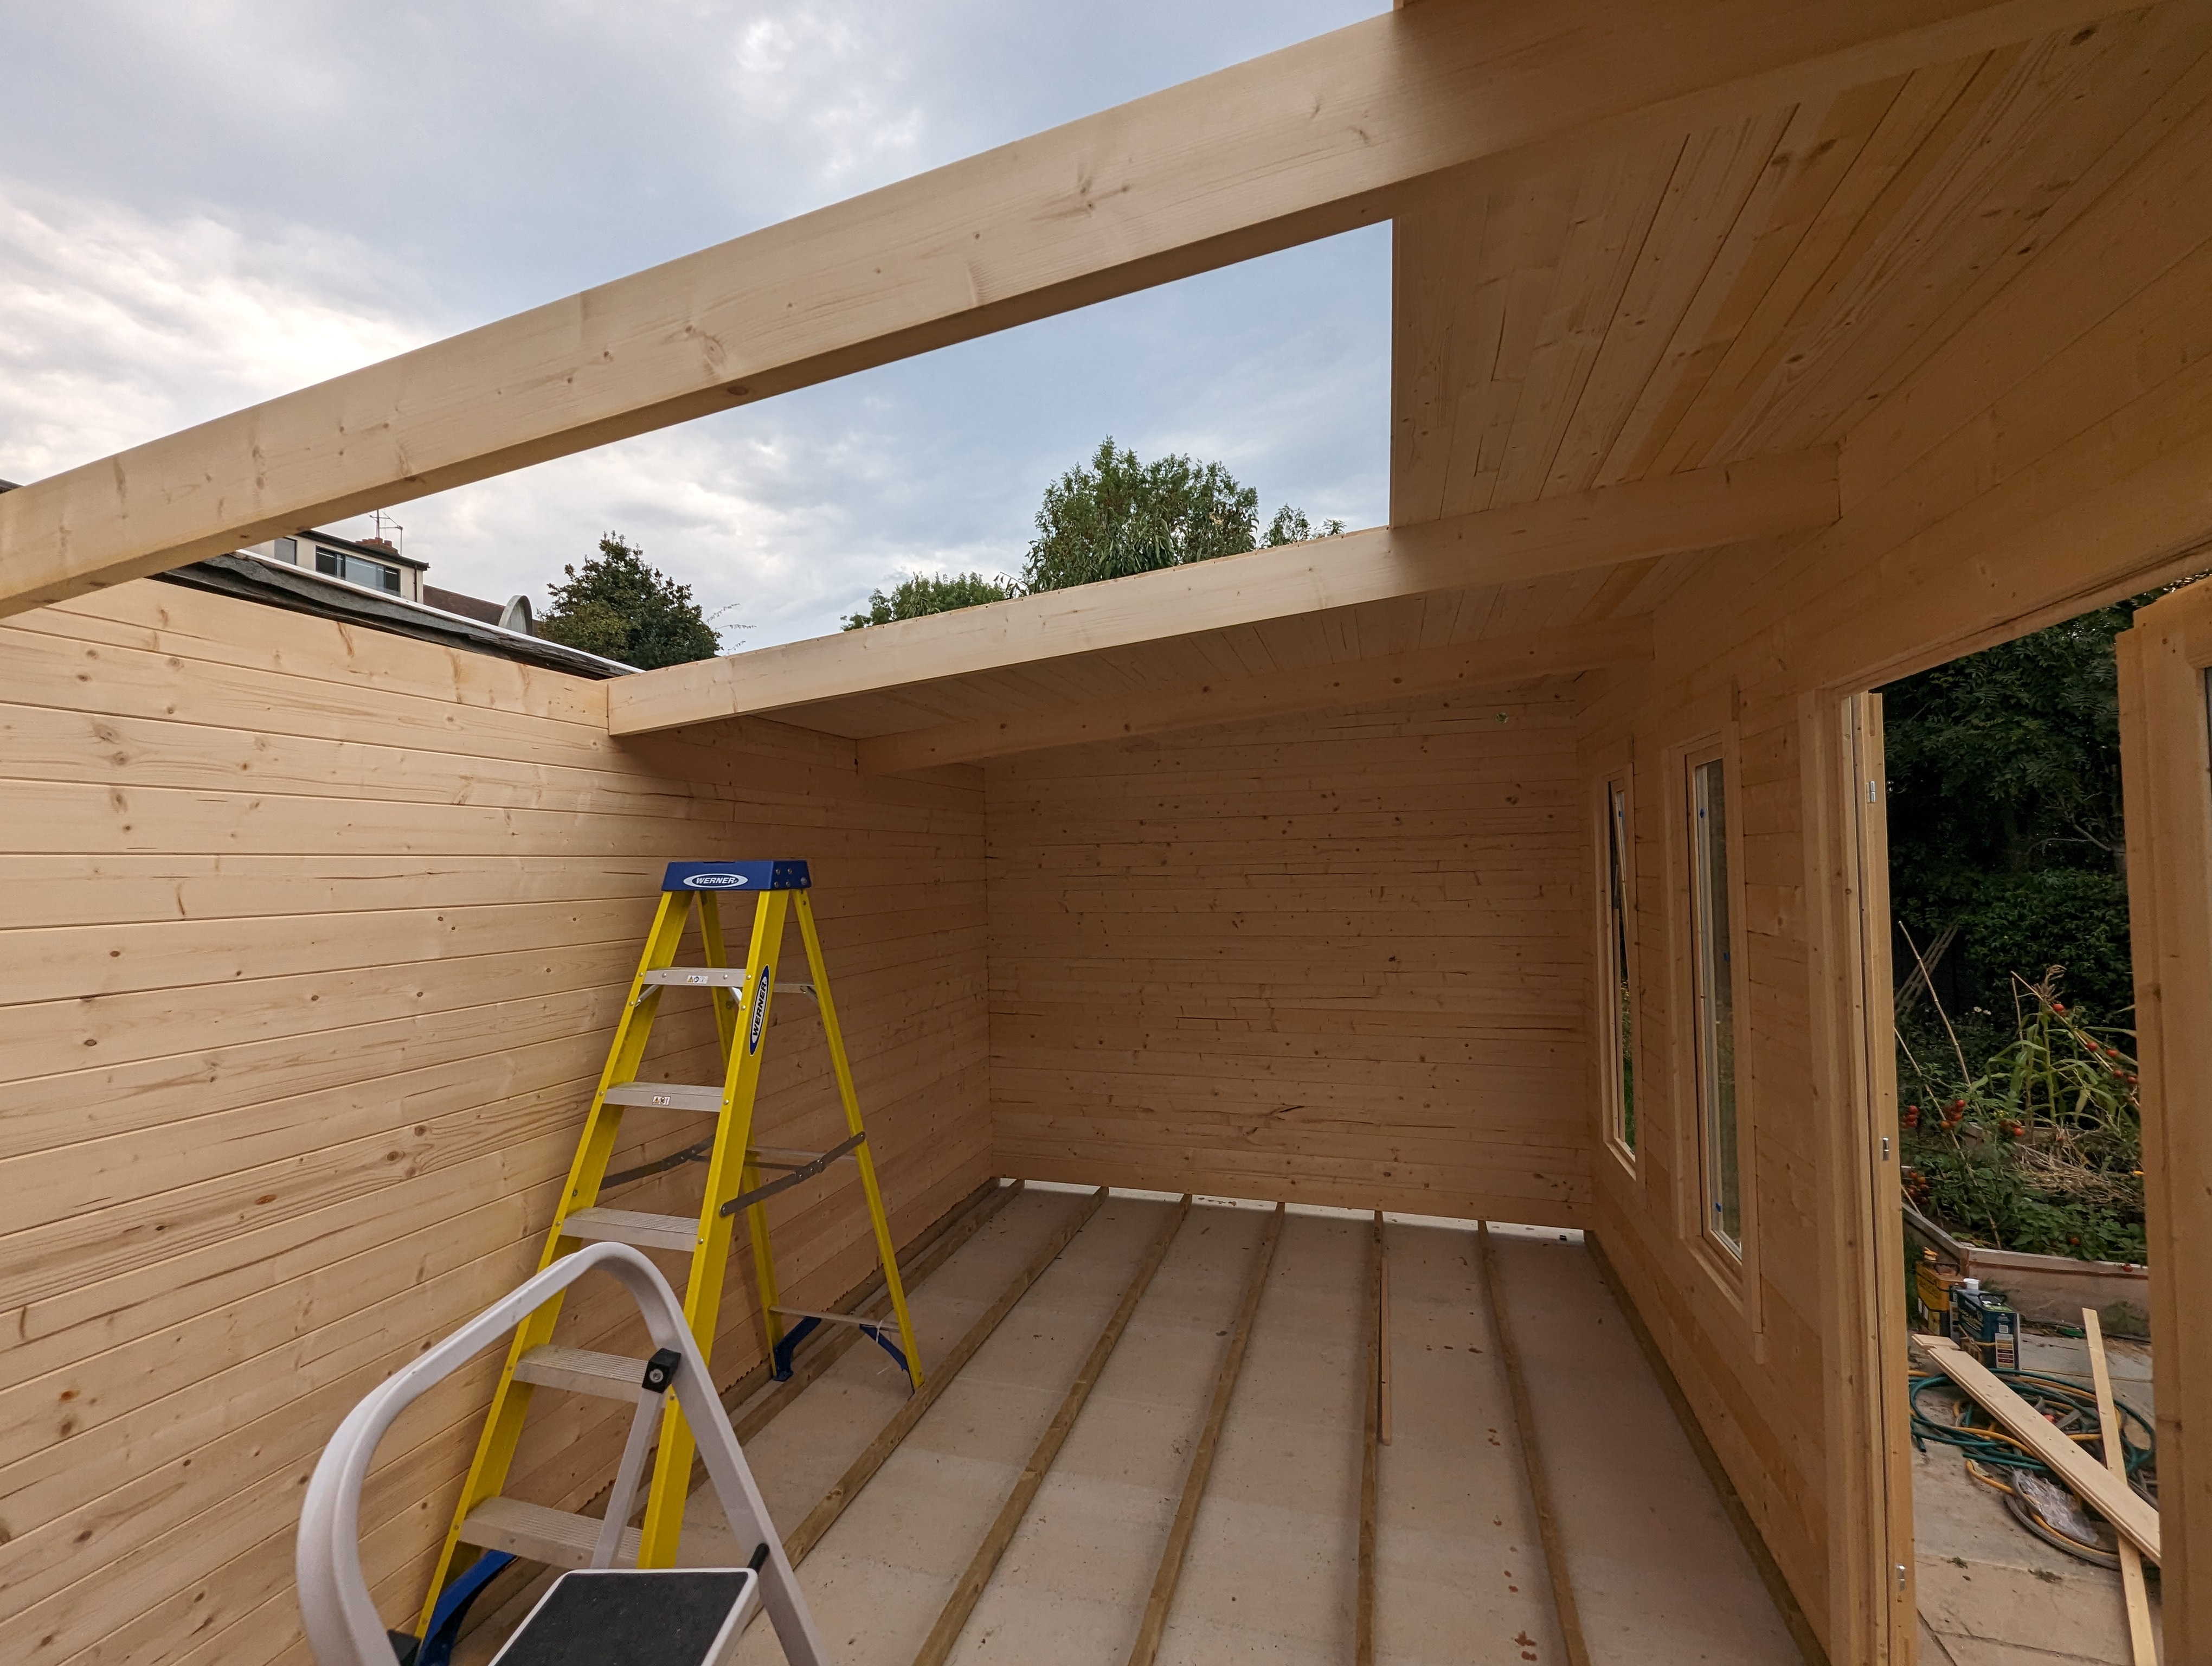
The build process itself is fairly straight forward with two people. Most of the build happened over a weekend, though we did need a bit more time to finish it up. The instructions say it should take two people two days… I guess that’s possible if it’s your 5th build! If you are planning on building one I would recommend budgeting more time than that. Reading the instruction front to back to understand the whole process first is very helpful, as well as arranging the bits so that they are stacked in reverse order of when they are needed. That makes the build process much more pleasant as you won’t have to be digging for every piece.
Otherwise it’s really just hard labour lifting every piece and hammering them in. Some pieces will be a bit warped (to be expected as it’s a natural material) and require some creativity and cursing to install, but otherwise it’s really just like IKEA assembly. For the really warped pieces we wetted them a bit and clamped them overnight with some straight pieces. Old woodworking trick.

First an elevated base to allow airflow underneath.
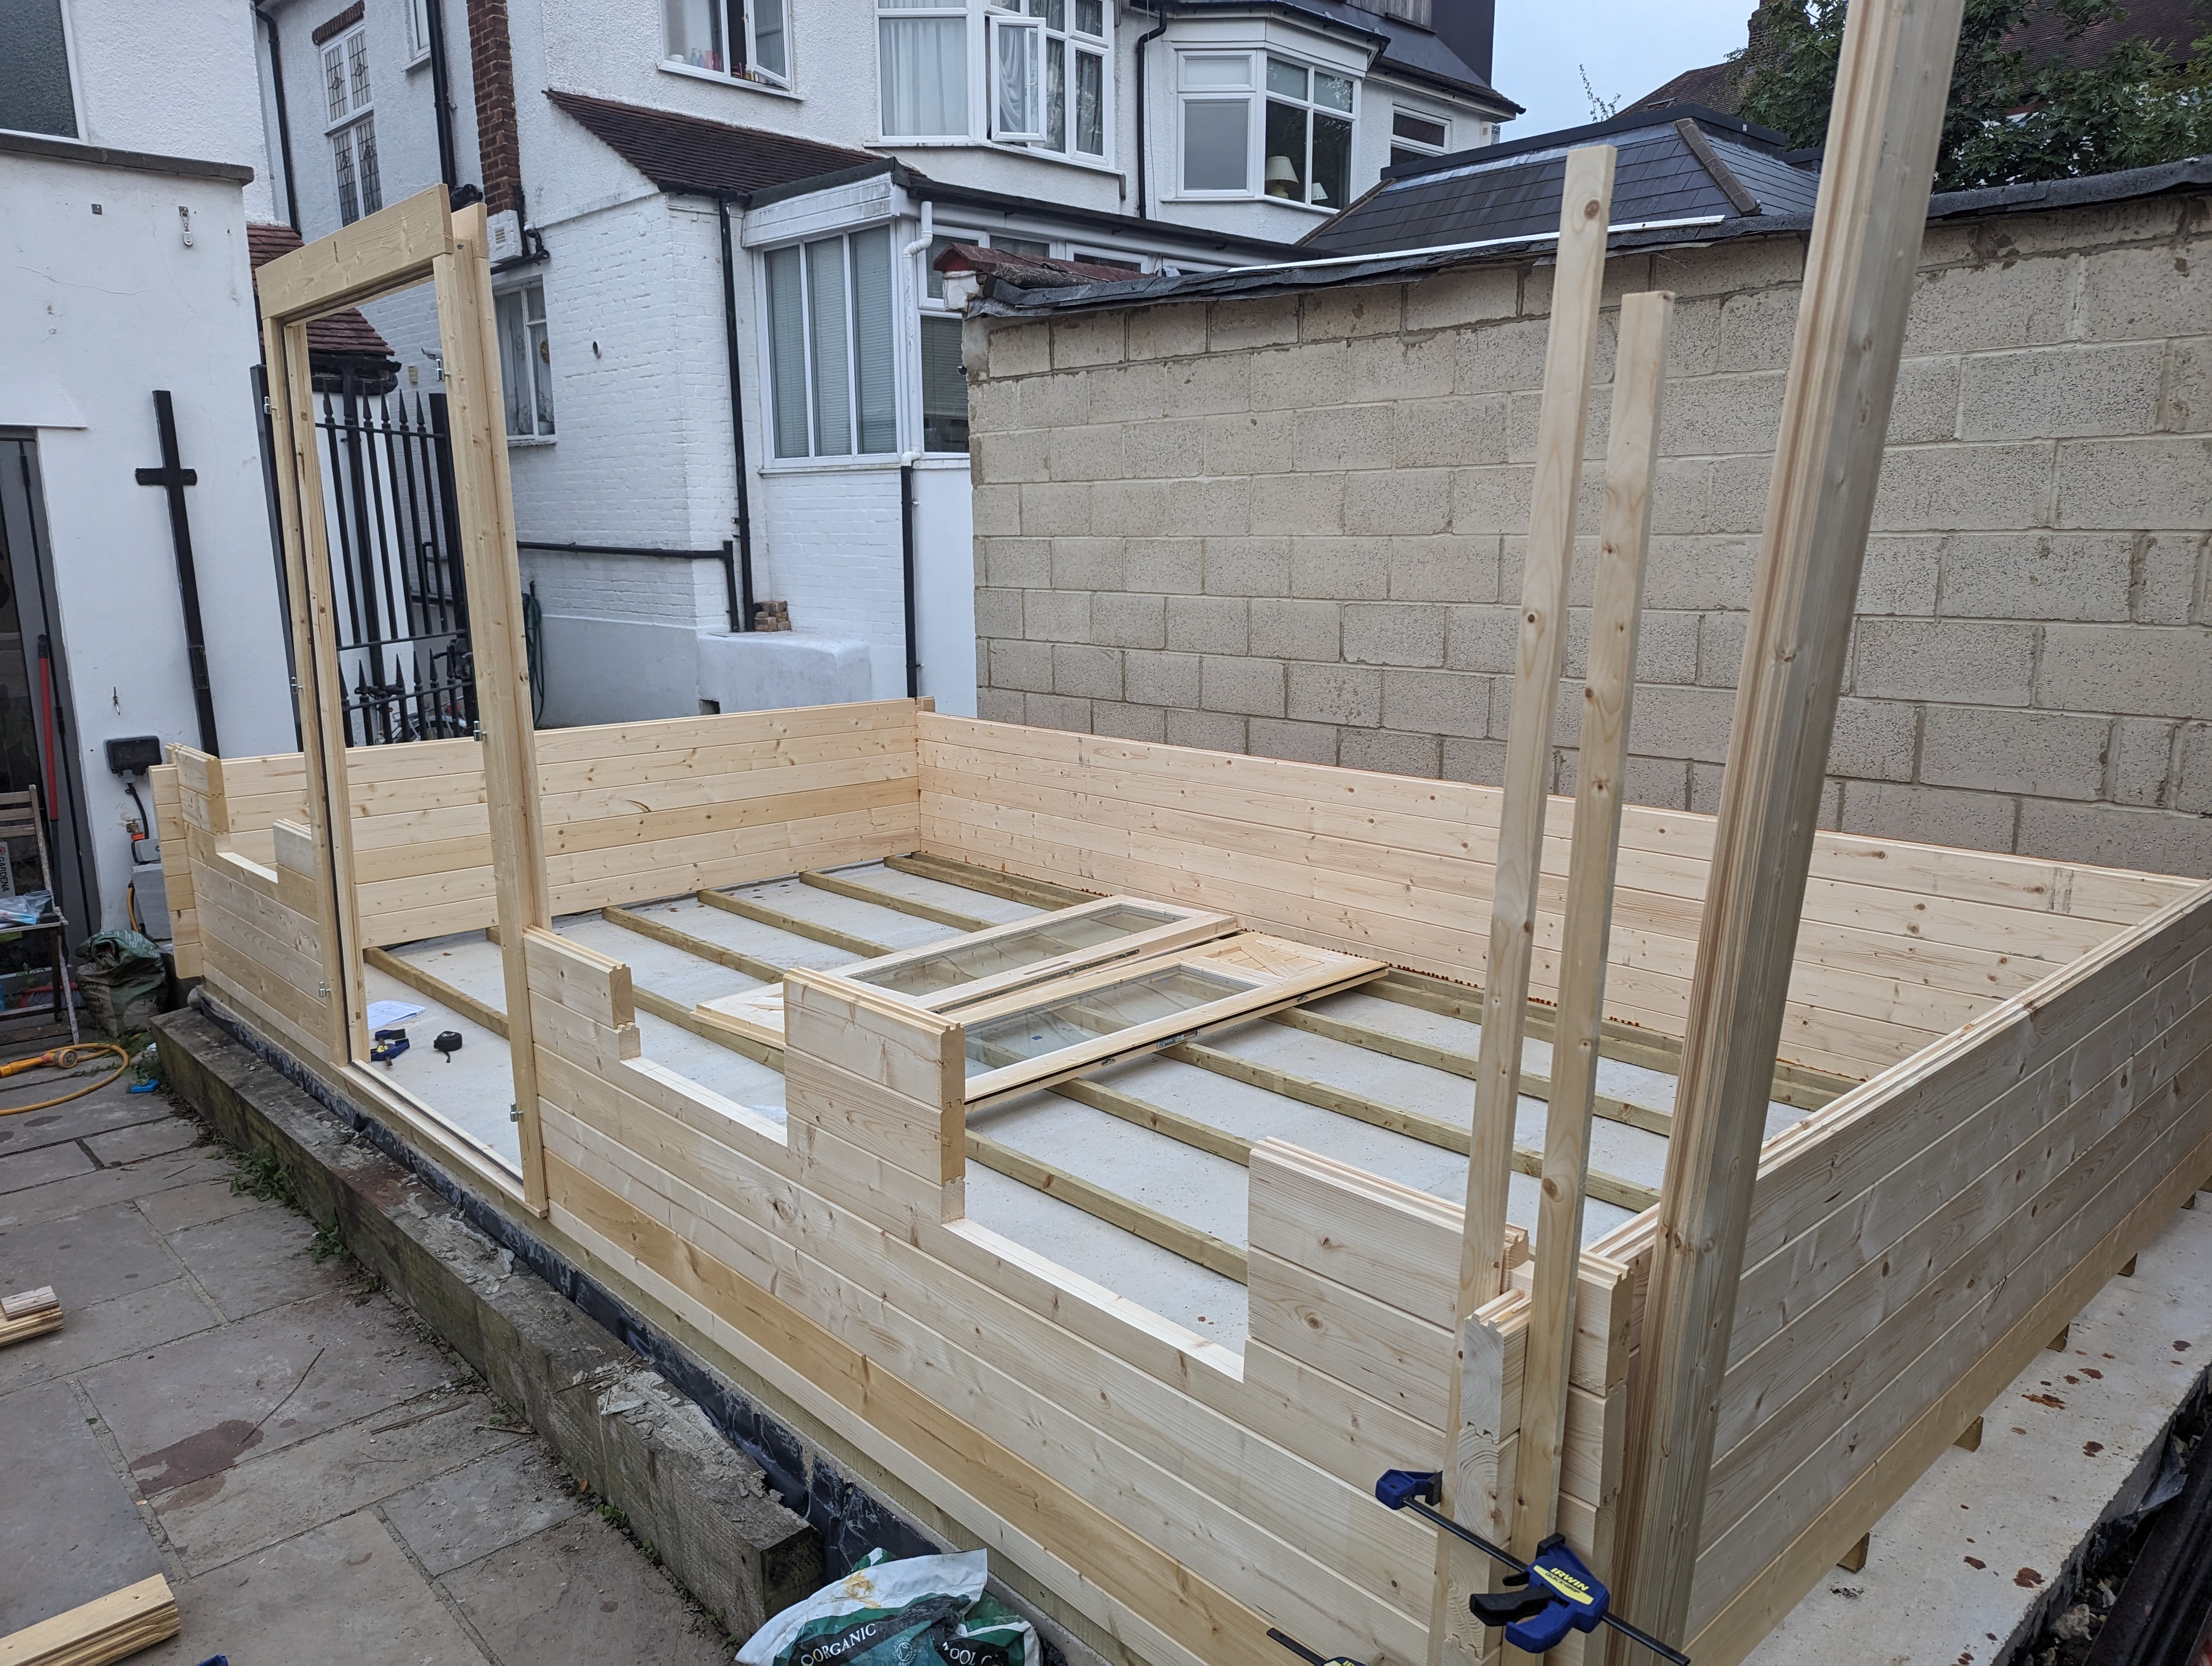
Building up the walls.
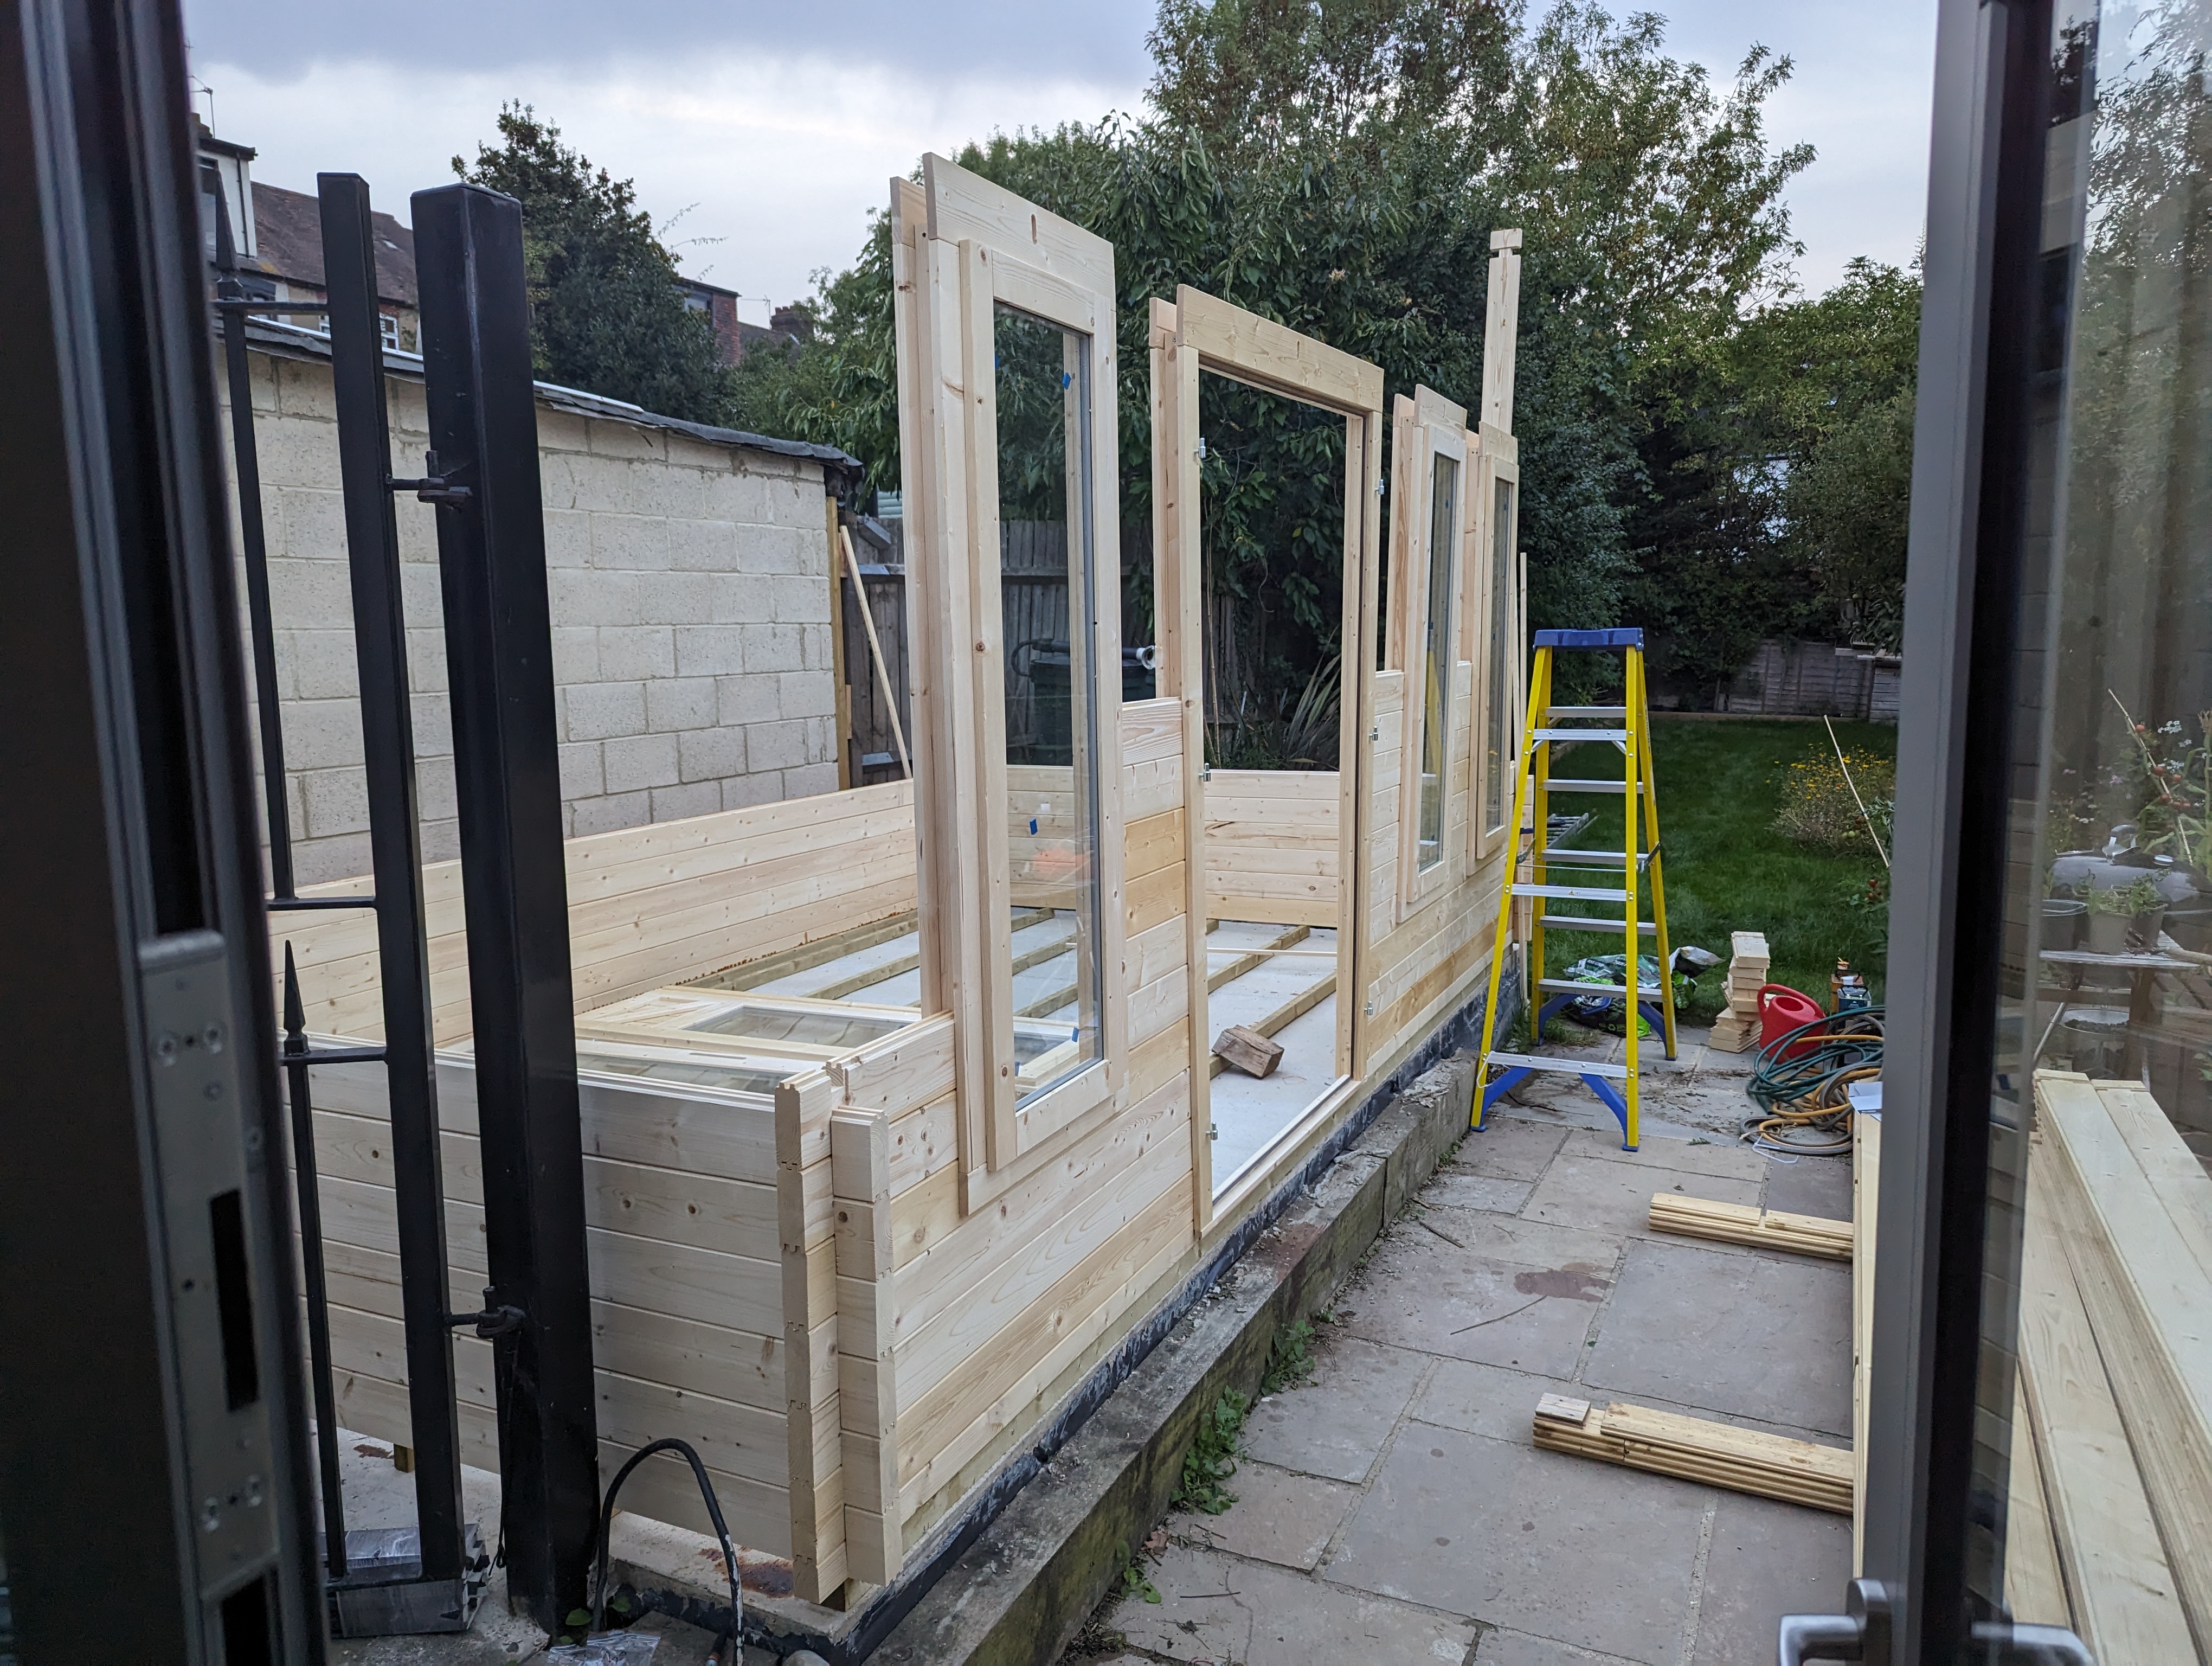
Slotting the window and door frames in.
The only slightly tricky bit is the roof, and only because we had to climb on it.
Nailing the roof boards.
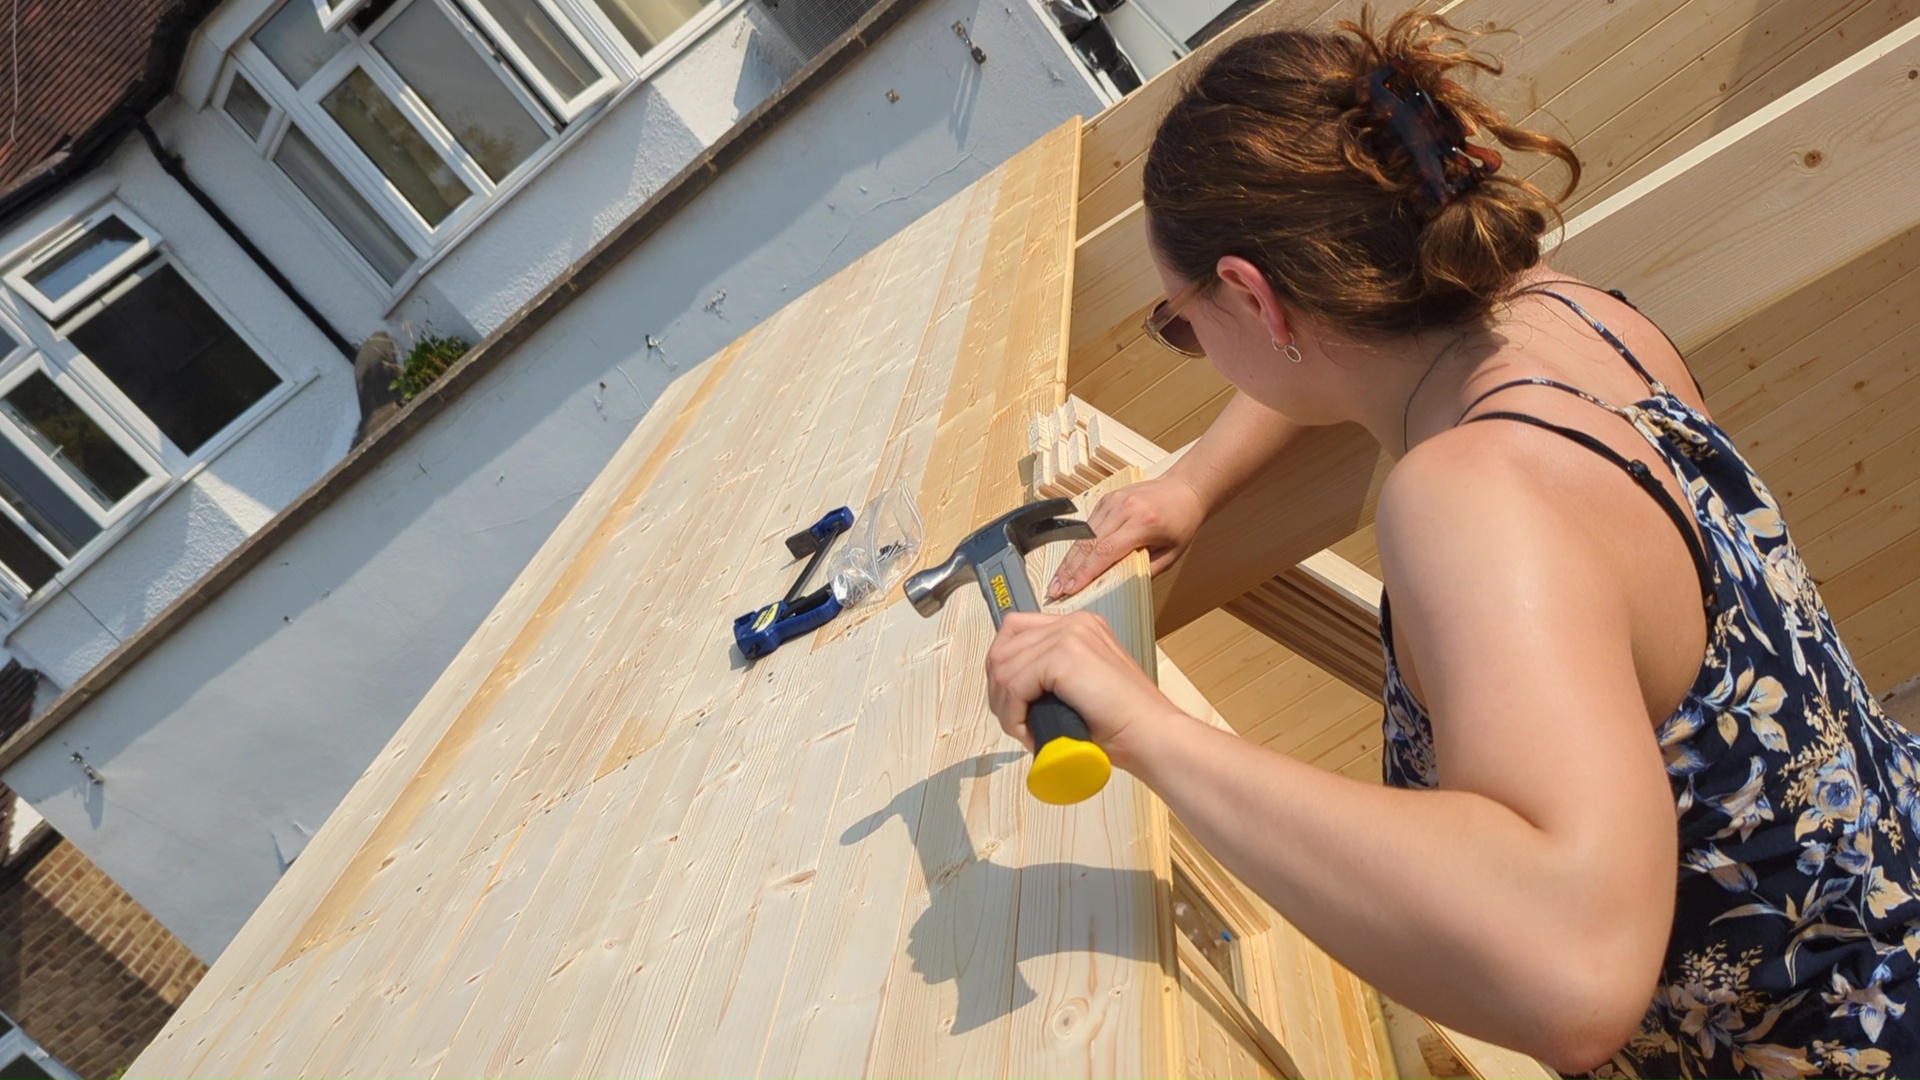
Slightly precarious.
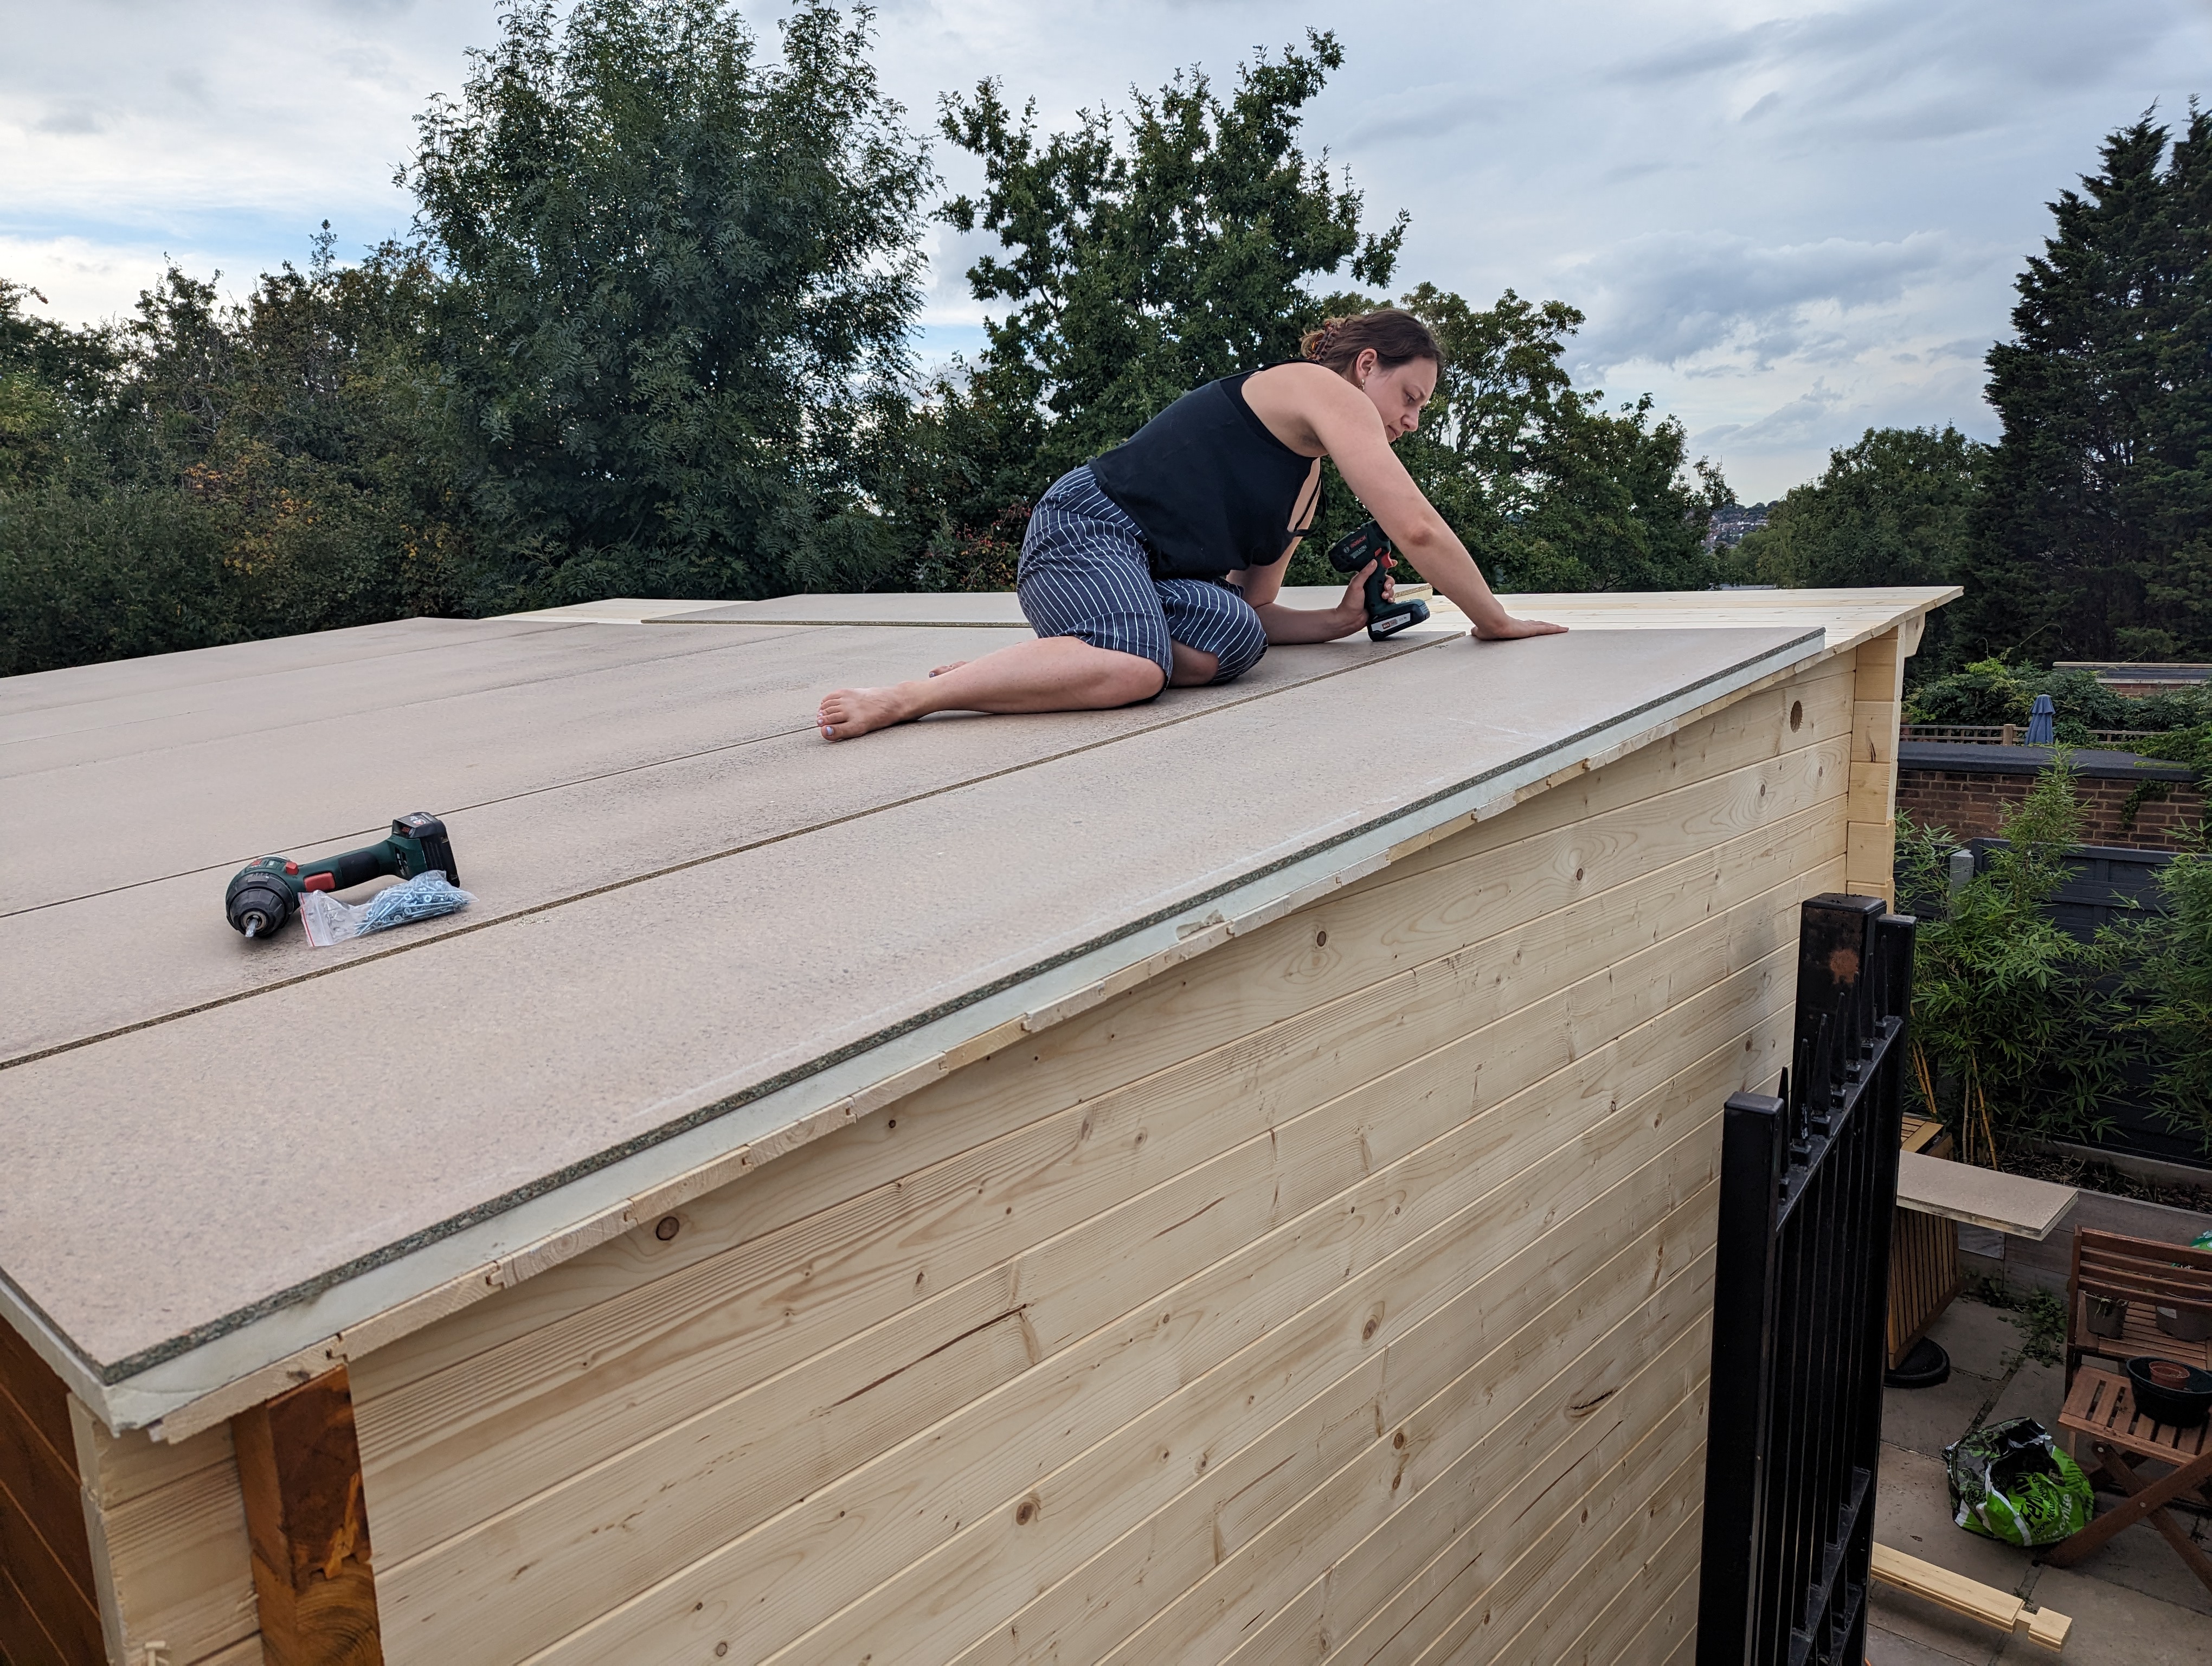
Insulation boards.
We then needed some kind of roof covering. Felt is the standard option, and the cabin company could have supplied that, but we ended up going with a EPDM rubber roof that’s more durable and also easier to seal against, which is important because we are also doing a DIY solar panel install, and that require putting quite a few holes through the roof. Unfortunately we didn’t glue it down very evenly, so water pools a bit on the low side. Oops! Hopefully that doesn’t cause a problem.
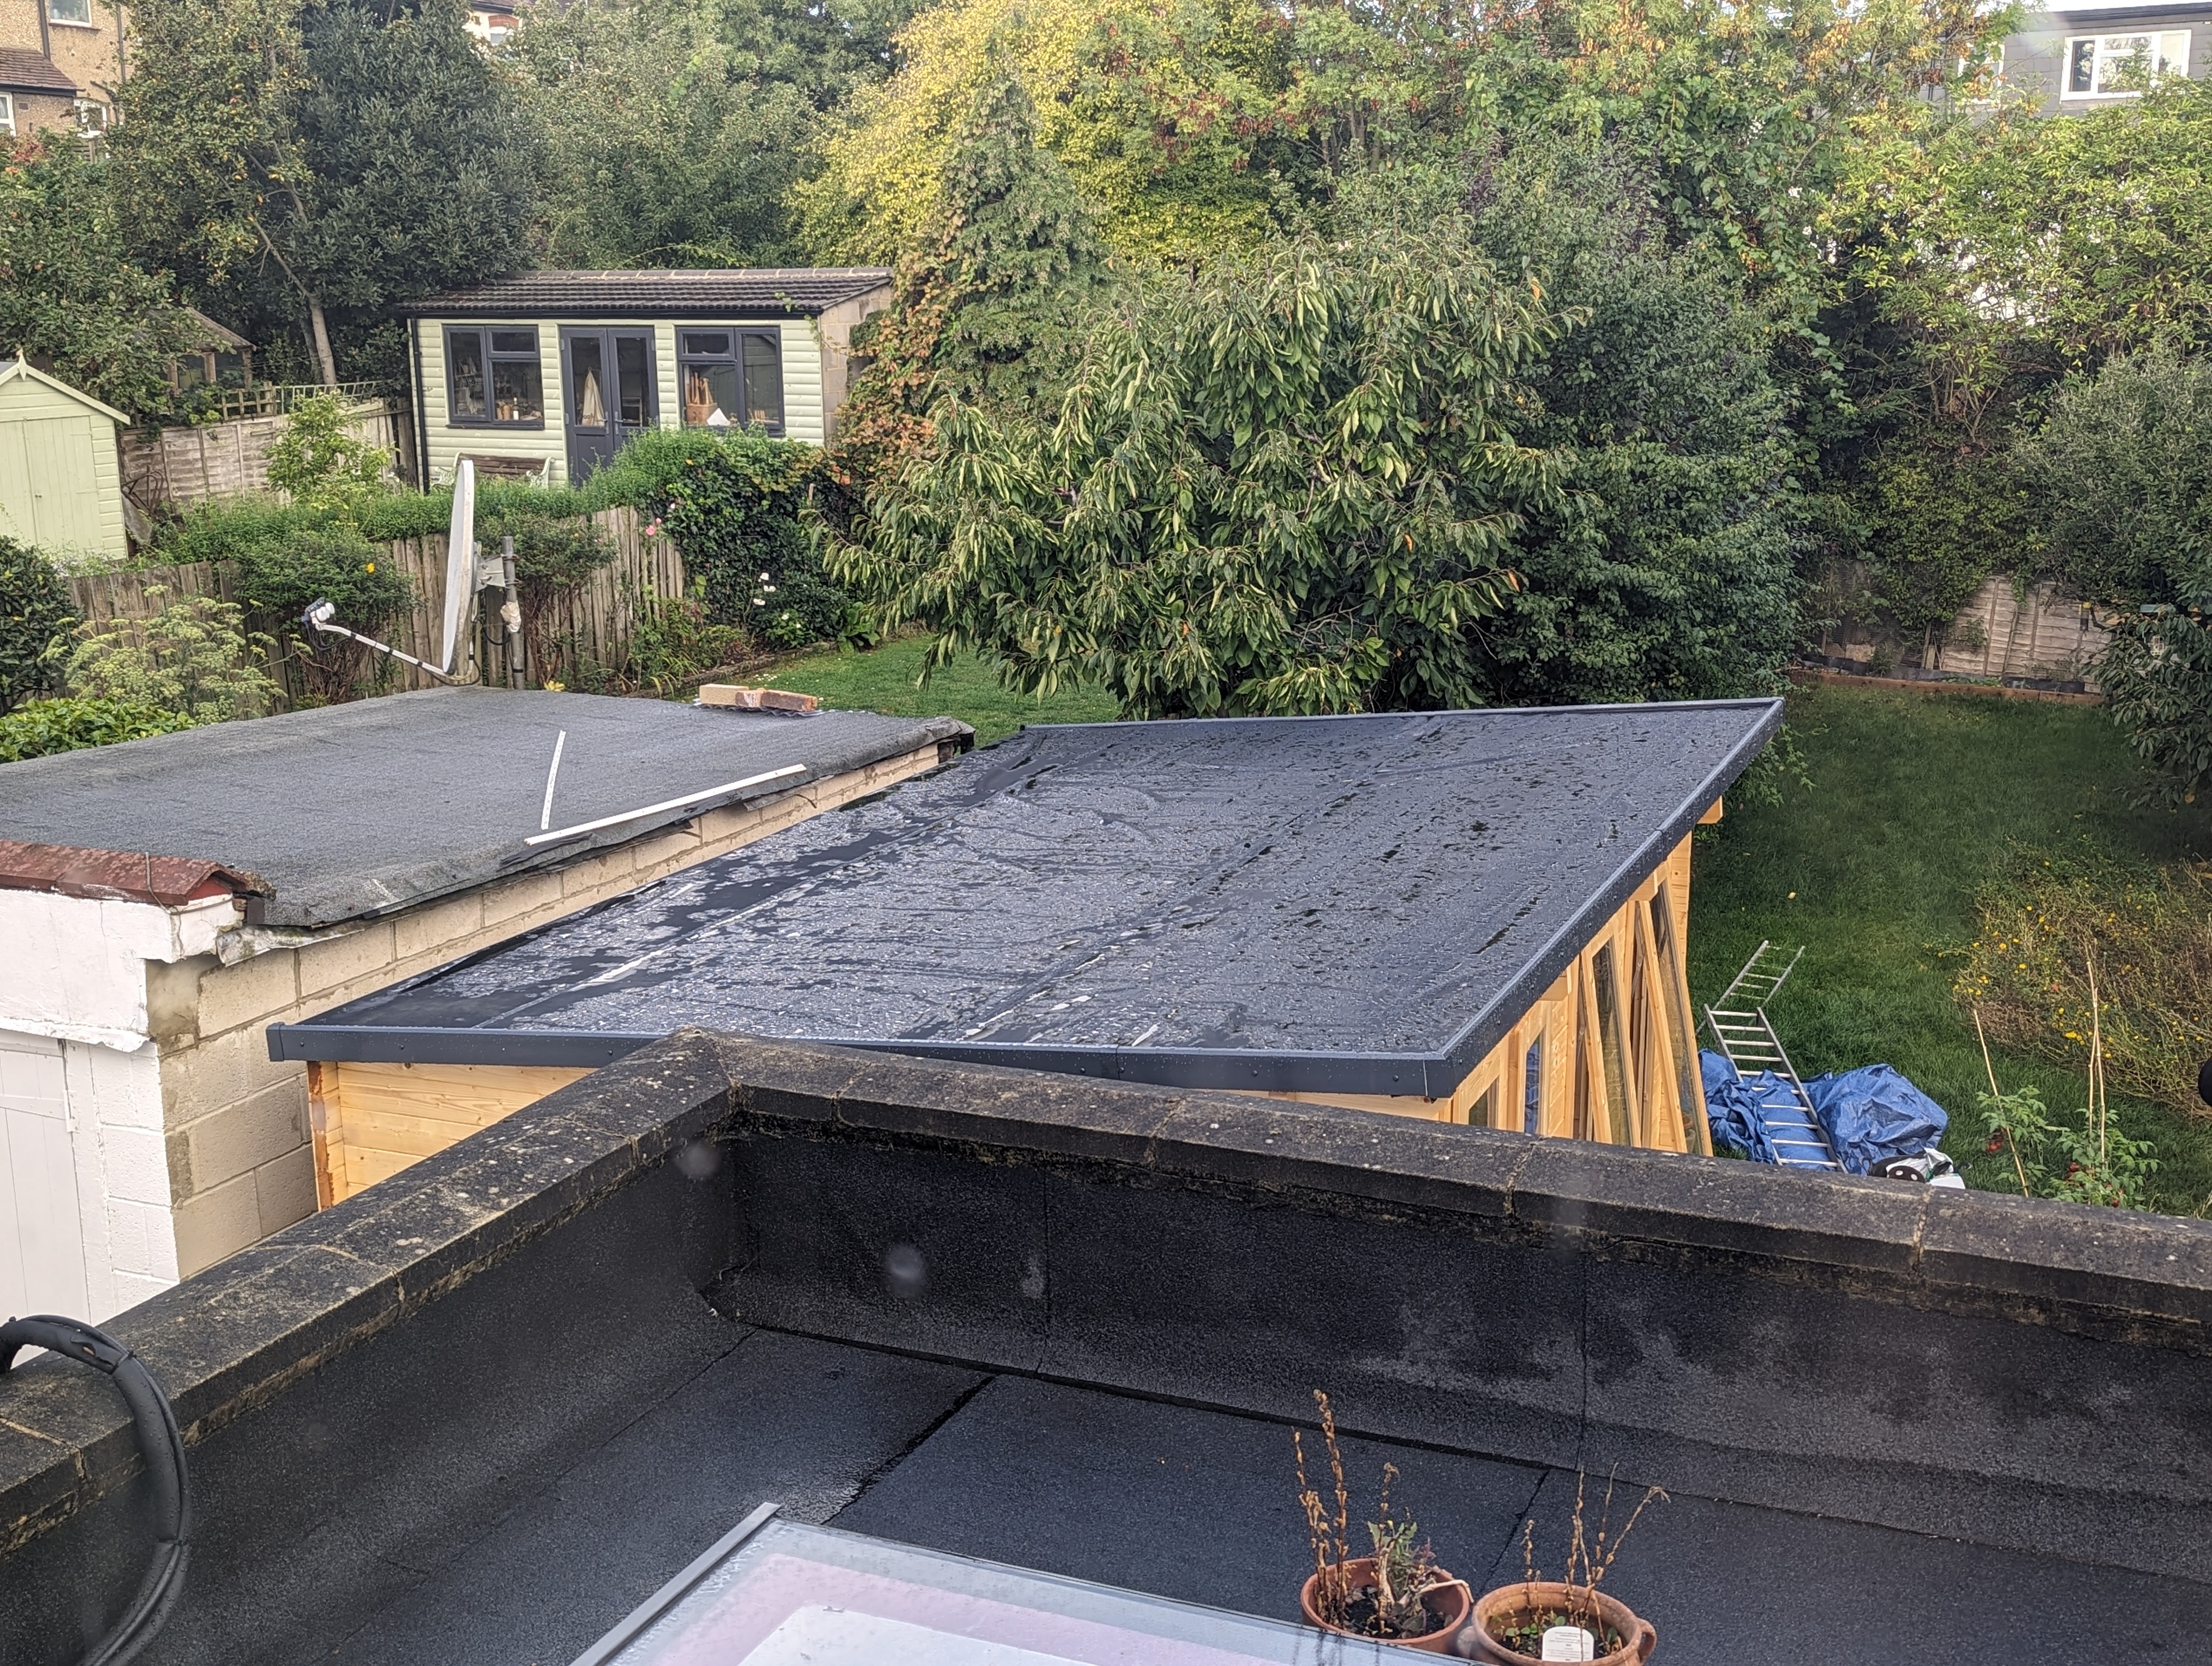
Rubber roof.
The last thing to go in is the floor insulation (suspended with clips to allow airflow underneath) and the floor boards. We used a nail gun here to speed things up and to save our arms from further punishment after having to hammer all the roof boards in. Roof boards need longer and stronger nails because they need to stop the roof flying off in strong wind - floor boards are only nailed (with expansion gaps) to stop them moving around too much, so brad nails with the nail gun are good enough for the floor, but not the roof.
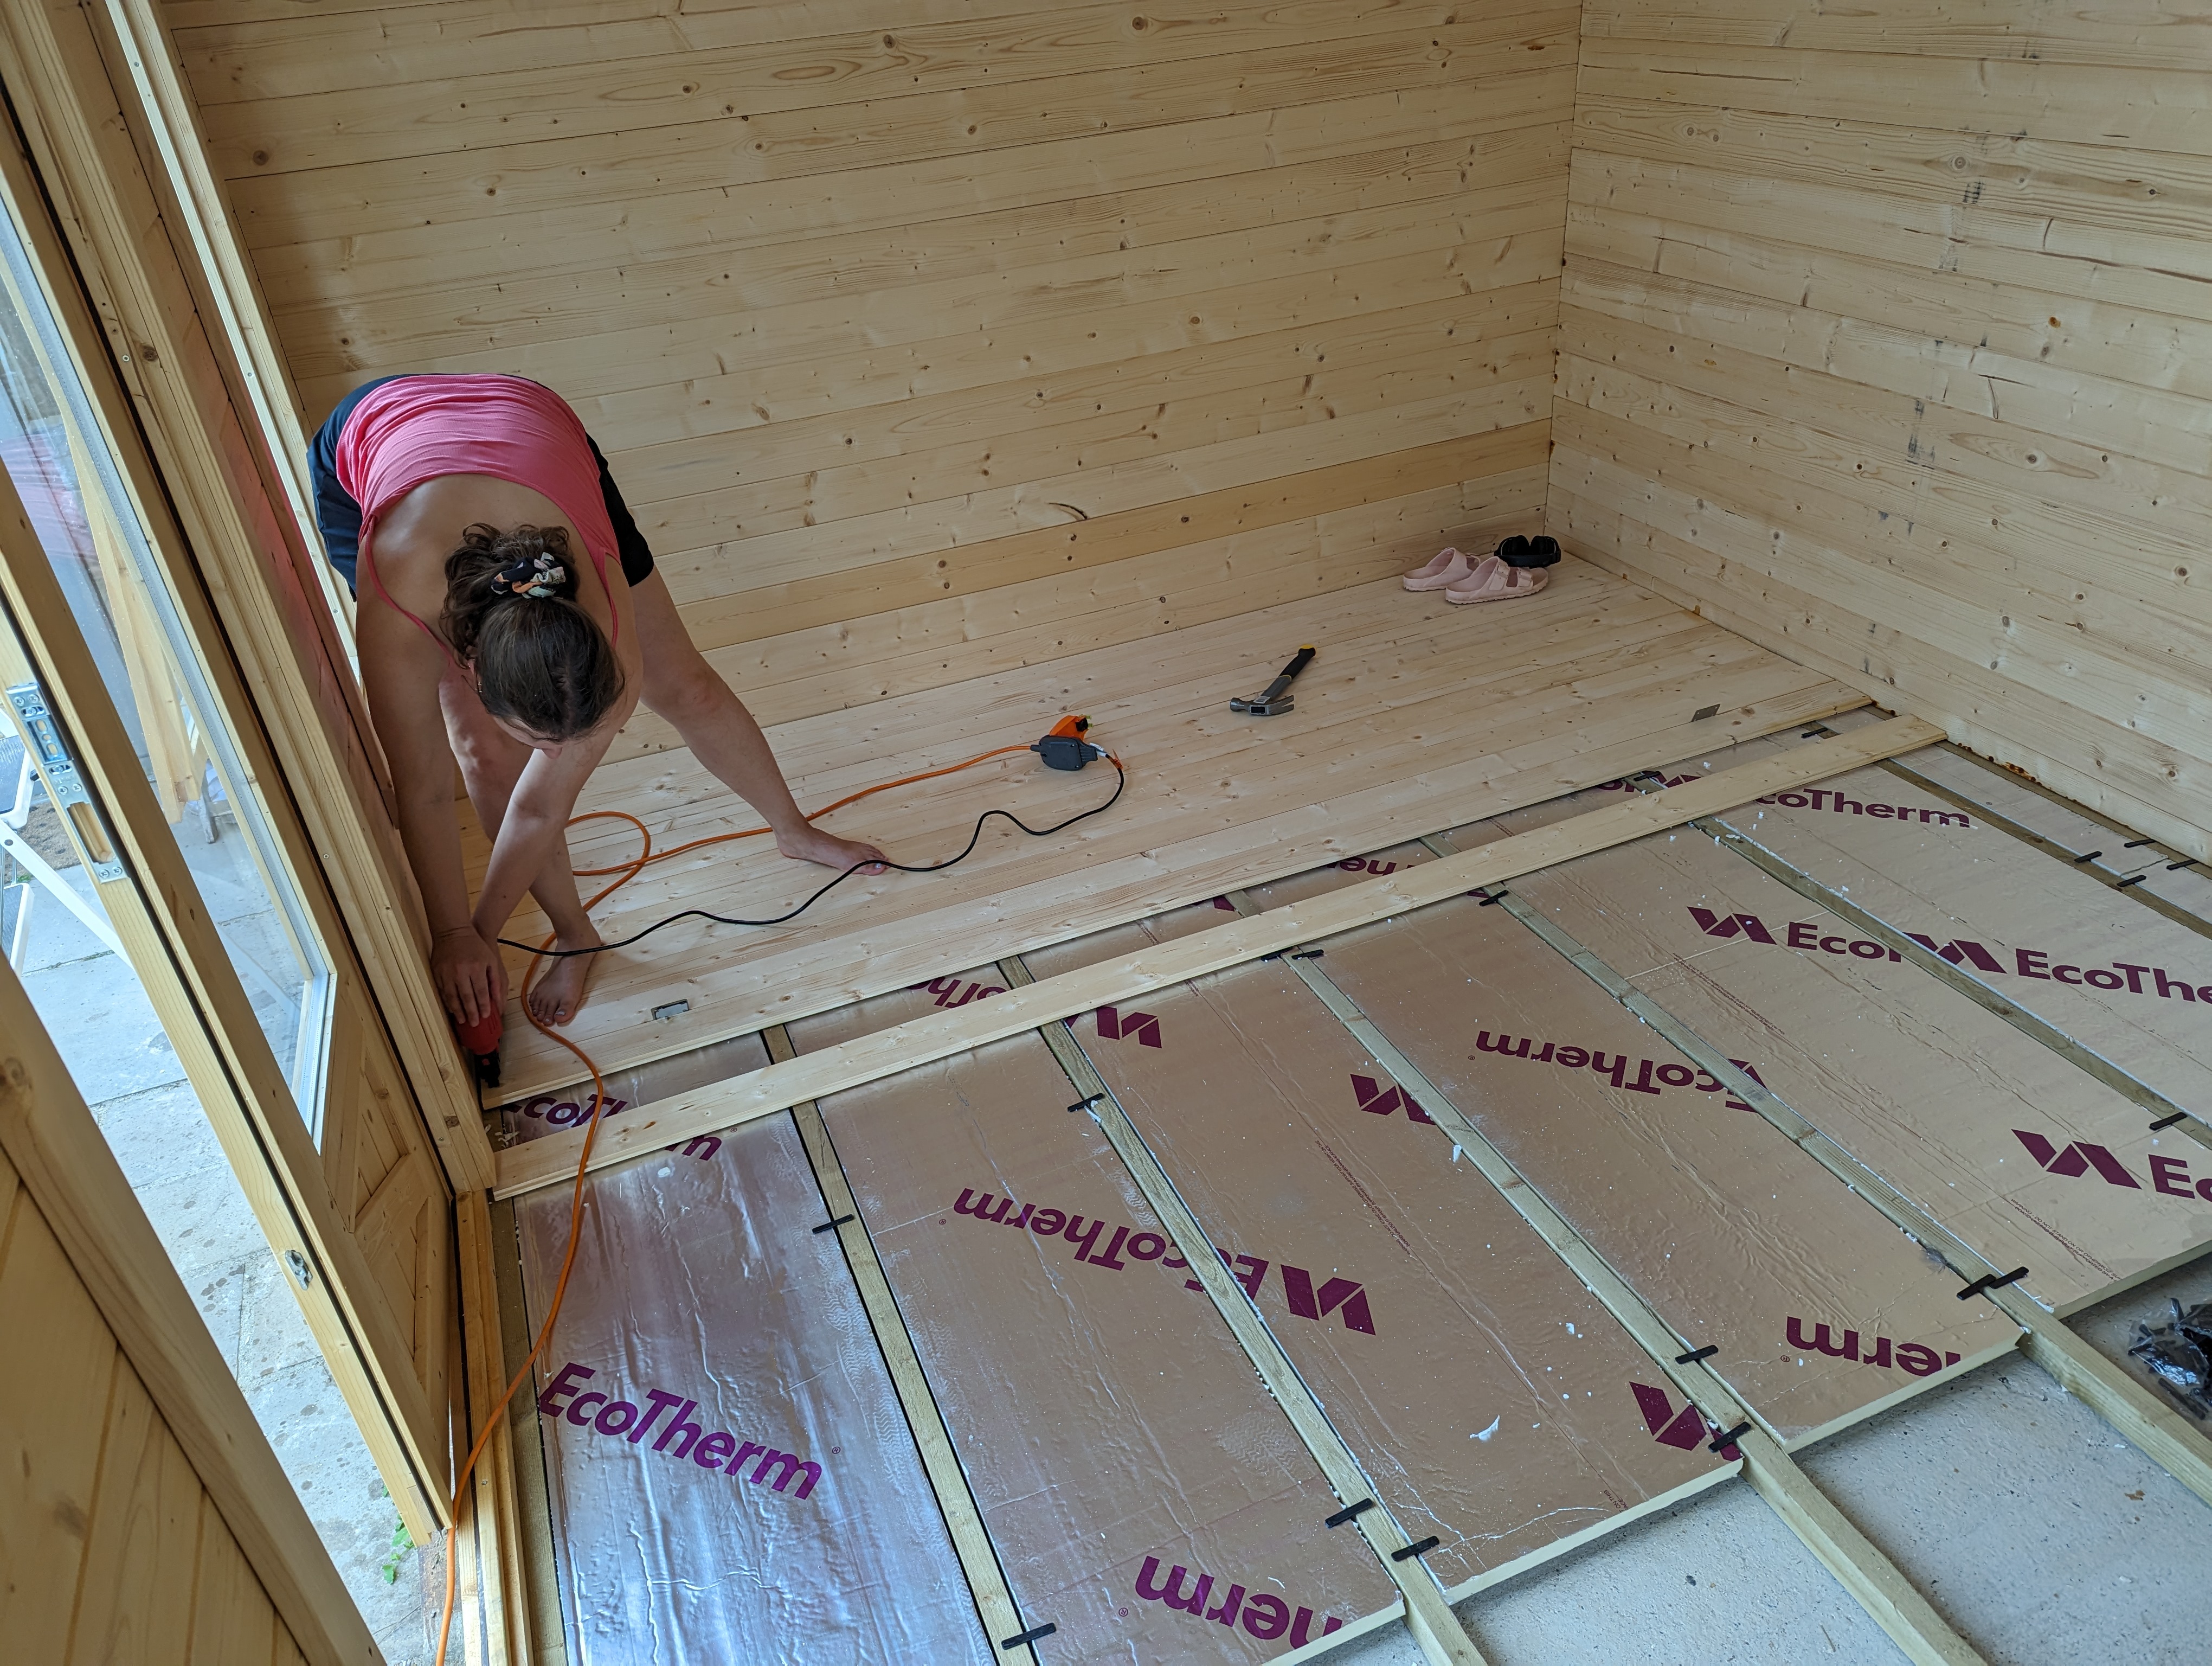
Floor insulation + boards.
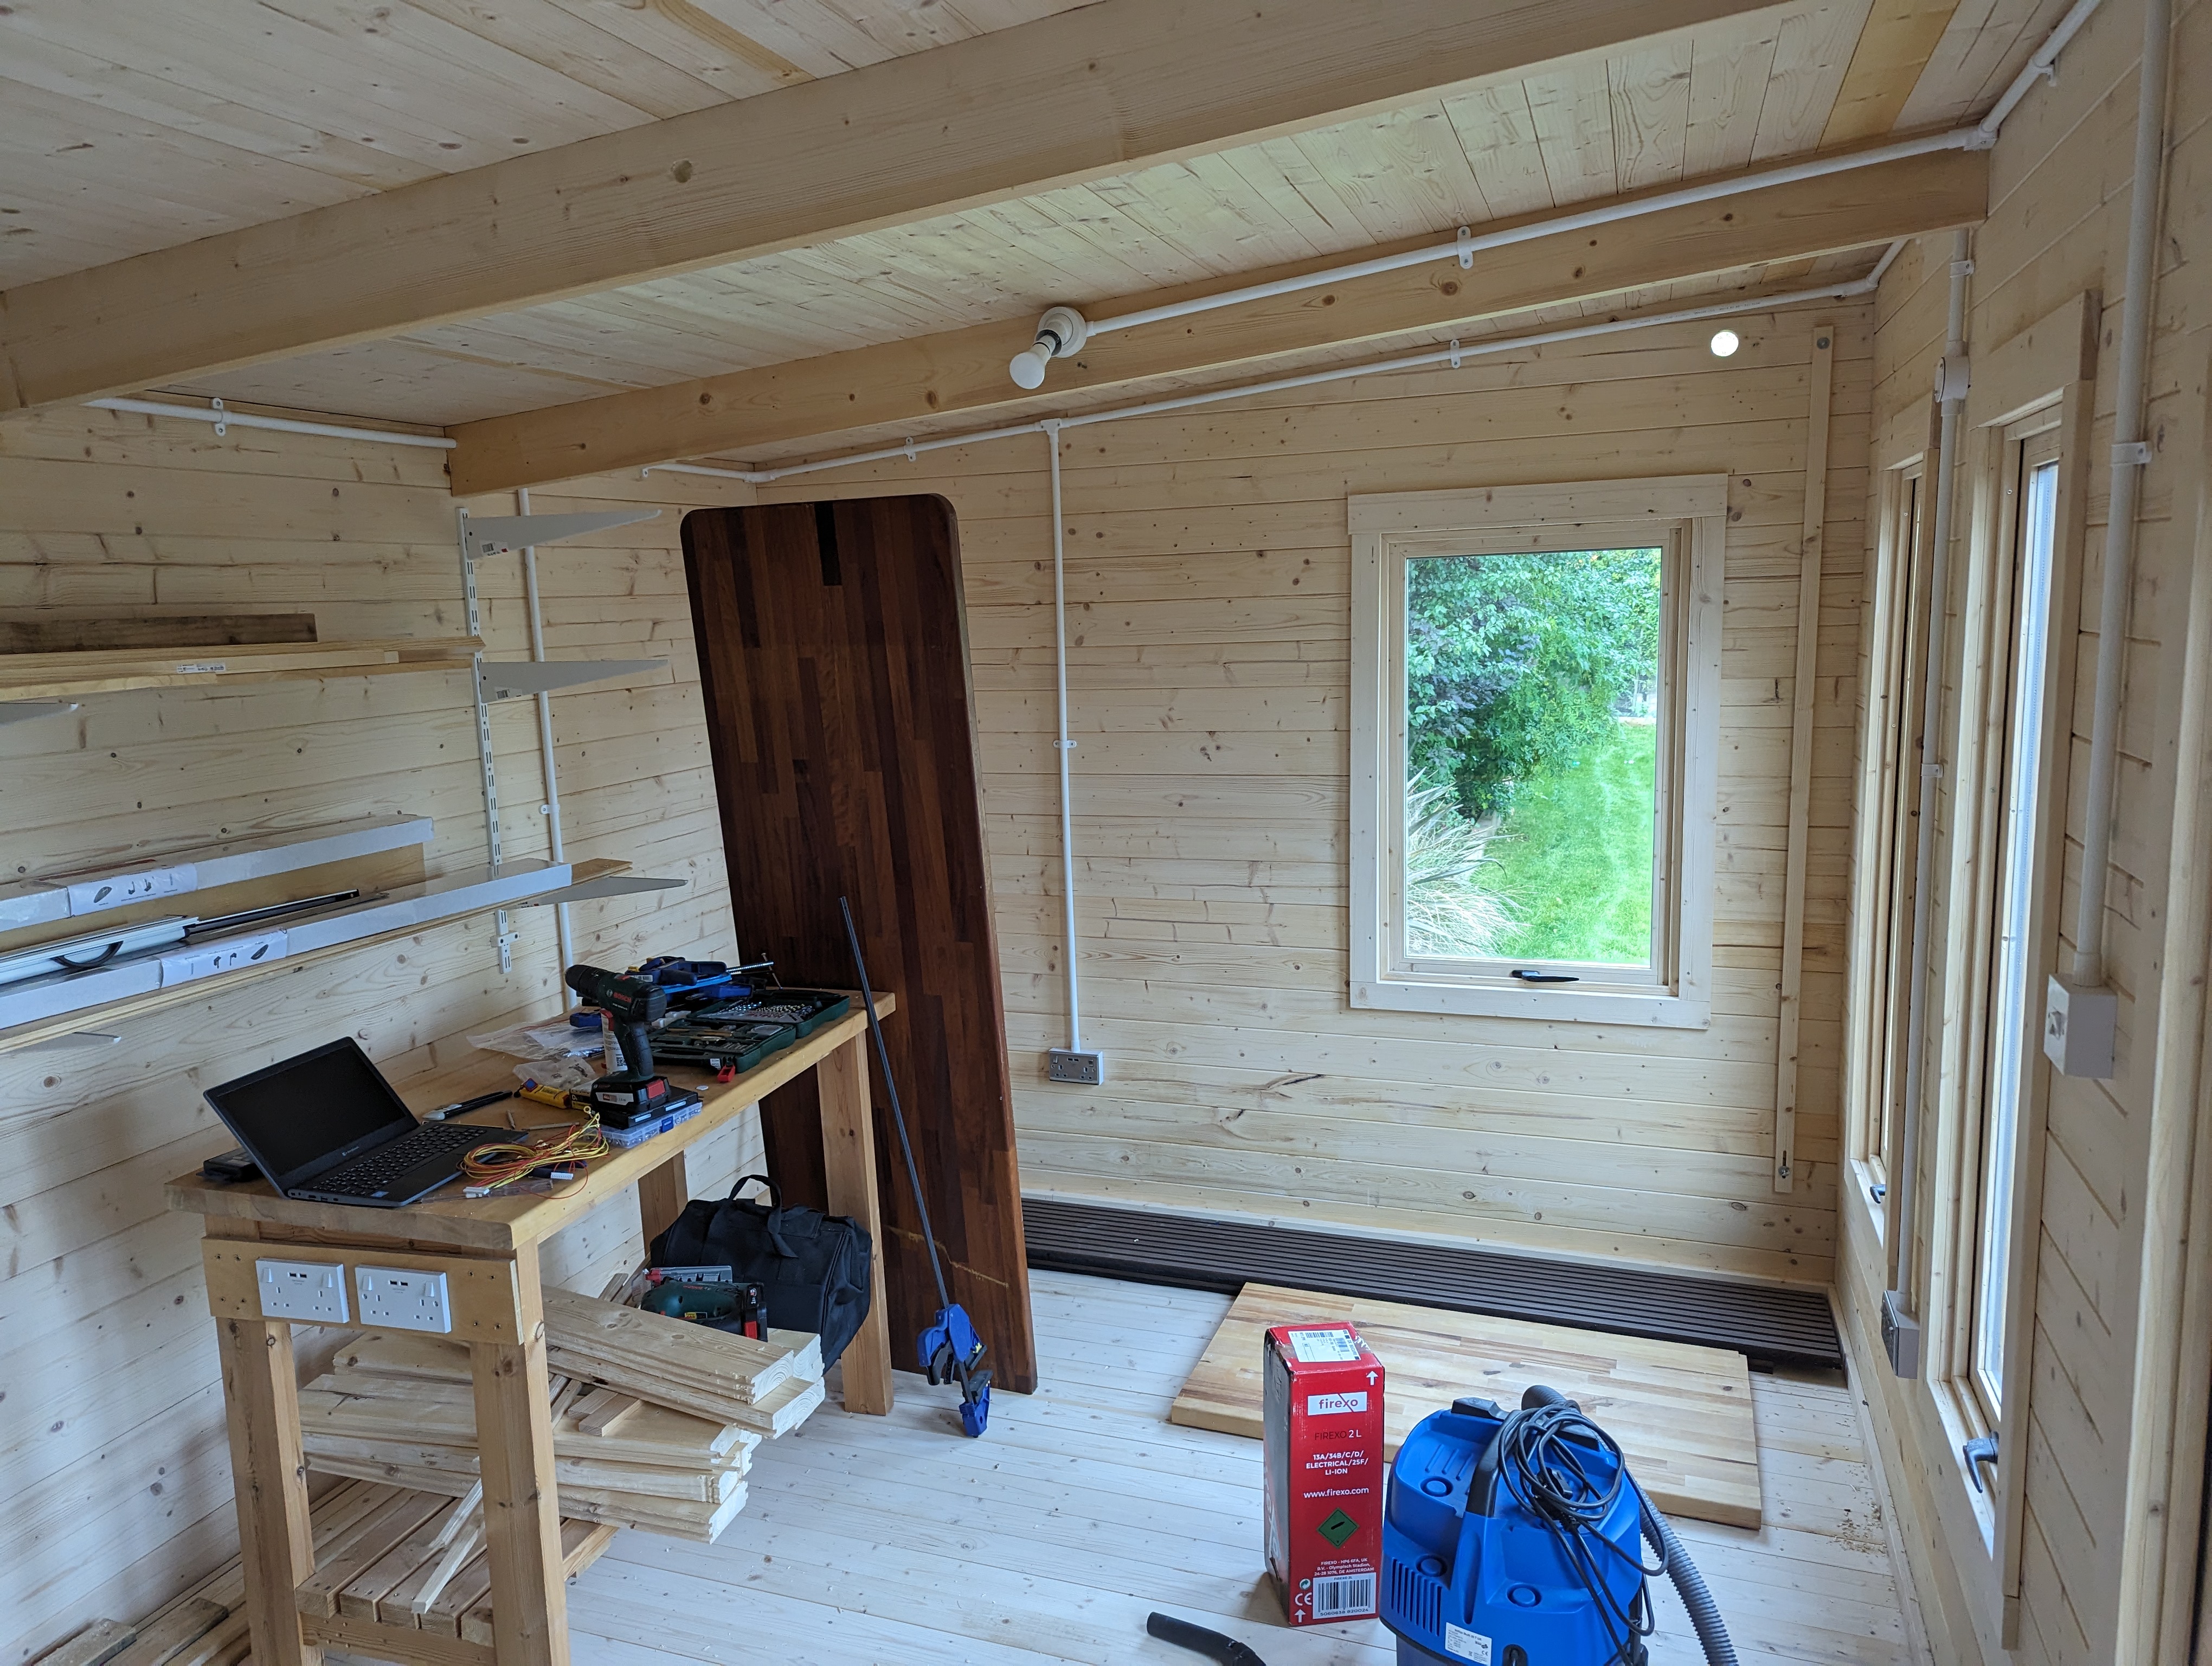
All done!
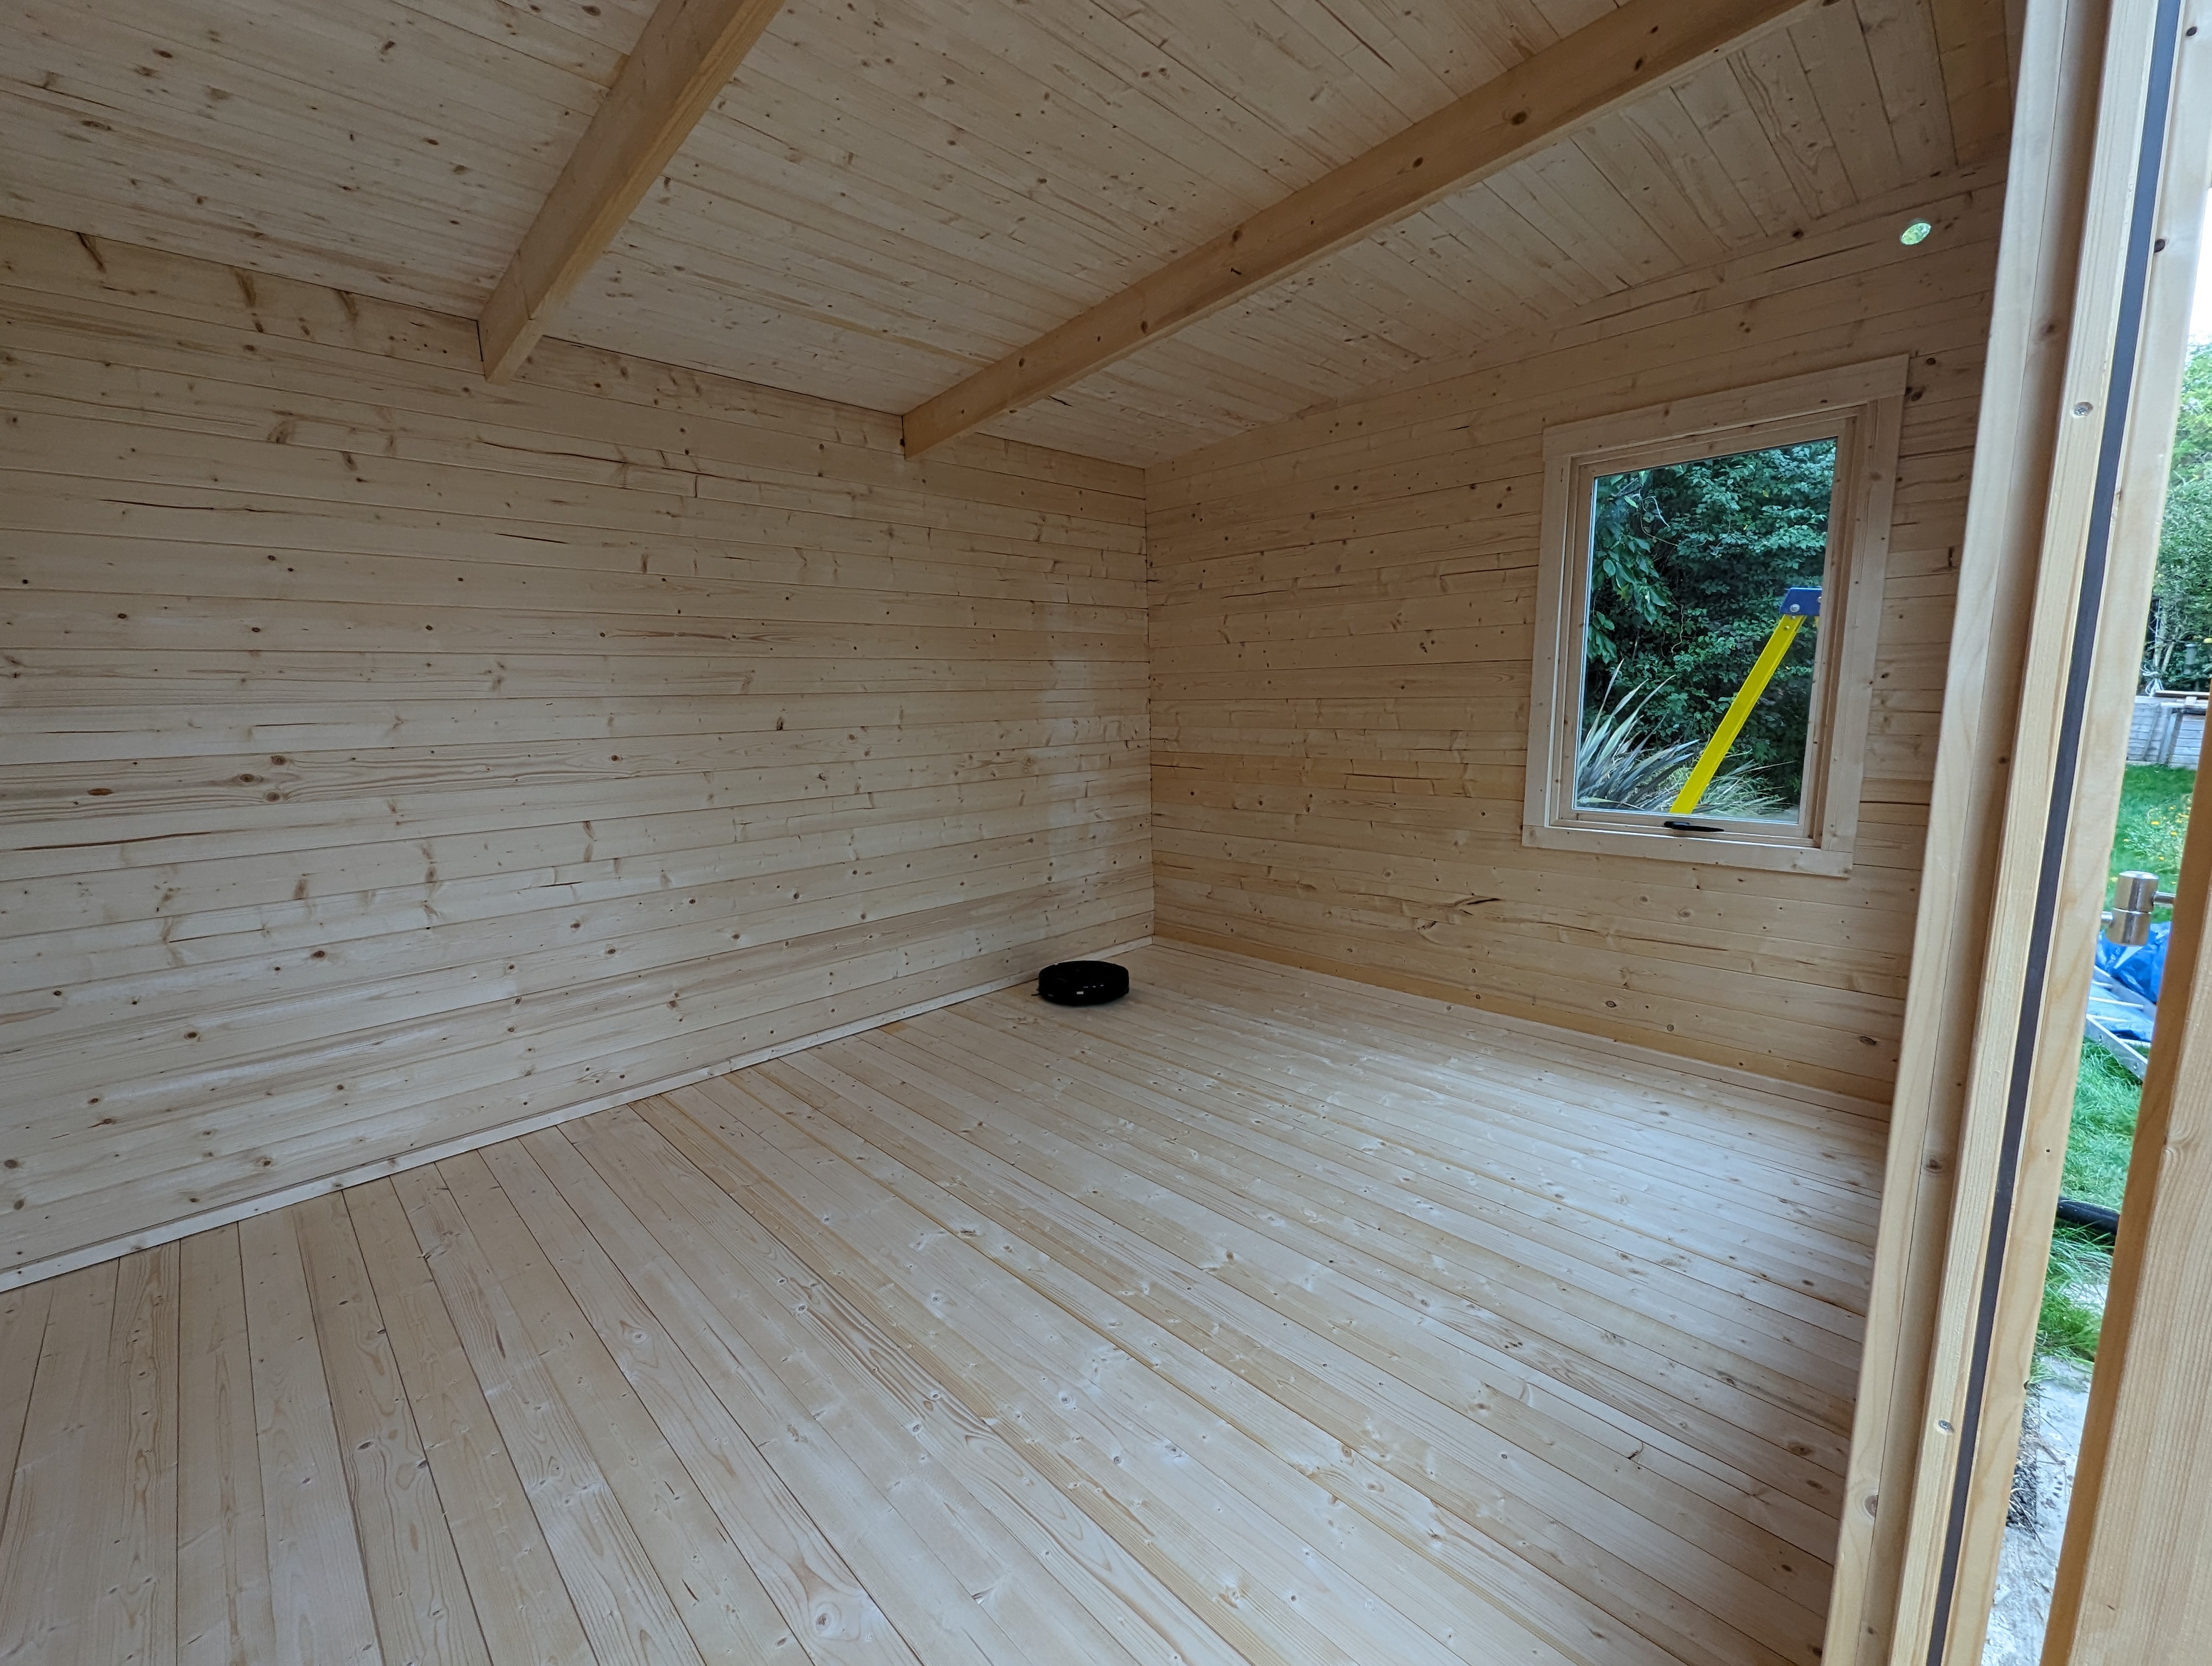
Inside.
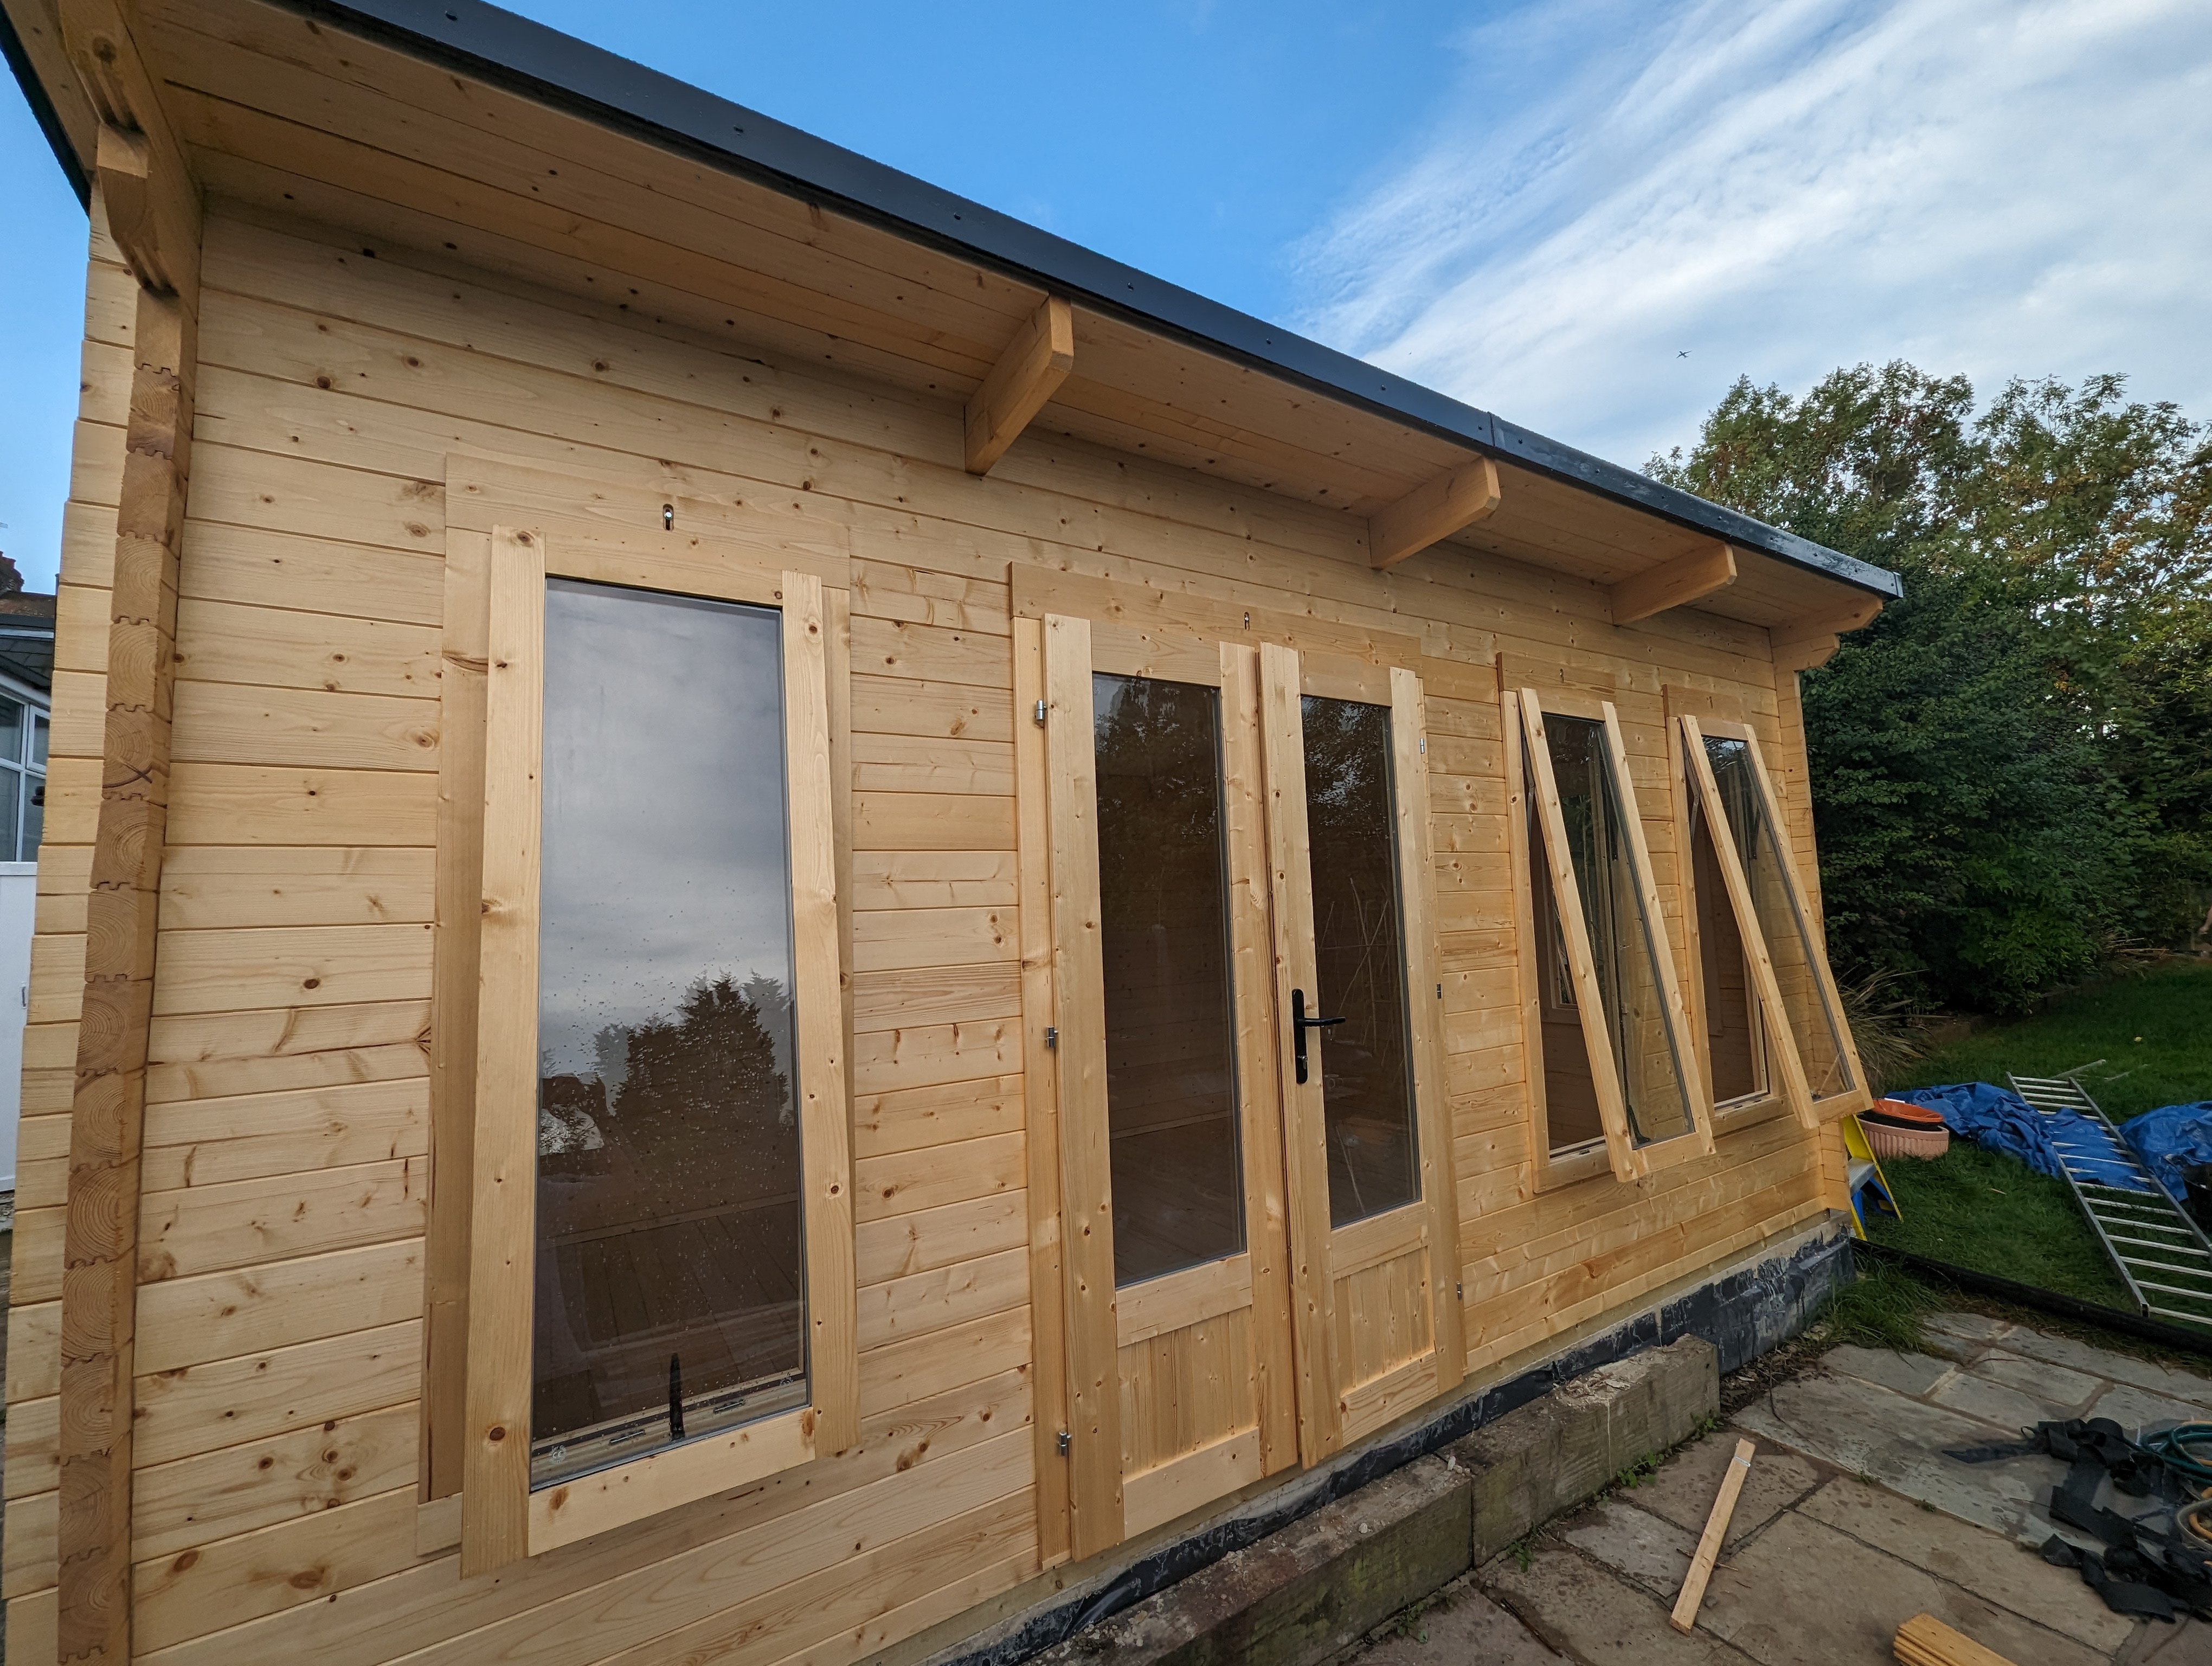
Outside.
We treated all the exposed surfaces inside and outside over the next few days, and it was ready for electrics. The old garage was supplied from the main house consumer unit with a 16A supply, which was plenty for the garage, but not quite enough for what we had planned for this new workshop. Fortunately, they had the foresight to use 6mm2 armoured cable for the run (much bigger cable than they needed), so we were able to change the upstream circuit breaker to 40A, which allows us to have 32A circuits inside the workshop. Why do we need a 40A upstream supply to have 32A circuits, instead of 32A + 32A? Using the same size breakers would theoretically work, but we would lose discrimination. What that means is when that circuit is overloaded, it’s not guaranteed which circuit breaker will trip first, and best practice is to be able to guarantee that the downstream one will trip. With 40A/32A we don’t have full discrimination since those breakers have sensitivity ranges that overlap, but it’s better than using identically rated breakers. In this case since there is no safety consideration, only conveniece (if the upstream trips first, it will kill all circuits in the workshop, and we have to go into the house to reset it), full discrimination is not a regulatory requirement.
In the UK you can do a surprising amount of electrical work yourself without certification (but you still need to be competent and do the work to BS7671 standards). Unfortunately a new consumer unit isn’t one of them, so this is one for the pros. When hiring an electrician to wire up a log cabin it’s very important to stress to them the necessity to allow for wood movement, otherwise terrible things will happen when seasons change.
We decided to go with a design based on round conduits. No glue is used to bond the conduits to the back boxes or the corner bend pieces, so they are free to slide in and out, and the expansion gaps are all hidden.
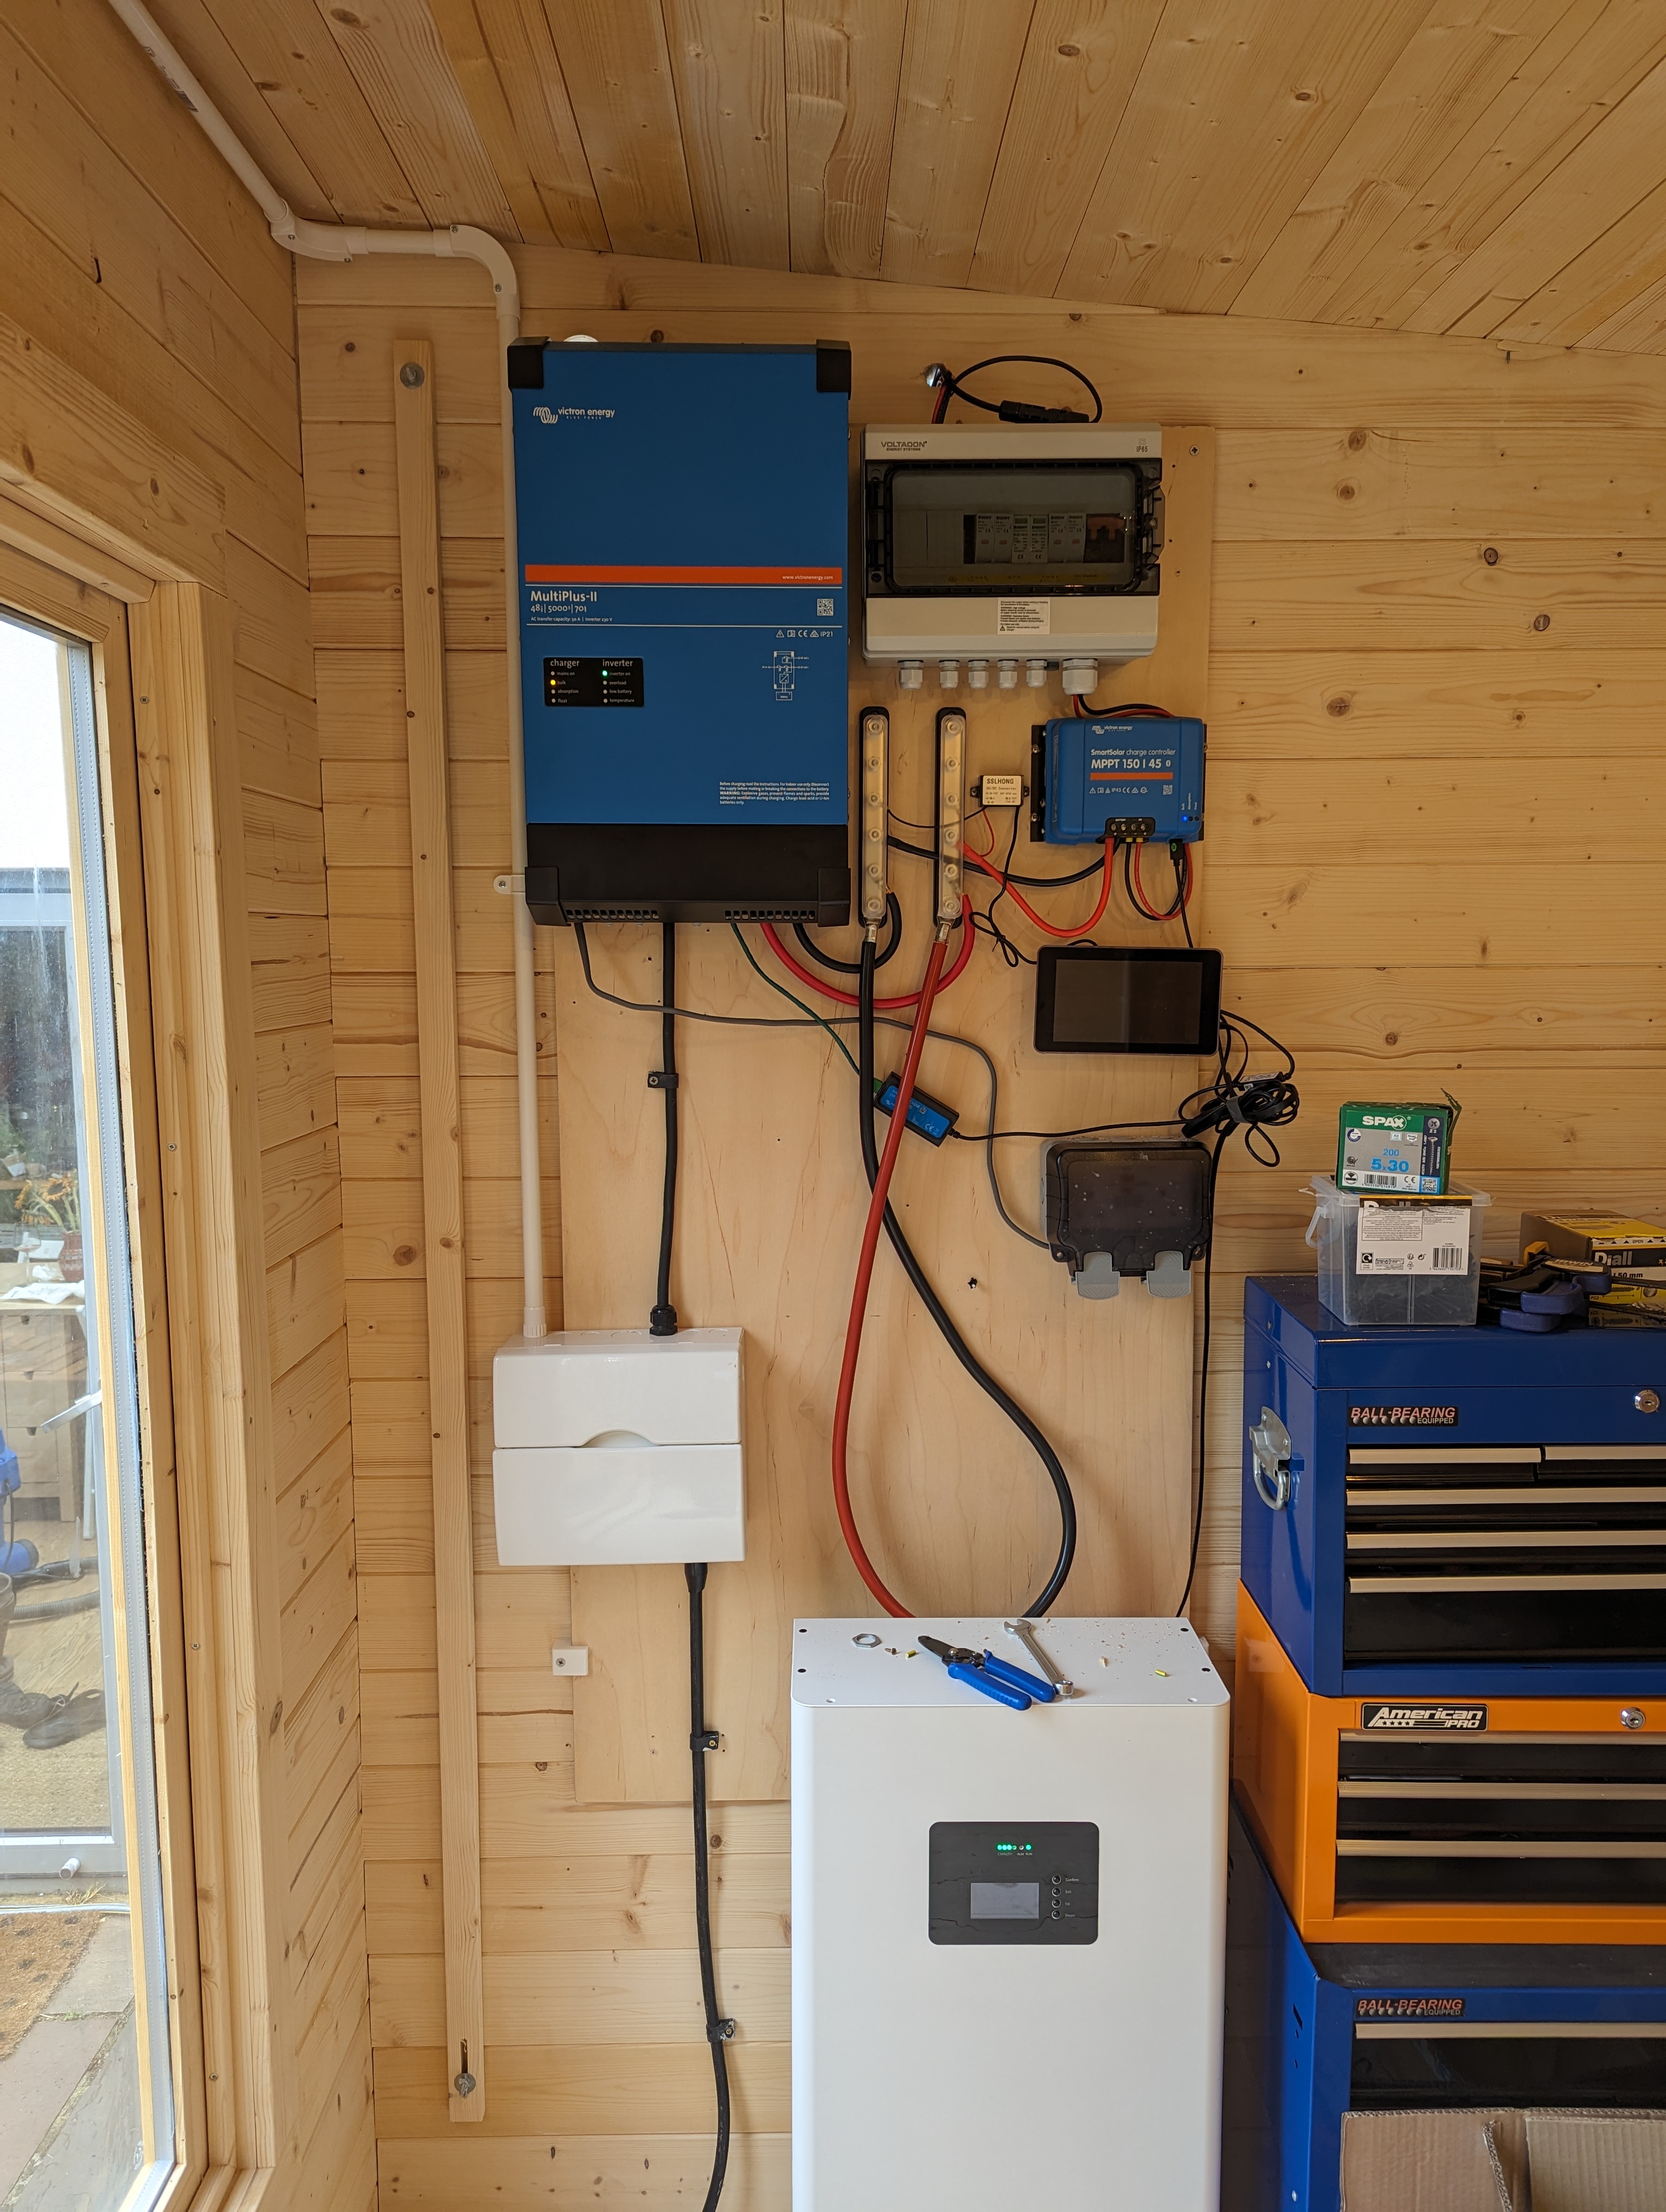
What’s with all the extra stuff? That’s my DIY solar + battery system for the whole house, but that’s another story for another day!
Overall we are quite happy with how it all turned out - a bit more work than the companies would have you believe, but really not too bad with a bit of DIY skills, and it’s actually a lot of fun to build!
Next - workshop layout and the solar + energy storage system.